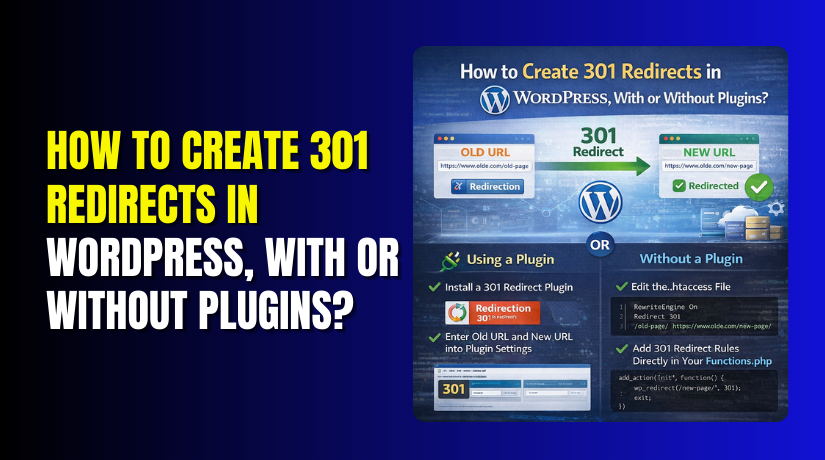
How to Create 301 Redirects in WordPress, With or Without Plugins? Complete Guide
Table of Contents
- Introduction
- What is 301 Redirect?
- What are the Benefits of 301 Redirect in WordPress?
- How to Create 301 Redirects in WordPress, With or Without Plugins?
- What are the Best Practices for Managing Redirects?
- Troubleshooting Common Redirect Issues
- Final Verdict
Introduction
You update your website. You change a page URL. You delete old content. You launch a new design.
These changes improve your site. But they create a hidden problem. Visitors who try to access old URLs see error pages. Search engines find broken links. Your traffic drops. Your rankings suffer.
301 redirects solve this problem. They automatically send anyone who visits an old URL to the new location. The visitor never sees an error. Search engines transfer their ranking value to the new page. Everything stays seamless.
WordPress offers multiple ways to create these redirects. You can install plugins with simple interfaces. You can edit server files directly. You can add code to your theme. Each method has advantages and trade-offs.
This guide covers everything you need to know about 301 redirects in WordPress. You will learn what they are and why they matter. You will get step-by-step instructions for creating them using plugins, .htaccess files, cPanel, and PHP code.
By the end, you will have multiple ways to keep your site’s traffic flowing smoothly.
What is 301 Redirect?
A 301 redirect is a permanent redirect that sends visitors and search engines from one URL to another . It tells browsers and search engines that the original page has moved to a new location permanently.
How does a 301 Redirect Works?
When someone tries to visit a page that has been redirected, a simple process happens behind the scenes:
- Step 1: The visitor’s browser sends a request to the server for the old URL (e.g., /old-page/)
- Step 2: The server recognizes this page has permanently moved and responds with HTTP status code 301, along with the new location in the header
- Step 3: The browser automatically sends a new request to the new URL
- Step 4: The server serves the content from the new page with a 200 OK status
From the user’s perspective, this entire process takes a fraction of a second. They simply land on the correct page without knowing anything happened.
What are the Benefits of 301 Redirect in WordPress?
- Preserve SEO Rankings and Link Equity
When you delete a page without a redirect, search engines find a 404 error. This signals that your site has broken links or missing content. A proper 301 redirect solves this by sending users and search engines to a relevant page instead.
Most importantly, 301 redirects pass along “link equity” or “ranking power” from the old URL to the new one. Any backlinks pointing to your old page continue to benefit your site through the redirect. This preserves the SEO value you built over time.
- Enhance User Experience
Nothing frustrates visitors more than clicking a link and landing on a “Page Not Found” error. They wanted specific content and found a dead end. Many will leave your site immediately.
301 redirects prevent this frustration. Visitors automatically reach the content they were seeking, even if the URL changed. They never see an error message. They stay engaged with your site.
- Manage Site Changes Smoothly
Websites constantly evolve. You reorganize content, launch new designs, change permalink structures, or migrate to new domains. Each change creates potential for broken links.
301 redirects make these transitions smooth. You can completely overhaul your site structure while ensuring that anyone with old bookmarks or links still reaches your content.
- Consolidate Duplicate Content
Sometimes you have multiple pages with similar content. Merging them into one authoritative page improves your site structure and SEO. 301 redirects let you point all the old URLs to your single new page.
- Fix 404 Errors
The 301 Redirects plugin includes a 404 error log that helps you identify broken links on your site. You can see exactly which URLs are generating errors and create redirects to fix them. This proactive approach keeps your site healthy.
- Track Redirect Performance
Plugins like Redirection maintain hit counts for each redirect. You can see which old URLs still receive traffic and ensure your redirects are working properly.
How to Create 301 Redirects in WordPress, With or Without Plugins?
You have several options for creating 301 redirects. The best method depends on your technical comfort level and how many redirects you need.
Method 1: Using the Redirection Plugin (Recommended for Most Users)
The Redirection plugin is the most popular redirect manager for WordPress with over 10 years of development. It’s completely free and packed with features.
Step 1: Install the Plugin
- Go to your WordPress dashboard
- Navigate to Plugins → Add New
- Search for “Redirection”
- Click Install Now, then Activate
Step 2: Complete the Setup Wizard
- After activation, go to Tools → Redirection
- Complete the simple setup wizard to configure basic settings
Step 3: Add a New Redirect
- In the Redirects tab, find the “Add new redirection” section
- In the Source URL field, enter the URL path you want to redirect (e.g., /old-page)
- In the Target URL field, enter the full URL of your destination page
- Select “301 – Moved Permanently” as the redirection type
- Click Add Redirect to save
Step 4: Test Your Redirect
- Open an incognito or private browser window
- Visit your old URL
- Confirm it loads the intended destination
- Use an HTTP status checker to verify the 301 status code
Additional Features of Redirection
- 404 error logging to identify broken links
- Query parameter handling for complex URLs
- Conditional redirects based on login status, browser, referrer, and more
- Import/Export for managing bulk redirects
- Hit counts to track redirect usage
- Automatic redirect creation when post permalinks change
Method 2: Using 301 Redirects – Redirect Manager Plugin
This is another excellent free plugin with a 404 error log and simple interface.
Step 1: Install the Plugin
- Go to Plugins → Add New
- Search for “301 Redirects – Redirect Manager”
- Install and activate
Step 2: Add Redirects
- Go to Settings → 301 Redirects
- Enter the old URL path in the Request field
- Enter the destination URL in the Destination field
- Click Add Redirect
Step 3: Monitor 404 Errors
- Check your dashboard for the 404 error log widget
- Identify problematic links that need redirects
- Create redirects directly from the error log
Method 3: Using Yoast SEO Premium
If you already use Yoast SEO Premium, it includes a built-in Redirect Manager.
Step 1: Locate the Redirect Manager
- Go to your WordPress dashboard
- Navigate to Yoast SEO → Redirects
Step 2: Add a Redirect
- Select “301” as the redirect type
- Enter the old URL (absolute or relative path)
- Enter the new destination URL
- Click Add Redirect
The Redirect Manager automatically creates 301 redirects when you delete or relocate pages, keeping your visitors seamlessly connected.
Method 4: Creating Redirects Without Plugins
For users who prefer not to install plugins, several code-based methods work.
Option A: Edit the .htaccess File (Apache Servers Only)
This method works on Apache and LiteSpeed servers but not on Nginx.
Important: Always back up your .htaccess file before editing. A single typo can break your entire site.
Step 1: Locate the .htaccess File
- Connect to your server via FTP or use your hosting file manager
- Navigate to your WordPress root directory (usually public_html)
- Enable viewing of hidden files if you don’t see .htaccess
Step 2: Download a Backup
- Download a copy of the .htaccess file to your computer
Step 3: Add Redirect Rules
- Open the .htaccess file in a plain text editor
- Add your redirect rules, typically after the line “# END WordPress”
For a single redirect, use:
Redirect 301 /old-page https://yourwebsite.com/new-page [citation:3]
For multiple redirects, add each on its own line:
Redirect 301 /old-page-1 /new-page-1
Redirect 301 /old-page-2 /new-page-2
For redirecting entire directories:
RewriteEngine On
RewriteRule ^old-directory/(.*)$ /new-directory/$1 [R=301,L] [citation:3]
Step 4: Save and Upload
- Save your changes
- Upload the file back to your server, replacing the original
- Test your redirects immediately
Option B: Use cPanel Redirects
This is a safer alternative to editing .htaccess directly.
Step 1: Access cPanel
- Log in to your hosting dashboard
- Open cPanel (often under Quick Links)
- Scroll down to the Domains section
- Click “Redirects”
Step 2: Configure the Redirect
- Select “Permanent (301)” as the type
- Choose your domain
- Enter the old URL path (e.g., “old-content”)
- Enter the full destination URL
- Select the appropriate www option
- Click Add
Option C: PHP Function in functions.php
This method adds a simple redirect using your theme’s functions.php file.
Step 1: Access functions.php
- Go to Appearance → Theme File Editor
- Select functions.php from the right sidebar
- Or use an FTP client to edit the file
Step 2: Add the Redirect Code
Add the following code at the end of the file:
function custom_url_forward() {
if ( $_SERVER[‘REQUEST_URI’] == ‘/old-page/’ ) {
wp_redirect( ‘/new-page/’, 301 );


exit();
}
}
add_action( ‘template_redirect’, ‘custom_url_forward’ );
Replace ‘/old-page/’ and ‘/new-page/’ with your actual paths.
Option D: PHP Snippet for Multiple Redirects
For multiple redirects, use this expanded version:
add_action(‘template_redirect’, function() {
$urls_to_redirect = [
‘/about/’,
‘/services/’,
‘/products/’,
‘/contact/’,
‘/old-page/’
];
$current_path = parse_url($_SERVER[‘REQUEST_URI’], PHP_URL_PATH);
if (in_array(rtrim(strtolower($current_path), ‘/’). ‘/’, $urls_to_redirect)) {
wp_redirect(home_url(‘/’), 301);
exit;
}
});
Edit the array to include all URLs you want to redirect to your homepage.
Option E: PHP Script for Individual Redirects
You can also create a dedicated PHP file for redirects.
Step 1: Create a redirects.php file
- Use File Manager to create a new file named “redirects.php”
- Right-click and select Edit
Step 2: Add the Redirect Code
<?php
// OldContent.php
header(“HTTP/1.1 301 Moved Permanently”);
header(“Location: https://www.yourwebsite.com/new-content/”);
exit();
?>
Change “OldContent” to match your file name and update the destination URL.
Method 5: Bulk 301 Redirects
When you have many URLs to redirect, handling them individually becomes tedious. These methods help with bulk redirects.
Using Redirection Plugin Import
The Redirection plugin supports importing CSV files with your redirects.
Step 1: Prepare a CSV File
Create a file with two columns:
/old-page, /new-page
/old-product, /new-product
/old-category/old-post, /new-category/new-post
Step 2: Import the File
- Go to Tools → Redirection
- Open the Import/Export section
- Upload your CSV file
- The plugin automatically creates all redirects
Using .htaccess for Bulk Redirects
For Apache servers, you can add multiple Redirect lines to .htaccess as shown earlier, or use RedirectMatch for patterns.
What are the Best Practices for Managing Redirects?
- Use the Correct Redirect Type
Always use 301 redirects for permanent changes to maintain SEO value. Use 302 or 307 redirects only for temporary moves where the original URL will return.
- Avoid Redirect Chains
Ensure that URLs redirect directly to the final destination without multiple intermediate redirects . Redirect chains slow down page load times and dilute SEO value. If you have A → B and B → C, update the first redirect to go directly A → C.
- Update Internal Links
Instead of relying on redirects, update internal links to point directly to new URLs. This reduces unnecessary redirects and improves site performance.
- Monitor Redirects Regularly
Periodically review your redirects to ensure they’re functioning correctly. Use tools like Google Search Console to check for redirect issues. Plugins like Redirection provide hit counts so you can see if redirects are still needed.
- Test After Implementation
After setting up redirects, test them thoroughly :
- Visit old URLs in incognito mode
- Use HTTP status checker tools to verify 301 responses
- Ensure only a single redirect hop occurs
- Check on multiple devices and browsers
- Document Your Redirects
Keep a record of all redirects you create. This helps when troubleshooting issues or when migrating sites later.
- Regular Cleanup
Occasionally review your redirects and remove any that are no longer needed. Too many redirects can slow down your server and become difficult to manage.
Troubleshooting Common Redirect Issues
- Redirect Loop Detected
A redirect loop happens when URL A points to URL B, but URL B points back to URL A. The browser tries endlessly until showing a “too many redirects” error.
Solution: Check your .htaccess file and plugin settings for conflicting rules. Ensure each redirect points directly to the final destination without circular references.
- Redirects Not Working
Several factors can prevent redirects from working :
- mod_rewrite not enabled: Some servers require this module for .htaccess redirects. Confirm with your hosting provider.
- Browser cache: Clear your browser cache and test in incognito mode.
- File still exists: The 301 Redirects plugin cannot redirect if the old .html or .php file still exists on your server. Delete the file first.
- 404 Errors After Redirects
If visitors still see 404 errors after implementing redirects:
- Double-check the destination URL for typos
- Verify the target page actually exists
- Check that your redirect syntax is correct
- Ensure no other plugins are interfering
- Redirects Not Getting 301 Status Code
If your redirects are working but returning the wrong status code:
- Verify your URLs are correct with proper slashes
- Check for extra spaces or invalid characters
- View the redirect by directly visiting the request URL to see if it loads correctly
- Default Permalink Structure Error
- The 301 Redirects plugin requires that you use anything but the default WordPress permalink structure.
- Go to Settings → Permalinks and choose a non-default option.
Final Verdict
301 redirects are essential for maintaining your website’s health during any structural changes. They preserve hard-earned SEO value by passing link equity from old URLs to new ones, preventing frustrating 404 errors that drive visitors away. Without proper redirects, you risk losing traffic and rankings that took months or years to build.
For most WordPress users, the Redirection plugin offers the perfect balance of ease and functionality. It handles everything from single redirects to complex bulk imports with full logging and 404 tracking—all without touching code.
For those who prefer a lighter setup, editing .htaccess files works well on Apache servers, while cPanel redirects offer a safer alternative for hosting users. Choose the method that matches your technical comfort level, but never skip this critical step when changing URLs. Your visitors and search rankings will thank you.
Have questions before starting with WooCommerce & WordPress? Get support here at WooHelpDesk.