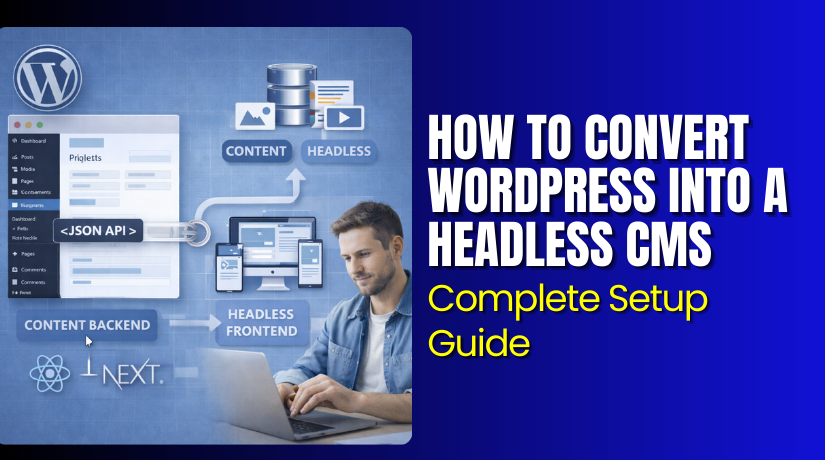
How to Convert WordPress Into a Headless CMS: Complete Setup Guide
Table of Contents
- Introduction to Headless WordPress
- What is a Headless CMS?
- Understanding the Decoupled WordPress Architecture
- Step-by-Step Guide to Convert WordPress to Headless CMS
- Common challenges in converting to headless WordPress
- Tips and best practices for a successful WordPress decoupled architecture
- Conclusion
Introduction to Headless WordPress
Headless WordPress changes how you build and run websites. It turns WordPress into a powerful content backend only. The frontend lives separately. This setup is called a headless CMS or decoupled WordPress.
WordPress powers over 40% of websites worldwide. It offers an easy dashboard and many plugins. Yet traditional WordPress mixes content and design in one place. This can slow things down and limit choices.
In recent years, headless WordPress gains strong traction. Developers and businesses switch for modern needs. Speed matters more than ever. Users expect fast pages on phones and desktops. Omnichannel content grows fast too. Brands publish to websites, apps, and devices at once.
Headless WordPress meets these demands. It separates the backend from the frontend. WordPress handles content creation. A modern framework builds the user interface. This decoupled approach delivers big wins.
Here are the key benefits of a decoupled WordPress approach:
- Lightning-fast performance — Pages load in milliseconds via static files or CDNs.
- Better scalability — Handle high traffic without slowdowns.
- Frontend freedom — Use React, Vue, Next.js, or any tool you love.
- Stronger security — The public site stays away from the admin area.
- Omnichannel delivery — Push content to websites, mobile apps, IoT, and more.
Many industries adopt headless WordPress now. E-commerce stores need speed and mobile-first design. SaaS companies build dynamic dashboards. Nonprofits and agencies want flexible, future-proof sites.
This post guides you step by step. You will learn how to convert your WordPress site into a headless CMS. Follow along to unlock these advantages for your project.
What is a Headless CMS?
A headless CMS changes the old way websites work. It keeps content separate from design and display. The “head” means the frontend — the part users see. When you remove the head, only the content backend remains.
In a traditional CMS like classic WordPress, everything lives together. Content, themes, templates, and HTML all mix in one system. This setup works well for simple blogs. But it creates limits when you need speed, flexibility, or multiple outputs.
A headless CMS solves these problems. It acts only as a content database and editor. You create posts, pages, and media inside it. Then you pull that content through an API. Any frontend can grab and show the data — websites, mobile apps, smart devices, or even voice assistants.
WordPress shines as a headless CMS. It already has a strong content engine. Thousands of plugins help manage complex data. With the right setup, WordPress becomes a top headless choice.
Here is how headless architecture brings real improvements:
- Greater flexibility — Pick any frontend tool you want. React, Vue, Svelte, Next.js, or even plain HTML works fine.
- Stronger scalability — Serve millions of visitors without slowing the content backend.
- Faster performance — Frontend can use static generation, edge caching, or CDNs for instant loads.
- Future-proof design — Change your frontend anytime without touching content.
- Multi-channel publishing — Send the same content to web, iOS, Android, kiosks, or wearables easily.
Many industries choose headless WordPress for these reasons.
- E-commerce brands build super-fast shops with great mobile experience.
- News publishers deliver articles to websites and apps at the same time.
- Marketing teams create personalized content across campaigns and devices.
- Universities share course info on web portals, student apps, and email newsletters.
- Agencies deliver custom sites for clients while keeping content easy to update.
Headless CMS gives freedom. You control content in one safe place. Then you build beautiful, fast experiences anywhere.
Understanding the Decoupled WordPress Architecture
Decoupled WordPress architecture splits your site into two clear parts. The backend stays with WordPress. The frontend lives on a separate system. This separation is the core of headless WordPress.
In the old way, WordPress handles both content and how it looks. Themes and PHP templates control everything. Changes to design often touch content too. This makes updates slow and risky.
Decoupling changes that completely. WordPress becomes a pure content manager. It stores posts, pages, custom data, users, and media. You never use WordPress themes or frontend templates anymore.
Instead, you build the frontend with modern JavaScript tools. Popular choices include:
- React
- Vue.js
- Next.js
- Nuxt.js
- Gatsby
- SvelteKit
- Angular
These frameworks talk to WordPress through an API. They pull only the data they need. Then they render beautiful, fast pages on their own.
This split brings powerful improvements to development:
- Faster builds — Frontend teams work without touching WordPress at all.
- Better teamwork — Backend content experts and frontend developers stay independent.
- Easier updates — Upgrade WordPress or change frontend without breaking the other side.
- Modern developer experience — Use hot reloading, component libraries, and the latest tools.
- Stronger control — Apply custom logic, animations, or interactions that themes limit.
Real-world examples show decoupled WordPress in action every day.
- Large news sites deliver stories to web and mobile apps with one content source.
- E-commerce brands create lightning-fast storefronts using Next.js while WordPress manages products.
- Corporate websites use Vue for interactive dashboards and career portals.
- Universities power course catalogs, event pages, and alumni networks across multiple channels.
- Marketing agencies build unique client sites with full design freedom and easy content edits.
In this setup, the roles stay clear:
- Backend (WordPress) — Stores and organizes all content. Exposes data safely through REST API or GraphQL. Handles user logins, media uploads, SEO metadata, and revisions.
- Frontend (React, Vue, etc.) — Fetches data via API calls. Builds the user interface. Manages routing, styling, performance tricks, and interactivity.
The result is a clean, powerful system. Content stays safe and simple to edit. The frontend becomes fast, flexible, and future-ready.
Step-by-Step Guide to Convert WordPress to Headless CMS
You now understand headless WordPress and its power. This section shows you exactly how to convert your existing WordPress site into a headless CMS. Follow each step carefully. You will end up with a fast, flexible, modern setup.
Step 1: Prepare WordPress website
Start with a clean and safe foundation.
- Make a full backup of your site, database, and files.
- Update WordPress core, themes, and all plugins to the latest versions.
- Remove unused themes and plugins to reduce bloat.
- Turn off permalink pretty links if you face issues later (set to plain).
- Install a basic security plugin like Wordfence or Sucuri for protection.
- Test your site works perfectly in its current state.
A clean setup avoids surprises during conversion.
Step 2: Select a frontend framework
Choose the tool that builds your new user-facing site.
Popular and strong options include:
- React (great for dynamic apps)
- Next.js (best for fast static + server-rendered pages)
- Vue.js or Nuxt.js (simple and flexible)
- Gatsby (excellent for content-heavy static sites)
- SvelteKit (lightweight and modern)
Pick one you know or want to learn. Next.js leads for most headless WordPress projects because it offers speed, SEO, and easy API fetching.


Install it on your computer or a new hosting space. Create a fresh project folder.
Step 3: Set up REST API or GraphQL to communicate between frontend and WordPress backend
WordPress needs to share content safely.
Two main ways exist:
- WordPress REST API (built-in, simple for starters)
- GraphQL (more powerful, flexible queries)
Many developers prefer GraphQL today. It lets you ask for exactly the data you need. This saves bandwidth and speeds up your site.
Step 4: Install essential plugins for headless setup
Add these free plugins to your WordPress backend:
- WPGraphQL (core plugin for GraphQL support)
- WPGraphQL for Advanced Custom Fields (if you use ACF)
- WPGraphQL CORS (fixes cross-origin issues)
- JWT Authentication for WP-API (secure login if needed)
- Headless Mode (optional, hides frontend themes)
Activate them one by one. Test the GraphQL endpoint at yoursite.com/graphql.
You should see the famous GraphiQL playground. This confirms it works.
Step 5: Configure API settings for data fetching
Make your API ready and secure.
- In WPGraphQL settings, enable public access if your site is public.
- Add authentication if you need private content or user logins.
- Set up CORS headers to allow your frontend domain.
- Disable XML-RPC if you do not use it (extra security).
- Use permalinks like /%postname%/ for clean URLs in API responses.
Test a simple query in GraphiQL. Fetch your latest posts or pages. Copy the query for later use.
Step 6: Customize frontend to fetch data from WordPress via API
Now bring content to life on the new frontend.
- Install a GraphQL client like Apollo Client or urql in your project.
- Create pages or components that match your old WordPress structure (home, blog, single post, etc.).
- Write queries to pull posts, pages, menus, featured images, categories, and custom fields.
- Use dynamic routing (for example, Next.js getStaticProps or getServerSideProps).
- Style everything with Tailwind CSS, CSS modules, or your favorite method.
- Handle media by fetching image URLs from WordPress and displaying them.
Example flow for a blog page:
- Query all posts with title, excerpt, date, slug, and featured image.
- Map the results into cards or list items.
- Link each to a dynamic single-post page.
Build navigation menus by querying WordPress menu data.
Step 7: Test and optimize performance of the headless setup
Check everything works smoothly.
- Test on desktop, mobile, and tablet screens.
- Verify links, images, forms, and search work correctly.
- Use Lighthouse in Chrome DevTools to score performance, SEO, and accessibility.
- Enable static generation or ISR (Incremental Static Regeneration) in Next.js for speed.
- Set up a CDN like Cloudflare or Vercel for global fast delivery.
- Monitor API response times and reduce over-fetching.
- Add caching headers on WordPress if needed.
Fix any broken images or missing data early.
Congratulations! Your WordPress site now runs as a true headless CMS. Content stays easy to manage in WordPress. The frontend delivers top speed and modern features.
Common challenges in converting to headless WordPress
Many teams face these issues when they switch:
- SEO can feel tricky at first — Traditional WordPress handles meta tags and sitemaps automatically. In headless mode, you must build these on the frontend yourself.
- Performance issues appear — Slow API calls or too many requests can hurt speed if you do not optimize.
- Content management changes — Editors miss the live preview. They see only the backend dashboard without knowing exactly how pages look.
- Media handling gets complex — Images and files stay on WordPress. You must fetch correct URLs and sizes for every device.
- Authentication and private content — Protected posts, user logins, or membership areas need extra setup for secure API access.
- Learning curve for teams — Developers must learn APIs, GraphQL, and a new frontend stack.
These problems happen often. But good planning and tools fix most of them quickly.
Tips and best practices for a successful WordPress decoupled architecture
Follow these steps to make your headless WordPress run smoothly and stay strong:
- Use WPGraphQL with caching plugins like WP Redis or WP Super Cache. This speeds up API responses a lot.
- Build SEO on the frontend — Add dynamic meta tags, schema markup, and generate XML sitemaps with tools like next-seo or react-helmet.
- Enable Incremental Static Regeneration (ISR) or static generation in Next.js. Pages rebuild only when content changes.
- Set up a preview system — Use WordPress preview links with frontend tokens. Editors see real-time drafts on the new site.
- Handle media smartly — Install plugins like WPGraphQL Media or ACF Image extensions. Serve images through a CDN like Cloudflare or BunnyCDN.
- Keep content updates easy — Use webhooks to trigger frontend rebuilds instantly when posts change in WordPress.
- Secure everything — Add JWT or OAuth for private data. Hide the WordPress admin behind strong passwords and 2FA.
- Monitor and test often — Use tools like New Relic or Vercel Analytics. Check Lighthouse scores regularly.
- Start small — Convert one section (like the blog) first. Then expand to the full site.
These practices turn potential headaches into smooth wins. Your site stays fast, secure, and easy to manage.
Conclusion
Headless WordPress unlocks real freedom. You get blazing speed, total frontend choice, and easy multi-channel publishing. Content stays simple to edit in the familiar WordPress dashboard. At the same time, your public site becomes modern, scalable, and future-proof.
Businesses of all sizes use decoupled WordPress today. They deliver better user experiences and handle growth without stress.
If you want faster pages, stronger security, or the power to build anything, headless WordPress is worth exploring. Start with a test project. Follow the steps we covered. You will see the difference quickly.
Ready to convert your site? Dive in and build something amazing. Your content deserves the best delivery possible.
For expert help with WooCommerce stores in a headless setup — including custom integrations, performance tuning, and smooth migrations — check out WooHelpDesk. Their team specializes in headless WordPress + WooCommerce projects and can guide you every step of the way. Visit WooHelpDesk today and take your store to the next level.