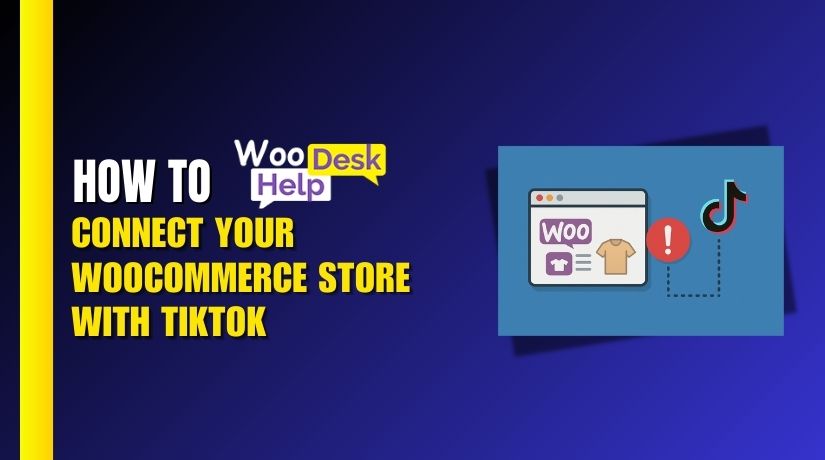
How to Connect Your WooCommerce Store with TikTok
Table of Contents
- Introduction
- Why TikTok For Business Matters for WooCommerce Store Owners
- Prerequisites Before You Start
- Step-by-Step Guide to Connect WooCommerce to TikTok For Business
- Best WooCommerce TikTok Plugin Options
- Mistakes to Avoid During WooCommerce TikTok Setup
- Tips for Success to Grow Your Store’s
- Conclusion
Introduction
One of the most effective platforms for online sales is TikTok. It’s no longer just for fun videos or dance trends. Millions of U.S. shoppers now discover products on TikTok every day. As a WooCommerce store owner, this is a chance you don’t want to miss.
WooCommerce TikTok For Business integration helps you reach new audiences. It lets you advertise products directly to TikTok users. You can track performance, grow traffic, and boost sales faster.
Online shopping is evolving due to social commerce. TikTok is playing a key role in reshaping eCommerce trends. With its short-form videos, creative ads, and huge user base, it’s a goldmine for smart eCommerce brands. If your WooCommerce store isn’t on TikTok yet, you might be losing sales.
Why should WooCommerce stores focus on TikTok For Business?
- It helps you run targeted ad campaigns
- You can showcase trending products in short, fun videos
- It builds trust through real user content
- You can use TikTok Pixel to track buyer actions
- Now more than ever, synchronizing your product catalog is simple
More importantly, connecting WooCommerce to TikTok is no longer a complex task. You can go live in a few simple steps if you have the correct setup and equipment. Whether you’re selling fashion, gadgets, or handmade items, TikTok gives your store fresh exposure.
We’ll explain why TikTok works so well for WooCommerce, what you need to get started, and how to complete the setup from start to finish.
Why TikTok For Business Matters for WooCommerce Store Owners
One of the social media sites with the quickest rate of growth in the US is TikTok. In the nation, there are more than 150 million active users. These users are highly engaged and love discovering new products. For WooCommerce store owners, TikTok is a big opportunity to grow.
People don’t go to TikTok just for fun anymore. They also go to shop. The hashtag #TikTokMadeMeBuyIt has over 70 billion views. That shows how powerful TikTok is in driving product sales.
Here are some reasons to think about integrating WooCommerce with TikTok:
- Reach a wider audience: TikTok’s users are spread across all age groups. You can identify your audience here, regardless of whether you sell to adults or teenagers.
- Boost brand visibility: Short videos help you show your products in a creative way. People are drawn to them and remember them.
- Build trust with real content: TikTok supports user-generated content. More people trust authentic videos than well-produced advertisements.
- Get better engagement: TikTok videos often get more likes, comments, and shares than posts on other platforms.
- Data-driven ads: TikTok For Business tools help you run smart ad campaigns. You can target people based on location, behavior, and interests.
When you connect WooCommerce to TikTok, you open a new sales channel. You can run ads, track conversions, and sync your product feed. This implies that your goods may be seen by consumers who are prepared to act.
With TikTok growing fast in the U.S., now is the time to act. Don’t let this trend pass your WooCommerce store. TikTok For Business WooCommerce setup is simple and worth every effort.
Prerequisites Before You Start
Before you begin the TikTok For Business WooCommerce setup, it’s important to have a few things ready. These basic requirements ensure that your store integrates smoothly with TikTok and functions as expected. Skipping any step can lead to errors or delays in syncing products and running campaigns.
- A Fully Functional WooCommerce Store
Your WooCommerce store should already be live and operating. This means your product pages should be complete with:
- Clear titles and descriptions
- High-quality product images
- Accurate pricing and stock levels
- A working cart and checkout process
Product information is taken straight from your store via TikTok. If your store isn’t well-optimized, your ads may perform poorly.
- TikTok For Business Account
To promote and monitor results, you must have a TikTok For Business account. An individual TikTok profile is not the same as this. Go to business.tiktok.com and sign up using your business email. Fill in your store’s name, website, and contact details carefully. This account will link your store with TikTok’s advertising tools.
- TikTok Ads Manager Access
Once your business account is ready, you’ll get access to TikTok Ads Manager. This tool helps you:
- Create video ads
- Choose your target audience
- Set your ad budget and schedule
- Track clicks, conversions, and more
It’s the main dashboard where you manage all your ad activity.
- TikTok Business Center
The Business Center connects all parts of your TikTok marketing setup. It lets you control user permissions, assign ad accounts, and manage data access. You’ll also use it to connect your WooCommerce store and pixel.
- Install the TikTok Pixel
A small code called the TikTok Pixel is added to your page. It tracks what users do on your site—like product views, add-to-carts, or purchases. This data helps improve ad targeting and gives you real-time campaign performance insights. Most WooCommerce TikTok plugins make Pixel setup easy with just a few clicks.
- Product Catalog Feed Ready
TikTok requires your product information in a particular format. A product catalog feed includes:
- Product names and IDs
- Descriptions
- Prices
- Stock availability
- Image links
Many WooCommerce plugins can generate and update this feed automatically. Without a proper catalog, your products can’t be shown in TikTok ads.
Having these items in place is key to successfully connect WooCommerce to TikTok. The better your setup, the better your ads will perform. A strong foundation will also save you time during integration and improve your return on ad spend.
Step-by-Step Guide to Connect WooCommerce to TikTok For Business
Connecting your WooCommerce store to TikTok For Business might seem complex, but it’s much easier with the right guidance. We’ll take you step-by-step through the entire setup process. You will learn how to sync your products, link accounts, install the required tools, and set up tracking.
To avoid frequent mistakes and have your TikTok advertising running quickly, carefully follow these procedures.
Step 1: Install the TikTok for WooCommerce Plugin
The easiest way to integrate TikTok with WooCommerce is by using the official plugin.
Here’s how to install it:
- Go to your WordPress dashboard.
- Navigate to Plugins > Add New.
- Search for “TikTok for WooCommerce”.
- Click Install Now and then Activate.
The plugin will show up in your WooCommerce settings after it has been activated. This plugin handles Pixel setup, catalog sync, and ad account linking.
Pro Tip: Make sure your WooCommerce and WordPress are up to date before installing the plugin. Compatibility problems may cause the integration to fail.
Step 2: Connect Your TikTok For Business Account
The next step is to link your TikTok For Business account after installing the plugin.
Follow these steps:
- Go to WooCommerce > TikTok from your WordPress dashboard.
- Click on “Get Started”.
- Log in with your TikTok For Business account.
- Allow access to your ad account and business center.
This will link your WooCommerce store with TikTok’s marketing system. It ensures both platforms can communicate and share data in real time.
The next step is to link your TikTok For Business account after installing the plugin.
Step 3: Set Up and Install the TikTok Pixel
The TikTok Pixel tracks user actions on your site. It sends valuable data back to TikTok to help optimize your ads.
The code does not require manual installation. The plugin does this for you.
Here’s how:
- After connecting your TikTok account, you’ll be asked to create or select a Pixel.
- Choose “Create New Pixel” if you don’t have one.
- The plugin will automatically add it to all pages of your WooCommerce store.
The Pixel tracks events such as:
- Page views
- Product views
- Add to cart
- Purchases
This data helps TikTok understand which ads drive results and where to improve targeting.
Note: You can check Pixel activity in TikTok Ads Manager under Assets > Events.
Step 4: Sync Your WooCommerce Product Catalog
Now it’s time to connect your product data to TikTok. This allows your items to appear in ads and dynamic product campaigns.
To sync your product catalog:
- In the plugin settings, go to the Catalog section.
- Choose “Sync Products”.
- TikTok will begin pulling data from your WooCommerce store.
- Products will appear in your TikTok Business Center catalog within a few minutes.
Make sure your products have:
- Titles and short descriptions
- At least one high-quality image
- Prices in USD
- Stock availability
This is important to ensure TikTok can show your products correctly in ads.
Keep in mind: Any future product updates will be auto-synced based on the plugin’s settings.
Step 5: Configure Your TikTok Ad Account
Once everything is connected, set up your TikTok Ads Manager to start creating campaigns.
To get started:
- Log in to TikTok Ads Manager.
- Click Create New Campaign.
- Choose a campaign goal (Traffic, Conversions, Product Sales).
- Define your audience, budget, and schedule.
- Make or upload a video advertisement that highlights your products.
- Link your ad to your synced product or product page.
For product-focused campaigns, choose the “Catalog Sales” objective. This option uses the synced WooCommerce catalog to promote specific items.
Track conversions and keep an eye on performance with the TikTok Pixel.
Optimization Tip: Start with a small budget and test multiple ad creatives. TikTok’s algorithm learns fast and will optimize based on what works best.
Step 6: Verify Domain in TikTok Business Center (Optional but Recommended)
Domain verification gives you better control over tracking and event prioritization. It’s an optional but useful step.
To verify your domain:
- Go to TikTok Business Center > Brand Safety > Domain Verification.
- Add your domain (e.g., www.mystore.com).
- Choose the verification method: Meta-tag, HTML file upload, or DNS record.
- Follow the on-screen instructions to complete verification.
Once verified, your TikTok Pixel will be more secure, and you’ll avoid tracking issues during campaigns.
Step 7: Test Everything Before Launching Ads
Before you go live with ads, make sure everything works as expected.
Test checklist:
- Pixel is firing correctly on product pages
- Your catalog is showing products with correct details
- TikTok Ads Manager shows your pixel and catalog as “Active”
- Your TikTok business account is linked to the right store
- Ad previews look clear and engaging
You can use the TikTok Pixel Helper browser tool to test events on your site.
Best WooCommerce TikTok Plugin Options
There are several plugins that help link WooCommerce with TikTok. Each has different features. Some are official, while others come from trusted third-party developers.
Let’s look at the best options available:
- TikTok for WooCommerce (Official Plugin)
This is the official plugin created by TikTok. It’s designed for store owners who want a simple, direct connection between their store and TikTok Ads.


Features:
- One-click Pixel installation
- Automatic product catalog sync
- Easy ad account connection
- Dashboard access inside WooCommerce
Pros:
- Free to use
- Supported by TikTok
- Updates regularly for compatibility
Ideal for:
Store owners who want a basic and easy integration with full support from TikTok.
- PixelYourSite Pro
PixelYourSite is a powerful tracking plugin. In addition to Facebook, TikTok Pixel and other tracking scripts are supported.
Features:
- Advanced event tracking
- Manual control over triggers
- Supports TikTok, Facebook, Pinterest, and more
Pros:
- Flexible tracking options
- Great for custom stores
- Compatible with many themes
Ideal for:
Store owners who want more control over Pixel events and tracking behavior.
- CTX Feed + TikTok Pixel Manager
This is a combination of two tools. For TikTok, CTX Feed generates a product feed. TikTok Pixel Manager helps with accurate event tracking.
Features:
- Auto product feed generation
- Real-time Pixel tracking
- Advanced event mapping
Pros:
- Works well with large product catalogs
- Detailed analytics
- Highly customizable
Ideal for:
Larger WooCommerce stores needing complete control over data and tracking.
- ShoppingFeeder for WooCommerce
ShoppingFeeder connects WooCommerce to many platforms, including TikTok, Google Shopping, and Facebook.
Features:
- Multi-channel product feed
- Supports custom rules and mapping
- Inventory sync
Pros:
- Covers more than just TikTok
- Ideal for multi-platform sellers
Ideal for:
Merchants who advertise across several platforms and want one feed manager.
- TikTok Ads for WooCommerce by CedCommerce
CedCommerce is known for its marketplace integrations. This plugin helps set up TikTok Ads directly from WooCommerce.
Features:
- Campaign setup within WooCommerce
- Catalog and Pixel sync
- Dashboard for ad monitoring
Pros:
- Simple UI
- Reliable support team
- Good for small businesses
Ideal for:
New sellers or beginners looking for a user-friendly TikTok solution.
Mistakes to Avoid During WooCommerce TikTok Setup
Even with the right plugin, a small mistake can cause big problems. Many WooCommerce store owners rush through setup and miss key steps. These mistakes can prevent tracking, break product sync, or waste ad spend.
The following are the most typical errors, along with tips for avoiding them:
- Skipping TikTok Pixel Verification
Assuming the TikTok Pixel is functioning without testing it is one of the worst errors. If the Pixel isn’t installed correctly, TikTok won’t track visitor actions like product views or purchases. This leads to poor ad targeting and low conversion rates.
How to avoid it:
Use the TikTok Pixel Helper browser extension to test the Pixel after installing it using your plugin. Check to see whether events such as “View Content” or “Add to Cart” are occurring when you visit a product page. If nothing shows up, double-check your plugin settings or reinstall the Pixel.
- Syncing Products With Missing or Incorrect Data
TikTok pulls your product data from the WooCommerce catalog. If your product feed has missing images, empty descriptions, or wrong prices, TikTok will reject those items or display them poorly in ads.
How to avoid it:
Before syncing, review all product details in WooCommerce:
- Add clear, high-resolution images
- Write short, relevant product descriptions
- Check that prices, SKUs, and stock levels are correct
- Avoid placeholder text like “Lorem Ipsum”
A clean, complete catalog gives your ads a professional look and builds trust with buyers.
- Using Outdated or Incompatible Plugins
Not all plugins stay up to date with WooCommerce or TikTok changes. If your plugin is outdated, it might break the sync or fail to send Pixel data. Additionally, some users install plugins that haven’t been tested with the most recent versions of WordPress.
How to avoid it:
- Choose plugins with recent updates and good reviews
- Use the most recent versions of WooCommerce and WordPress at all times.
- Run plugin updates regularly from your dashboard
- Check compatibility notes before installing a new plugin
Outdated plugins can also slow down your site and cause technical errors during setup.
- Ignoring TikTok’s U.S. Targeting Settings
Many WooCommerce stores serve U.S. customers but forget to localize their TikTok Ads. This mistake leads to ads being shown in the wrong countries or to users not likely to convert.
How to avoid it:
When creating campaigns in TikTok Ads Manager, always set your audience targeting by:
- Country: United States
- Language: English
- Interests related to your products
- Age and gender preferences (if needed)
Ignoring this step could cause TikTok’s algorithm to show your advertising to the incorrect users.
- Launching Ads Without Testing First
Some store owners set up everything and launch campaigns immediately. But if something is broken—like a missing Pixel event or incorrect catalog—it could waste money fast.
How to avoid it:
Do a full system check before spending any ad budget:
- Use Pixel Helper to check all tracked events
- Before your TikTok commercials go live, preview them.
- Make a test purchase on your store and track the event
- Review your catalog in TikTok Business Center to ensure products are approved and active
Testing helps catch problems early and gives you the confidence to run your campaigns smoothly.
- Not Connecting the Right TikTok Account or Business Manager
During setup, you may accidentally connect the wrong TikTok account, especially if you manage multiple brands. This can cause issues with Pixel tracking, catalog sync, or ad permissions.
How to avoid it:
- Double-check that you’re logged into the correct TikTok For Business account
- Confirm the right TikTok Business Center is connected
- Review user permissions to make sure your store has full access to ad tools and catalog
Correcting a wrong connection later can be frustrating and time-consuming, so take your time during this step.
Tips for Success to Grow Your Store’s
Once your WooCommerce TikTok For Business setup is complete, your work isn’t over. To get the best results, you need to run smart campaigns and continue testing what works. TikTok’s platform is powerful, but only if used correctly.
Below are simple tips to help you succeed and grow your store’s traffic and sales.
- Use Short, Engaging Video Ads
TikTok is all about fast, visual content. People will scroll past your advertisement if it doesn’t catch their attention in the first three seconds.
Tips for better videos:
- Use bright lighting and high-quality video
- Show the product in action quickly
- Add captions for silent viewers
- Add a compelling call to action, such as “Shop Now.”
You don’t need expensive cameras—just clear, real content.
- Start With a Small Budget and Test
Instead of spending a large budget on one ad, test a few versions. This enables you to discover what your audience responds to the most.
A/B test things like:
- Video styles
- Captions or hooks
- Call-to-action buttons
- Audience types
Start small, gather data, and scale the winning ad.
- Use TikTok Pixel Data to Retarget Visitors
With the Pixel installed, you can retarget people who visited your site but didn’t buy.
Example retargeting campaigns:
- Show ads to cart abandoners
- Offer discounts to returning visitors
- Highlight reviews to build trust
This helps bring warm leads back to your store and improves conversions.
- Stay Consistent and Follow Trends
TikTok trends move fast. Use current music, effects, or hashtags in your ads. Stay active by posting content regularly, even if it’s organic.
Conclusion
TikTok is changing how online stores attract and convert customers. By integrating your WooCommerce store with TikTok For Business, you’re stepping into one of the most dynamic and engaging platforms available today. The correct resources and direction are crucial whether you’re starting your first campaign or growing it.
Need expert help with setup, plugin selection, or ad strategy? Contact our WooCommerce specialists at WooHelpDesk.com or call us directly at +1 888 602 0119 (US & Canada) . Our team is here to help you connect smarter, grow faster, and sell more—on TikTok and beyond.
Let WooHelpDesk be your partner in WooCommerce success.