How To Change PHP Version For WordPress On Hostinger
2 mins read

How To Change PHP Version For WordPress On Hostinger

Introduction

Keeping your PHP version up to date is essential for maintaining a secure, fast, and compatible WordPress website. Newer PHP versions offer improved performance, better security, and enhanced compatibility with modern themes and plugins. Hostinger makes it easy to update the PHP version directly from the control panel without modifying core files. In this guide, you’ll learn how to check your current PHP version in the WordPress admin dashboard, update the PHP version through the Hostinger dashboard, and verify the changes using WordPress Site Health tools. Following these steps ensures your website runs on an optimized PHP environment while reducing the risk of errors and performance issues.

1. Introduction

You will learn the steps to update the PHP configuration through the Hostinger control panel and verify the change in WordPress.

Introduction

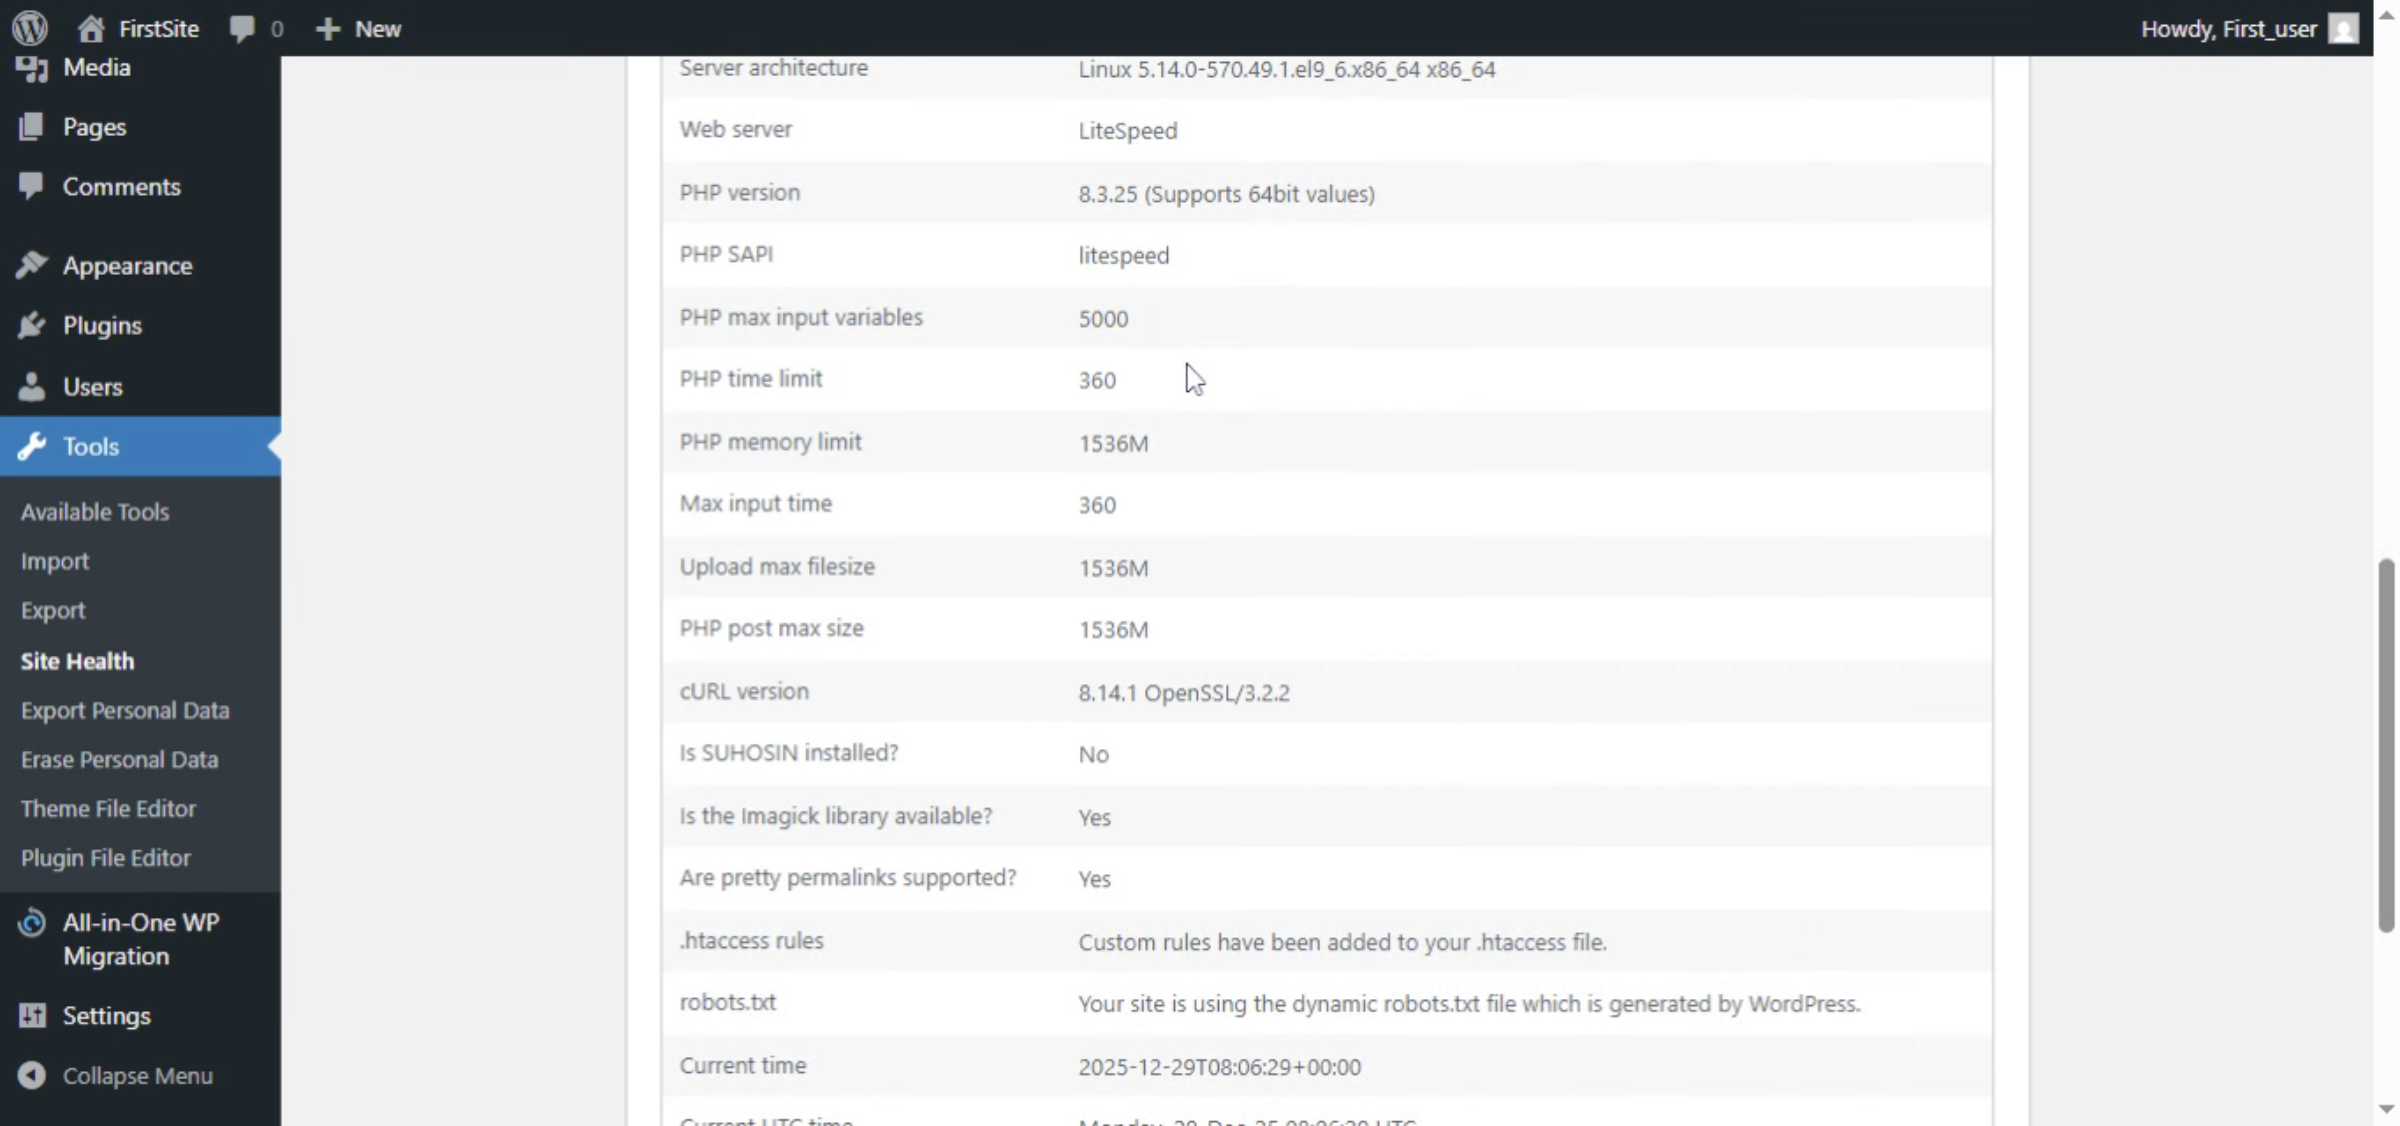
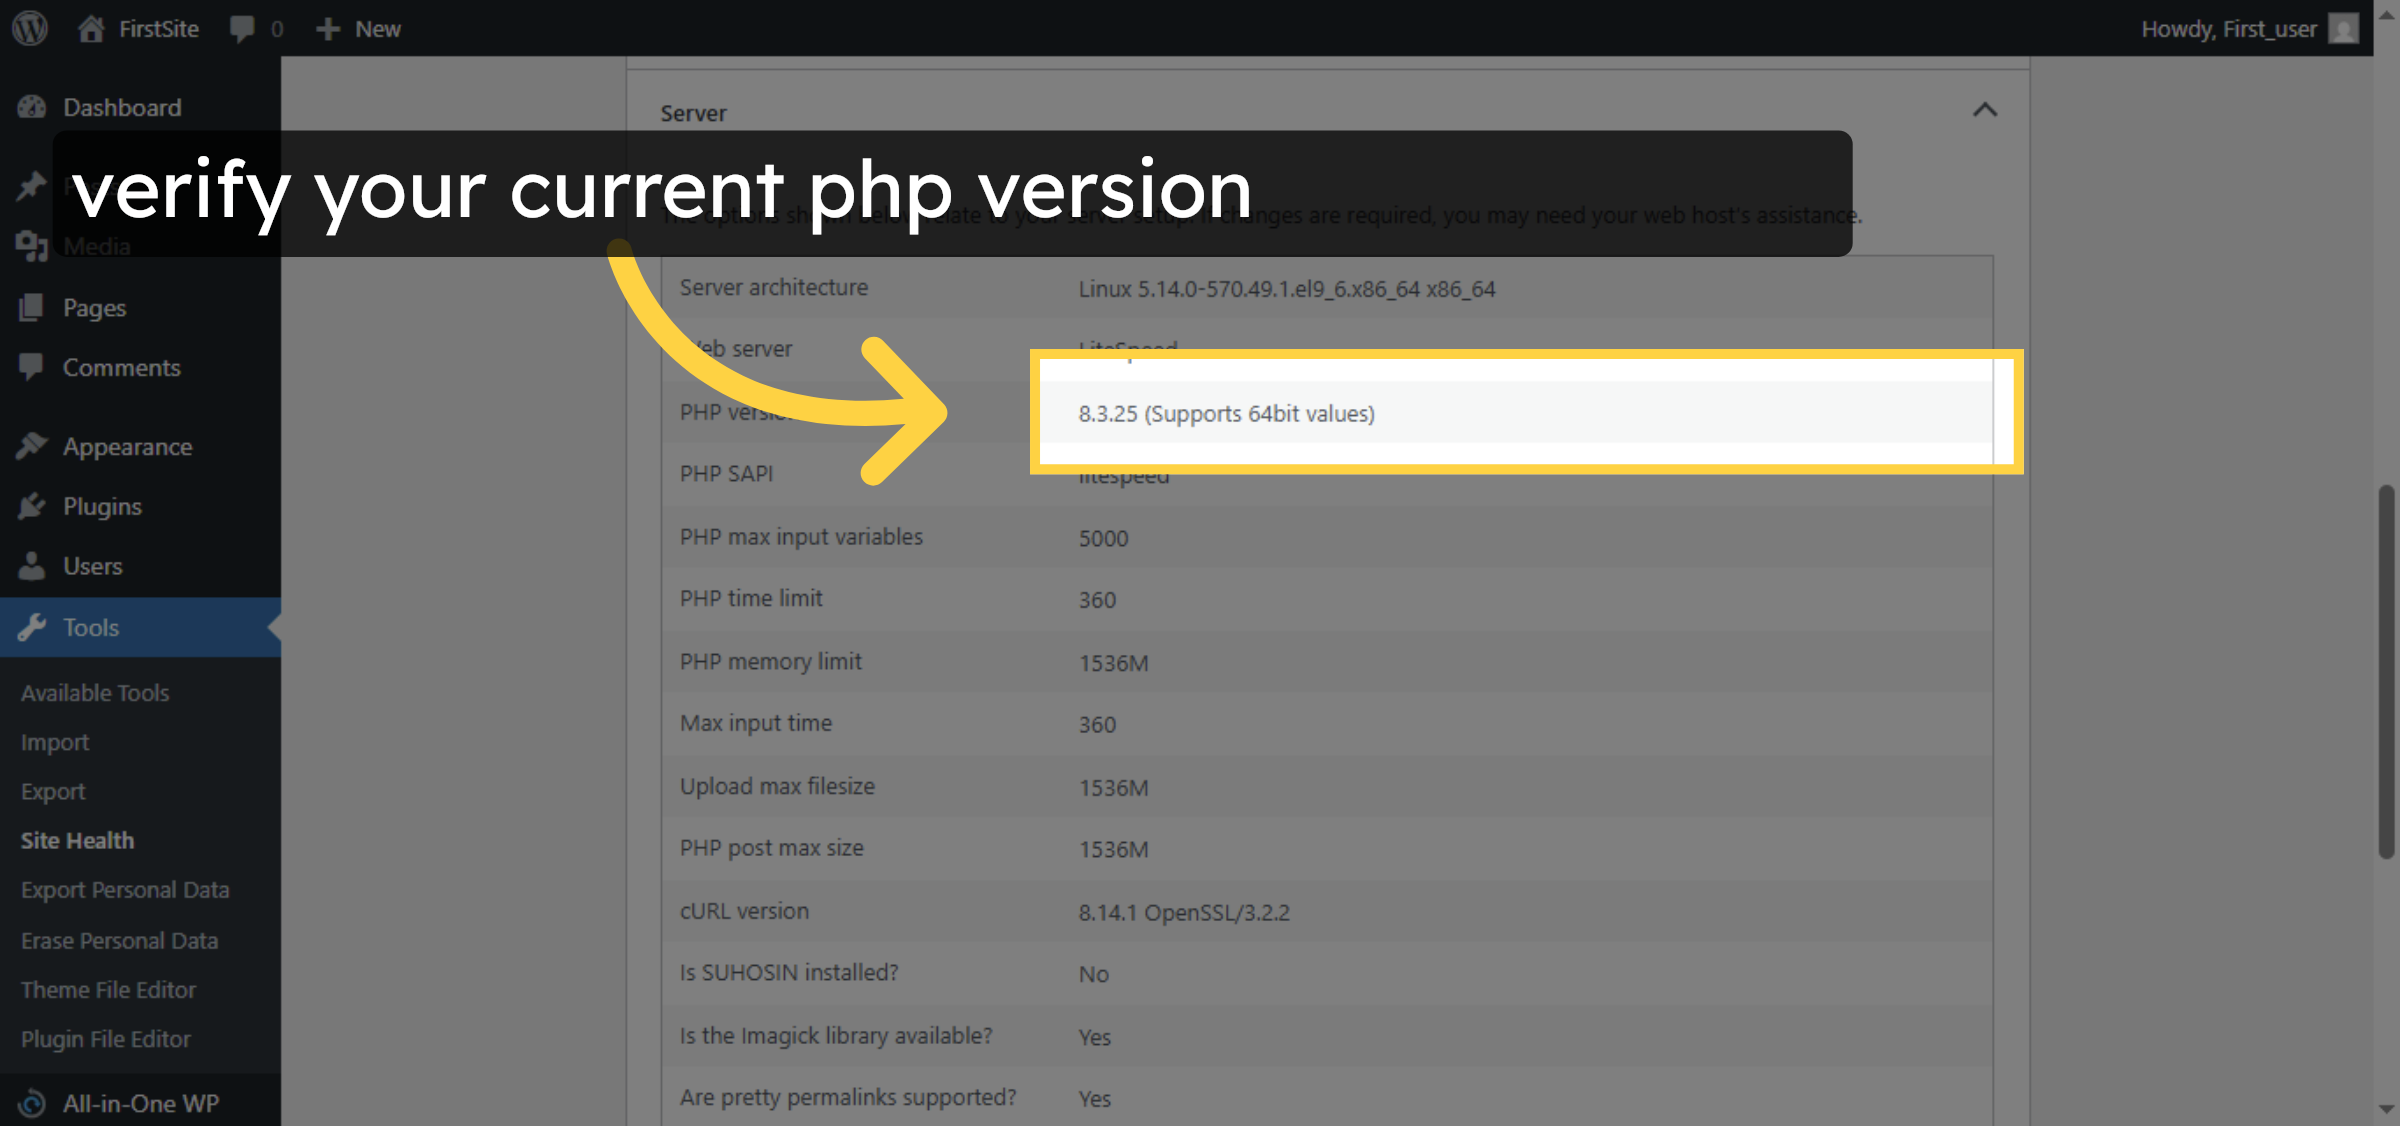
2. Check your current php version.

Open your wordpress Admin Dashboard and then goto tools->server->info then Check your current php version.

Check your current php version.

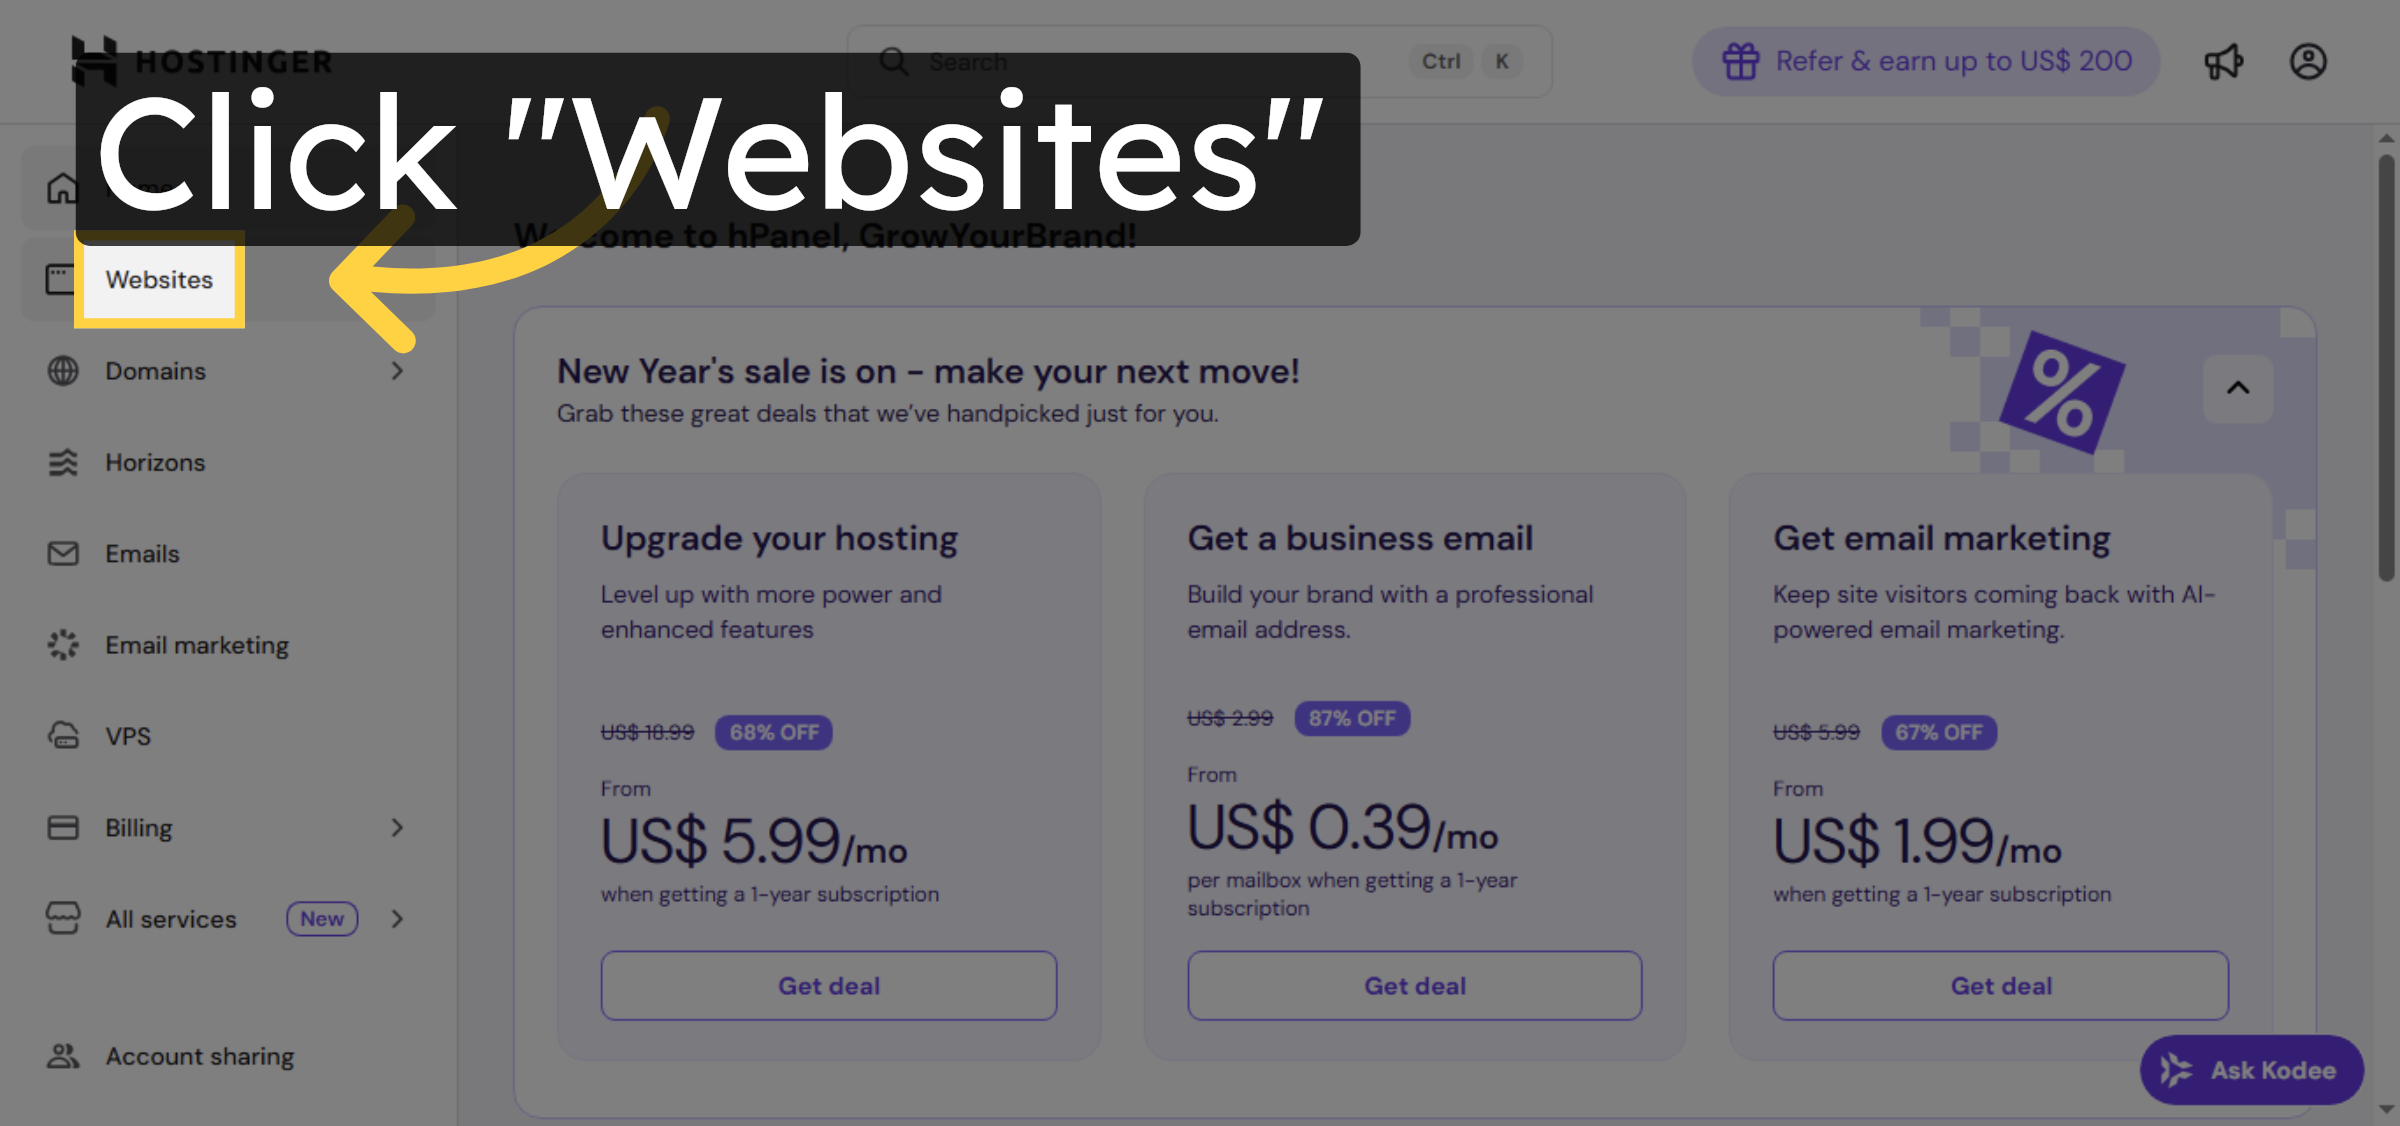
3. Click Websites Section

Click the “Websites” section in the Hostinger control panel to view your hosted sites and their management options.

Click Websites Section

4. Open Website Dashboard

Click “Dashboard” for the website you want to update to access its management interface.

Open Website Dashboard

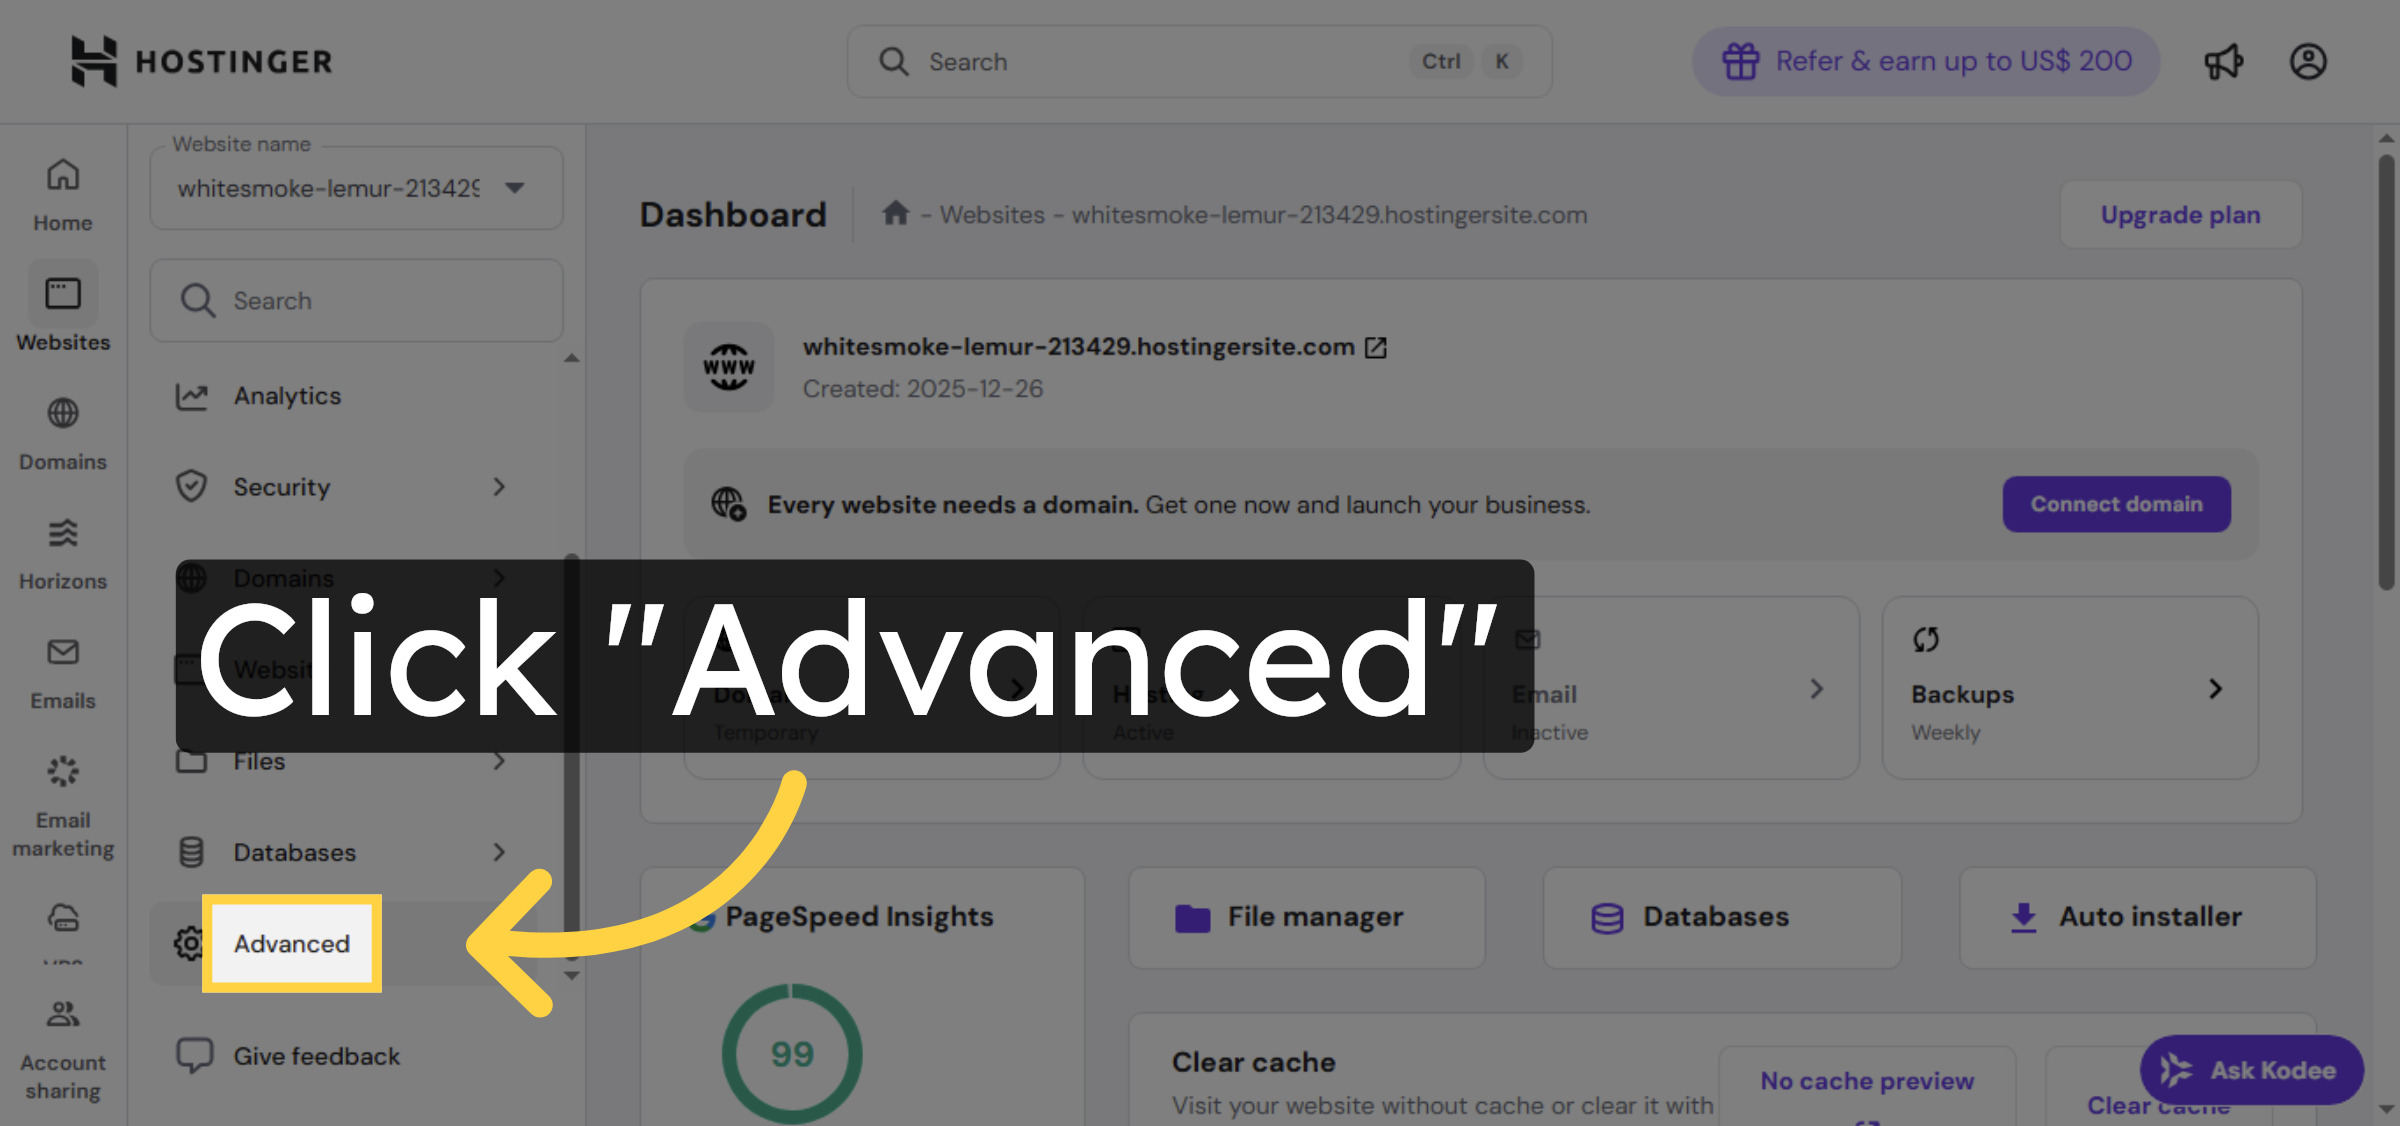
5. Access Advanced Settings

Click the “Advanced” tab within the website dashboard to find additional configuration options.

Access Advanced Settings

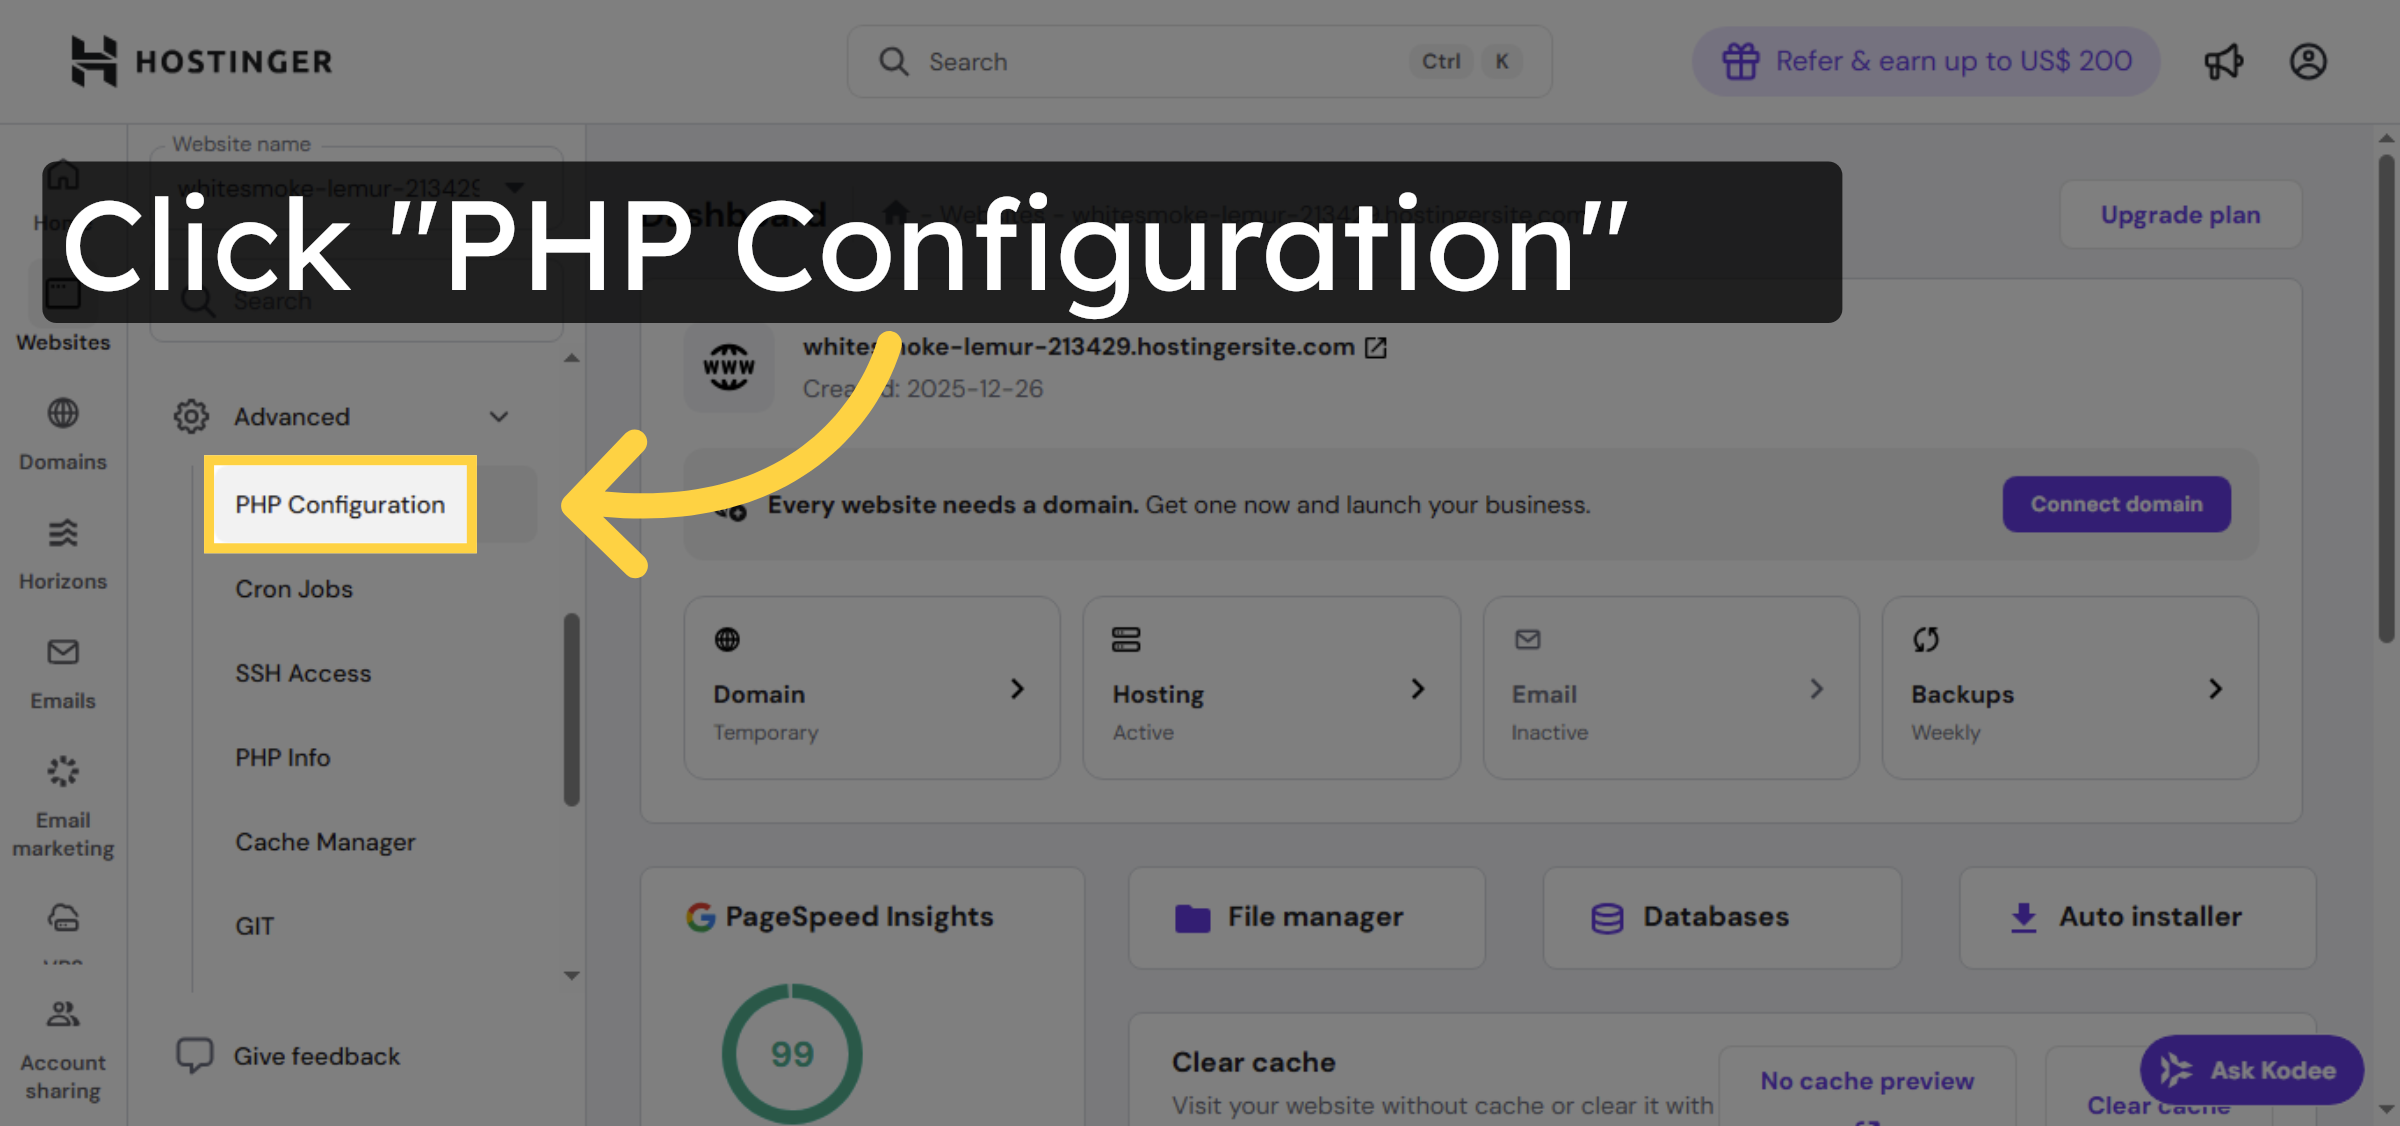
6. Open PHP Configuration

Click “PHP Configuration” to access the settings where you can change the PHP version for your site.

Open PHP Configuration

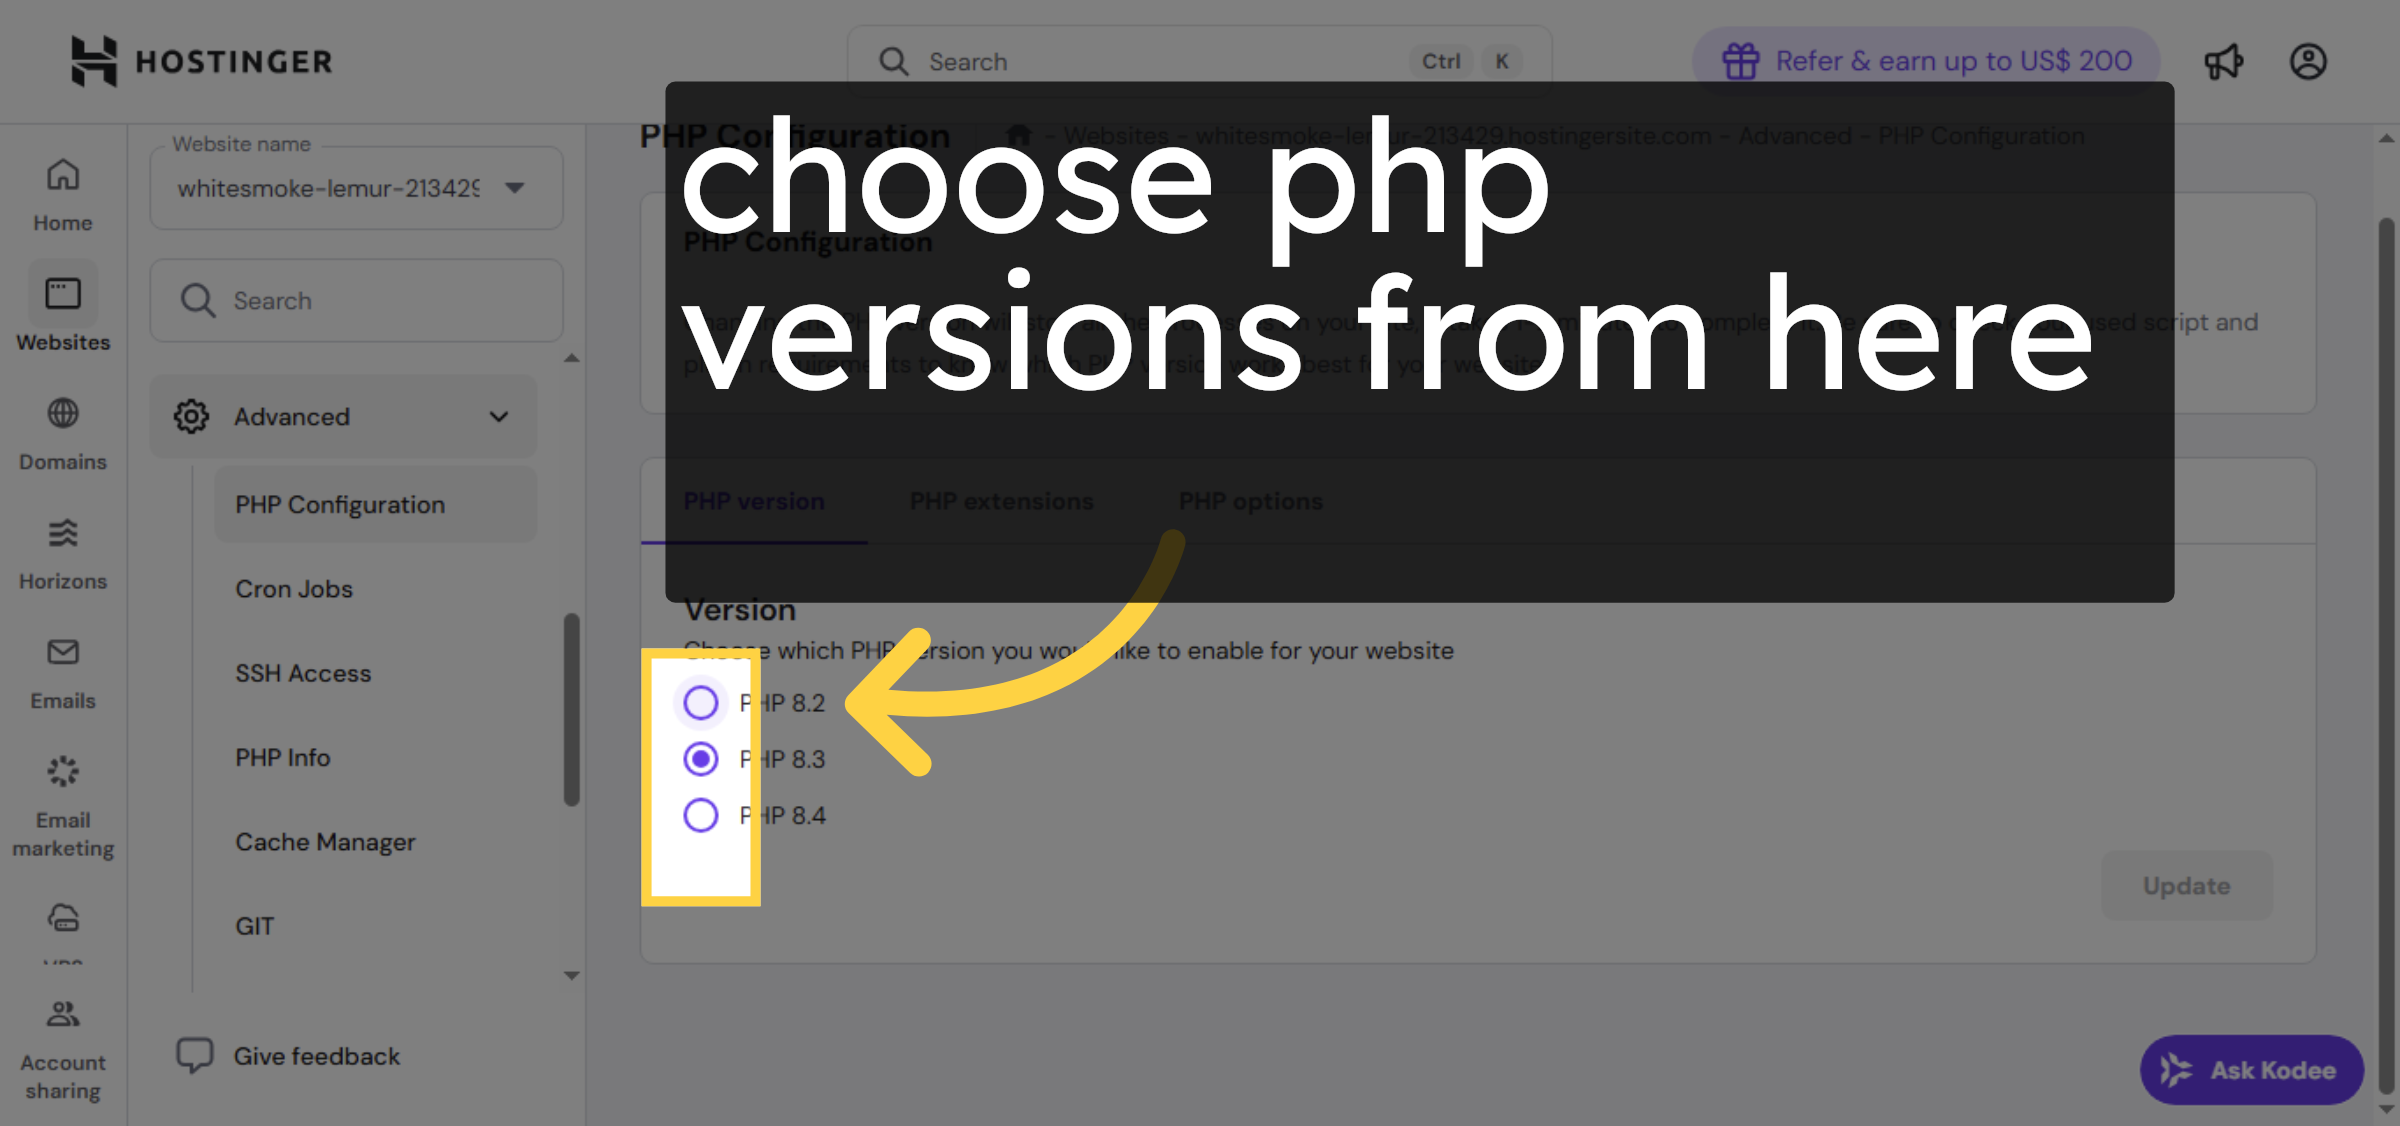
7. Select PHP Version Dropdown

Click the dropdown menu to select the desired PHP version for your WordPress site.

Select PHP Version Dropdown

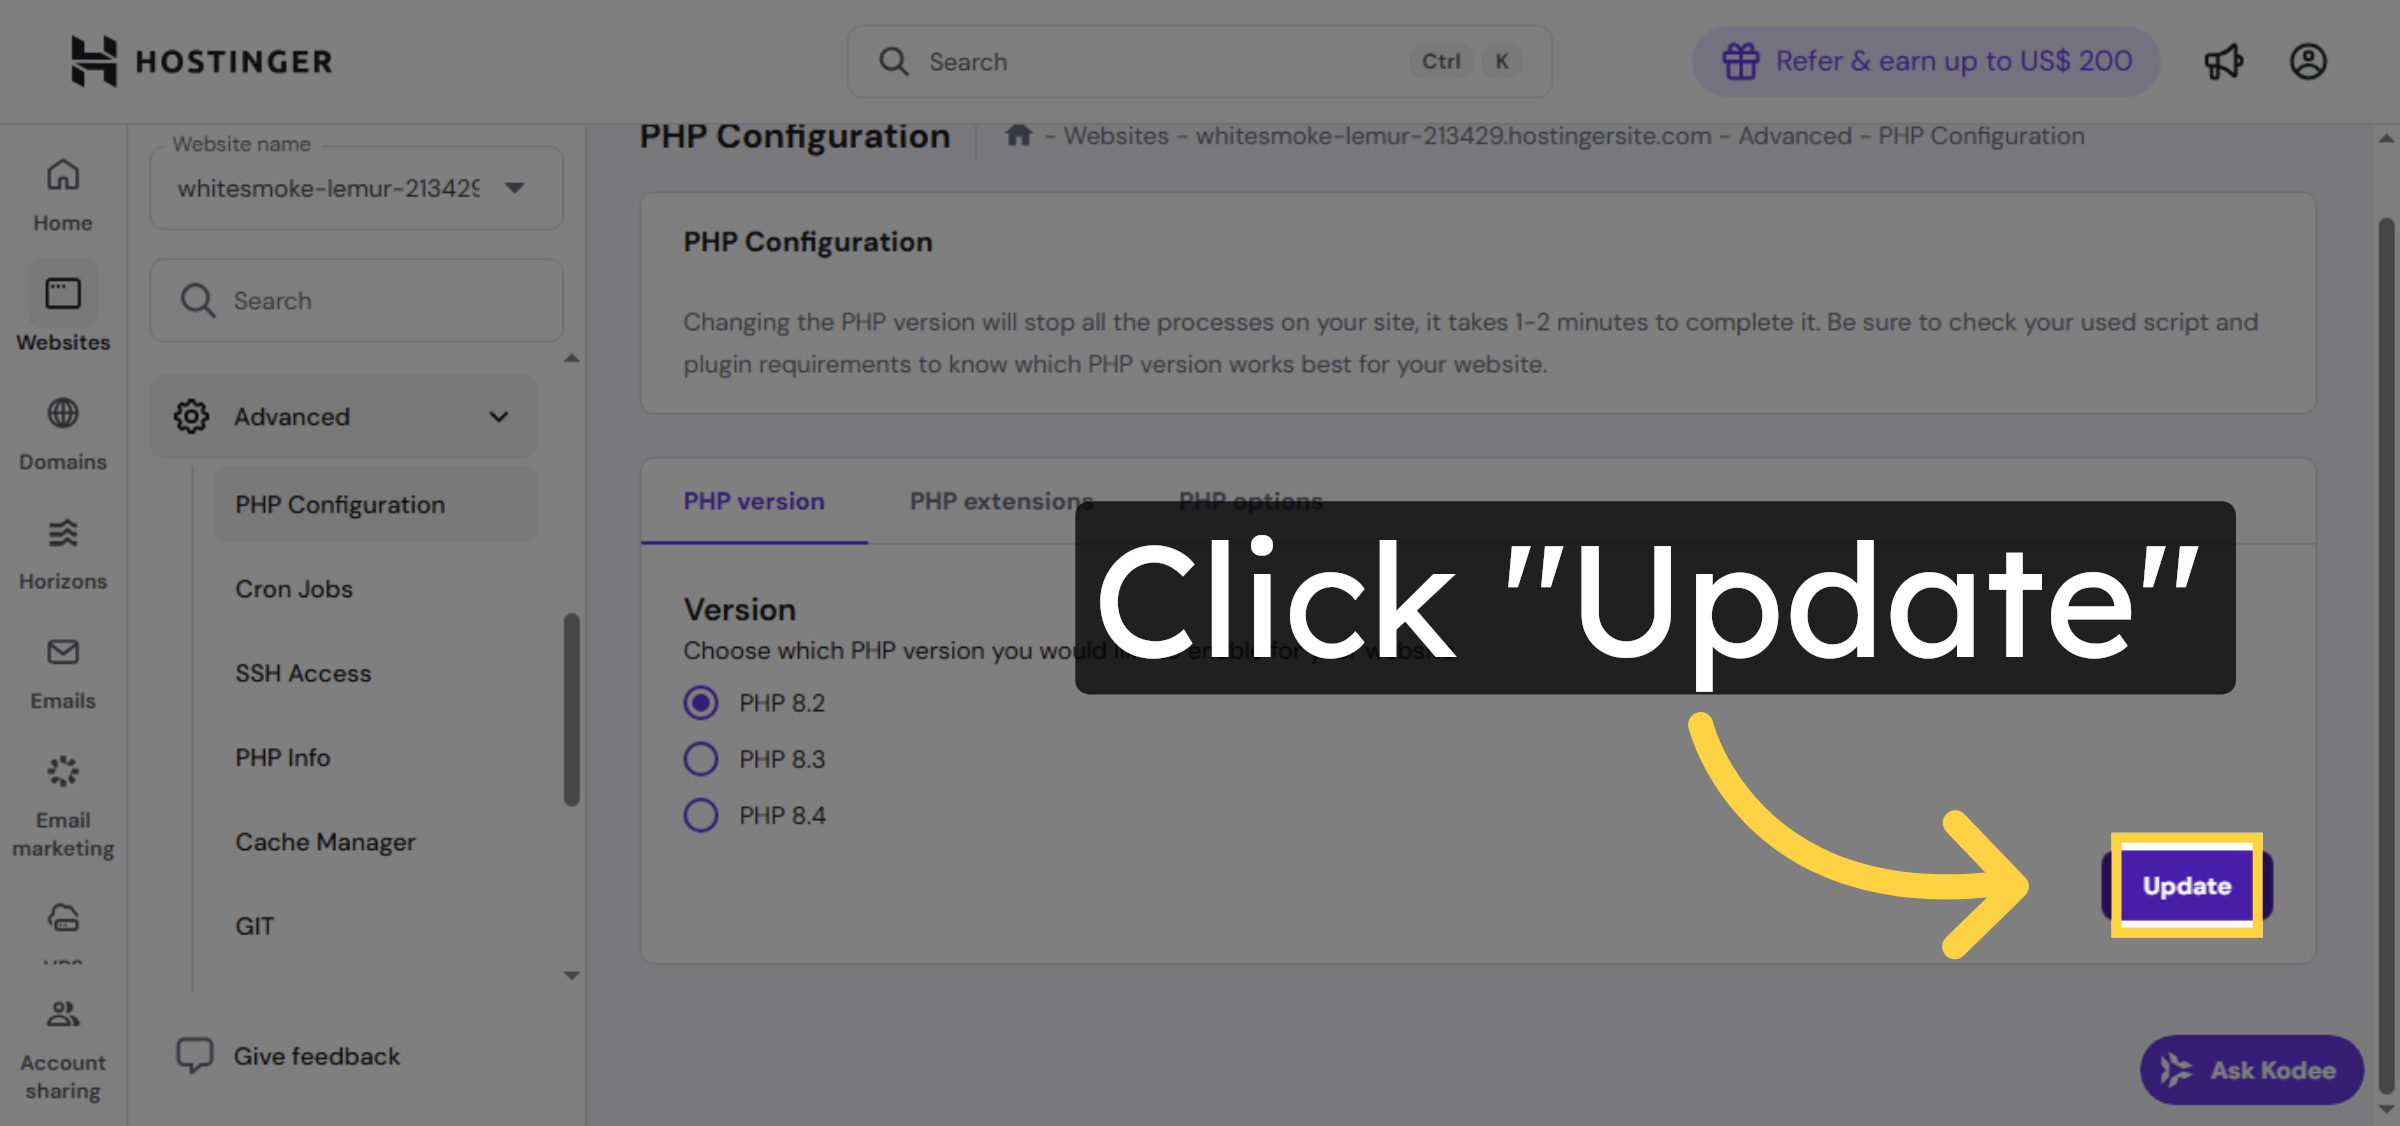
8. Click Update Button

Click the “Update” button to apply the new PHP version settings to your website.

Click Update Button

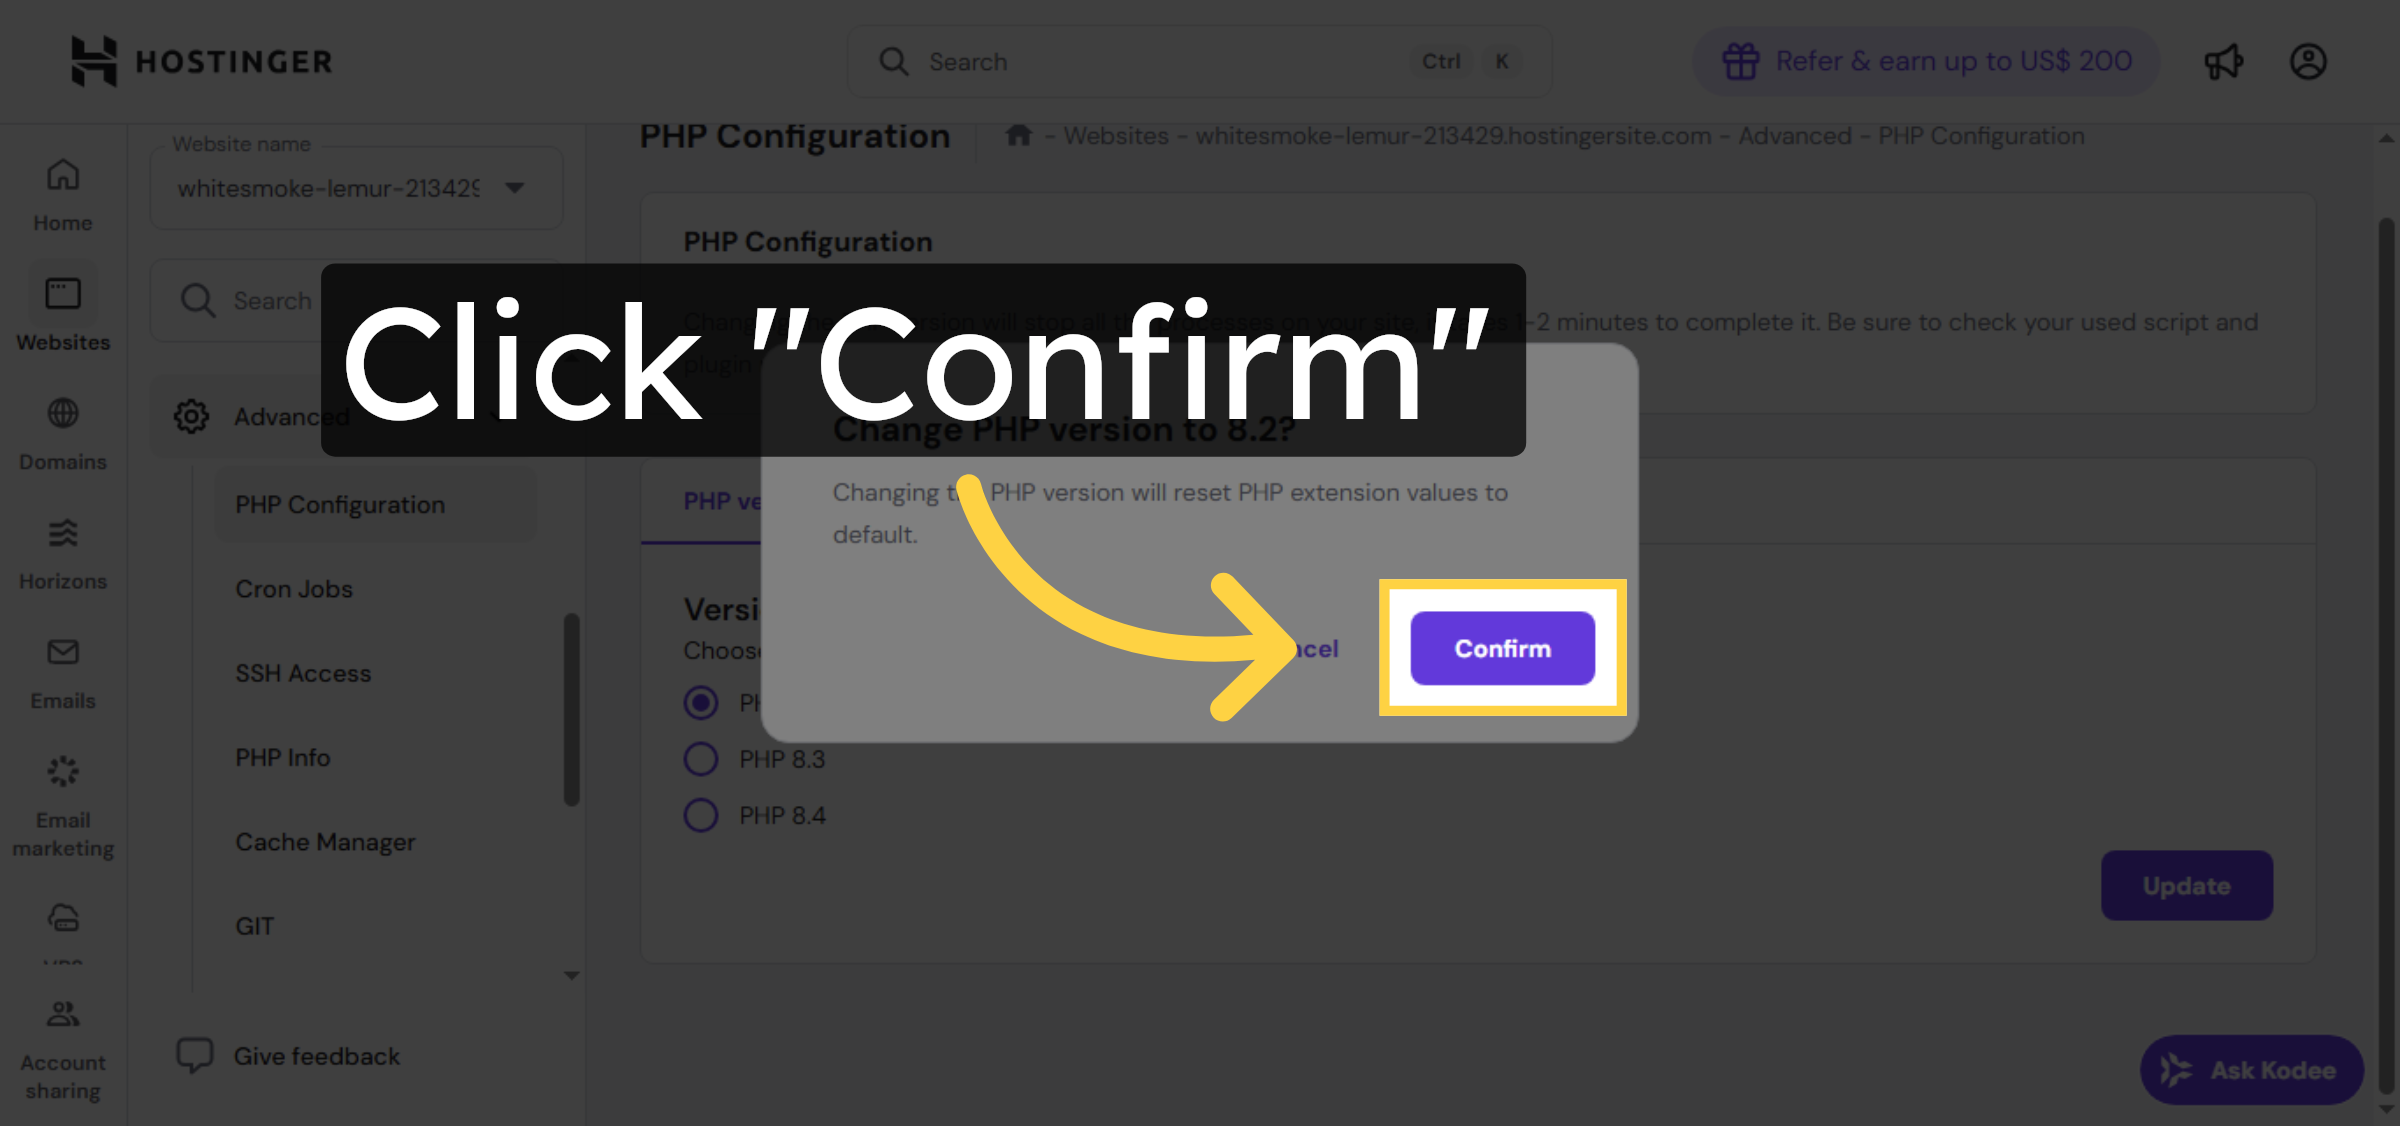
9. Confirm PHP Version Change

Click “Confirm” to finalize and save the PHP version update in the Hostinger control panel.

Confirm PHP Version Change

Ad Banner

10. Switch to your wordpress Admin Dashboard.

Click “Tools” in the WordPress dashboard to access site management utilities.

Switch to your wordpress Admin Dashboard.

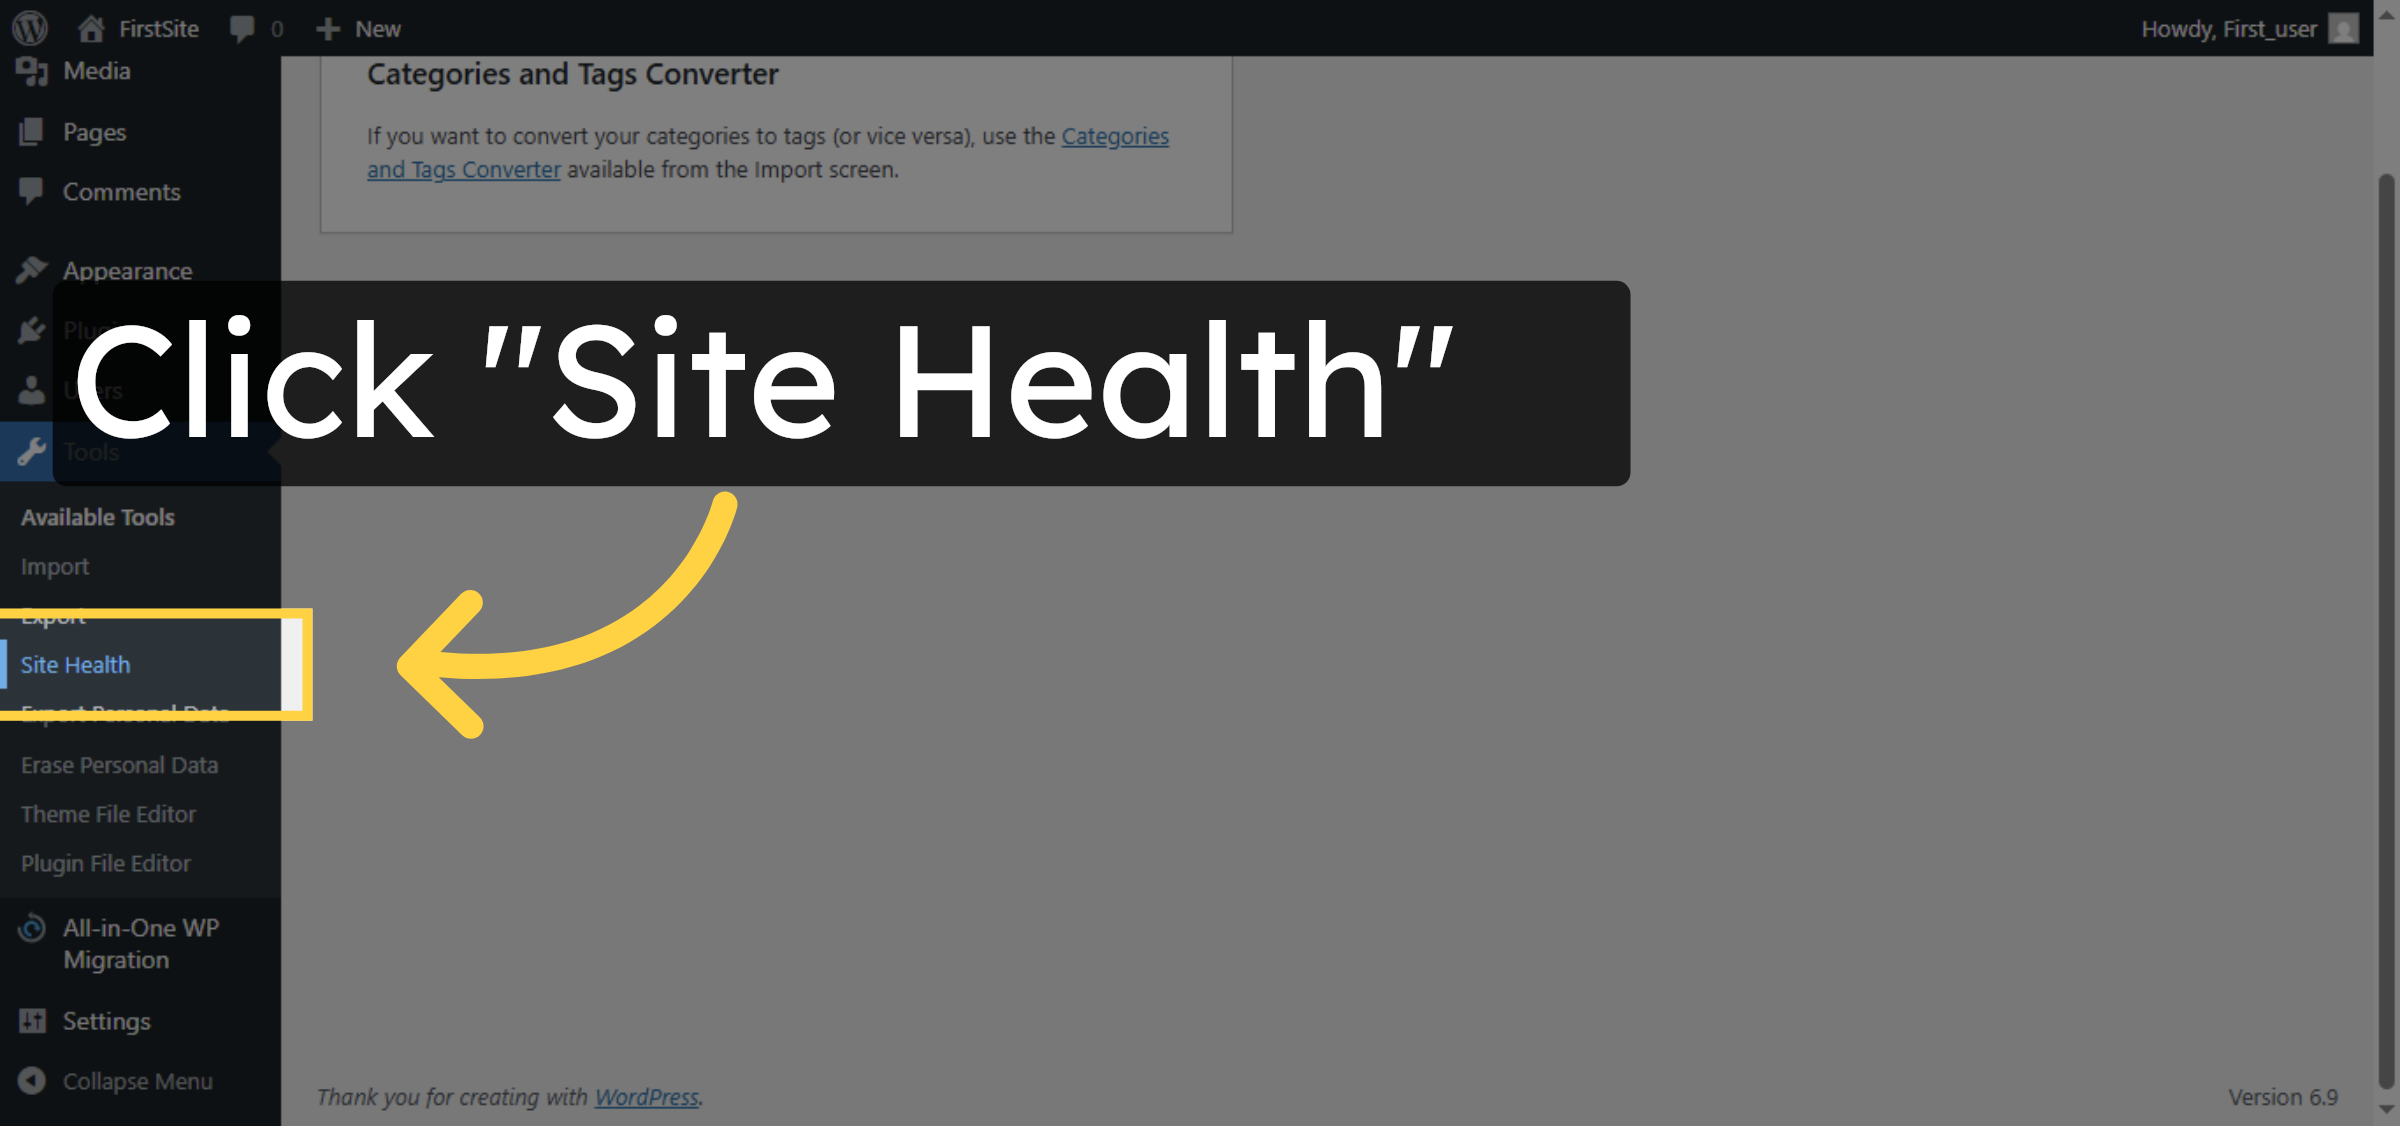
11. Access Site Health

Click “Site Health” to review the status and configuration details of your WordPress site.

Access Site Health

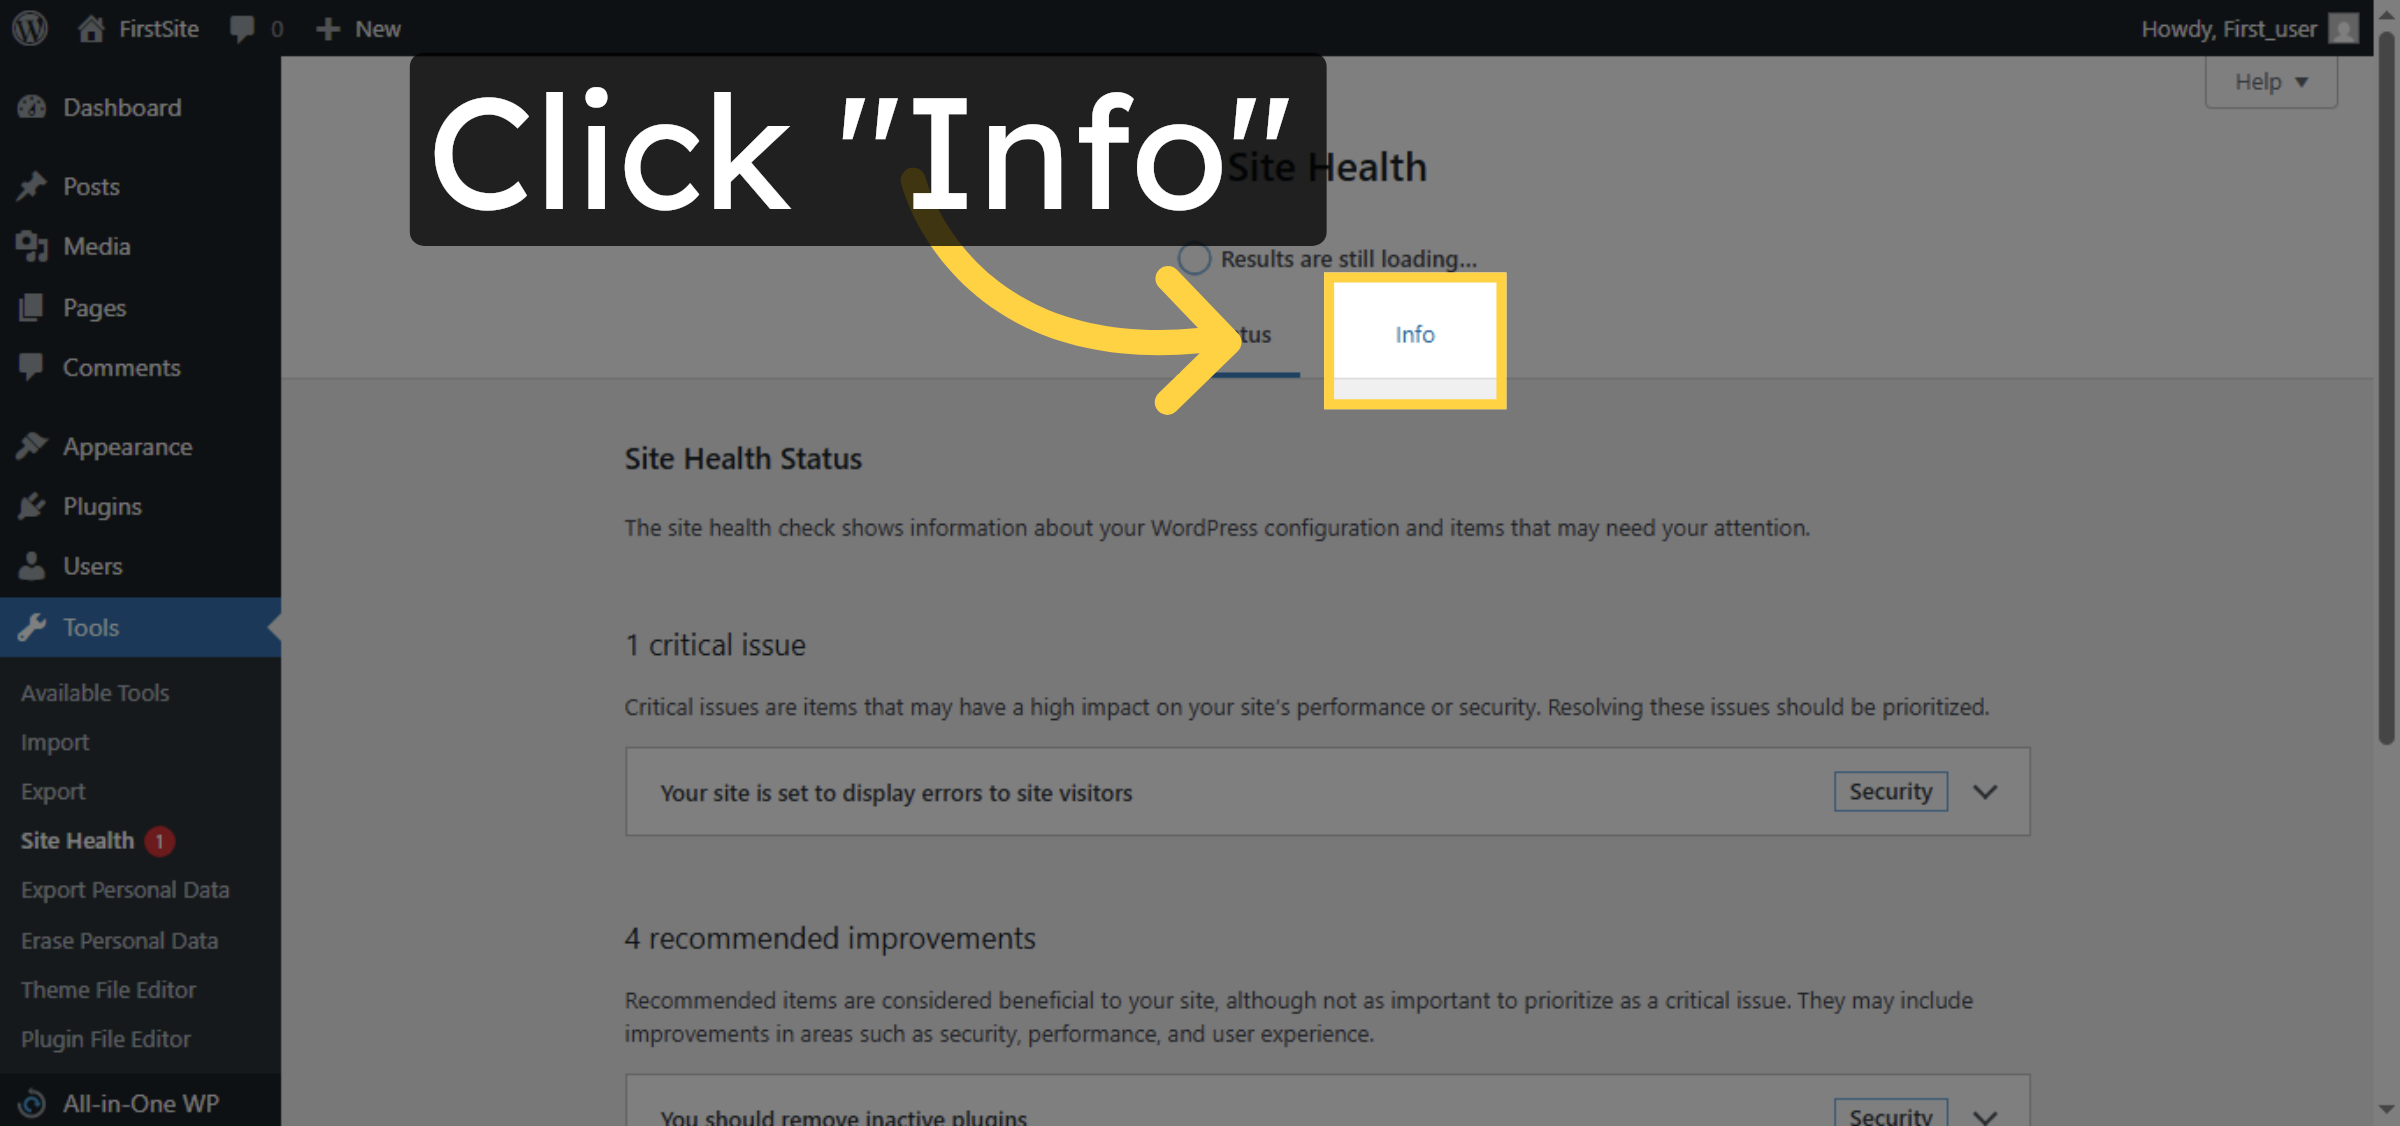
12. Open Site Health Info Tab

Click the “Info” tab within Site Health to view detailed information about your site environment.

Open Site Health Info Tab

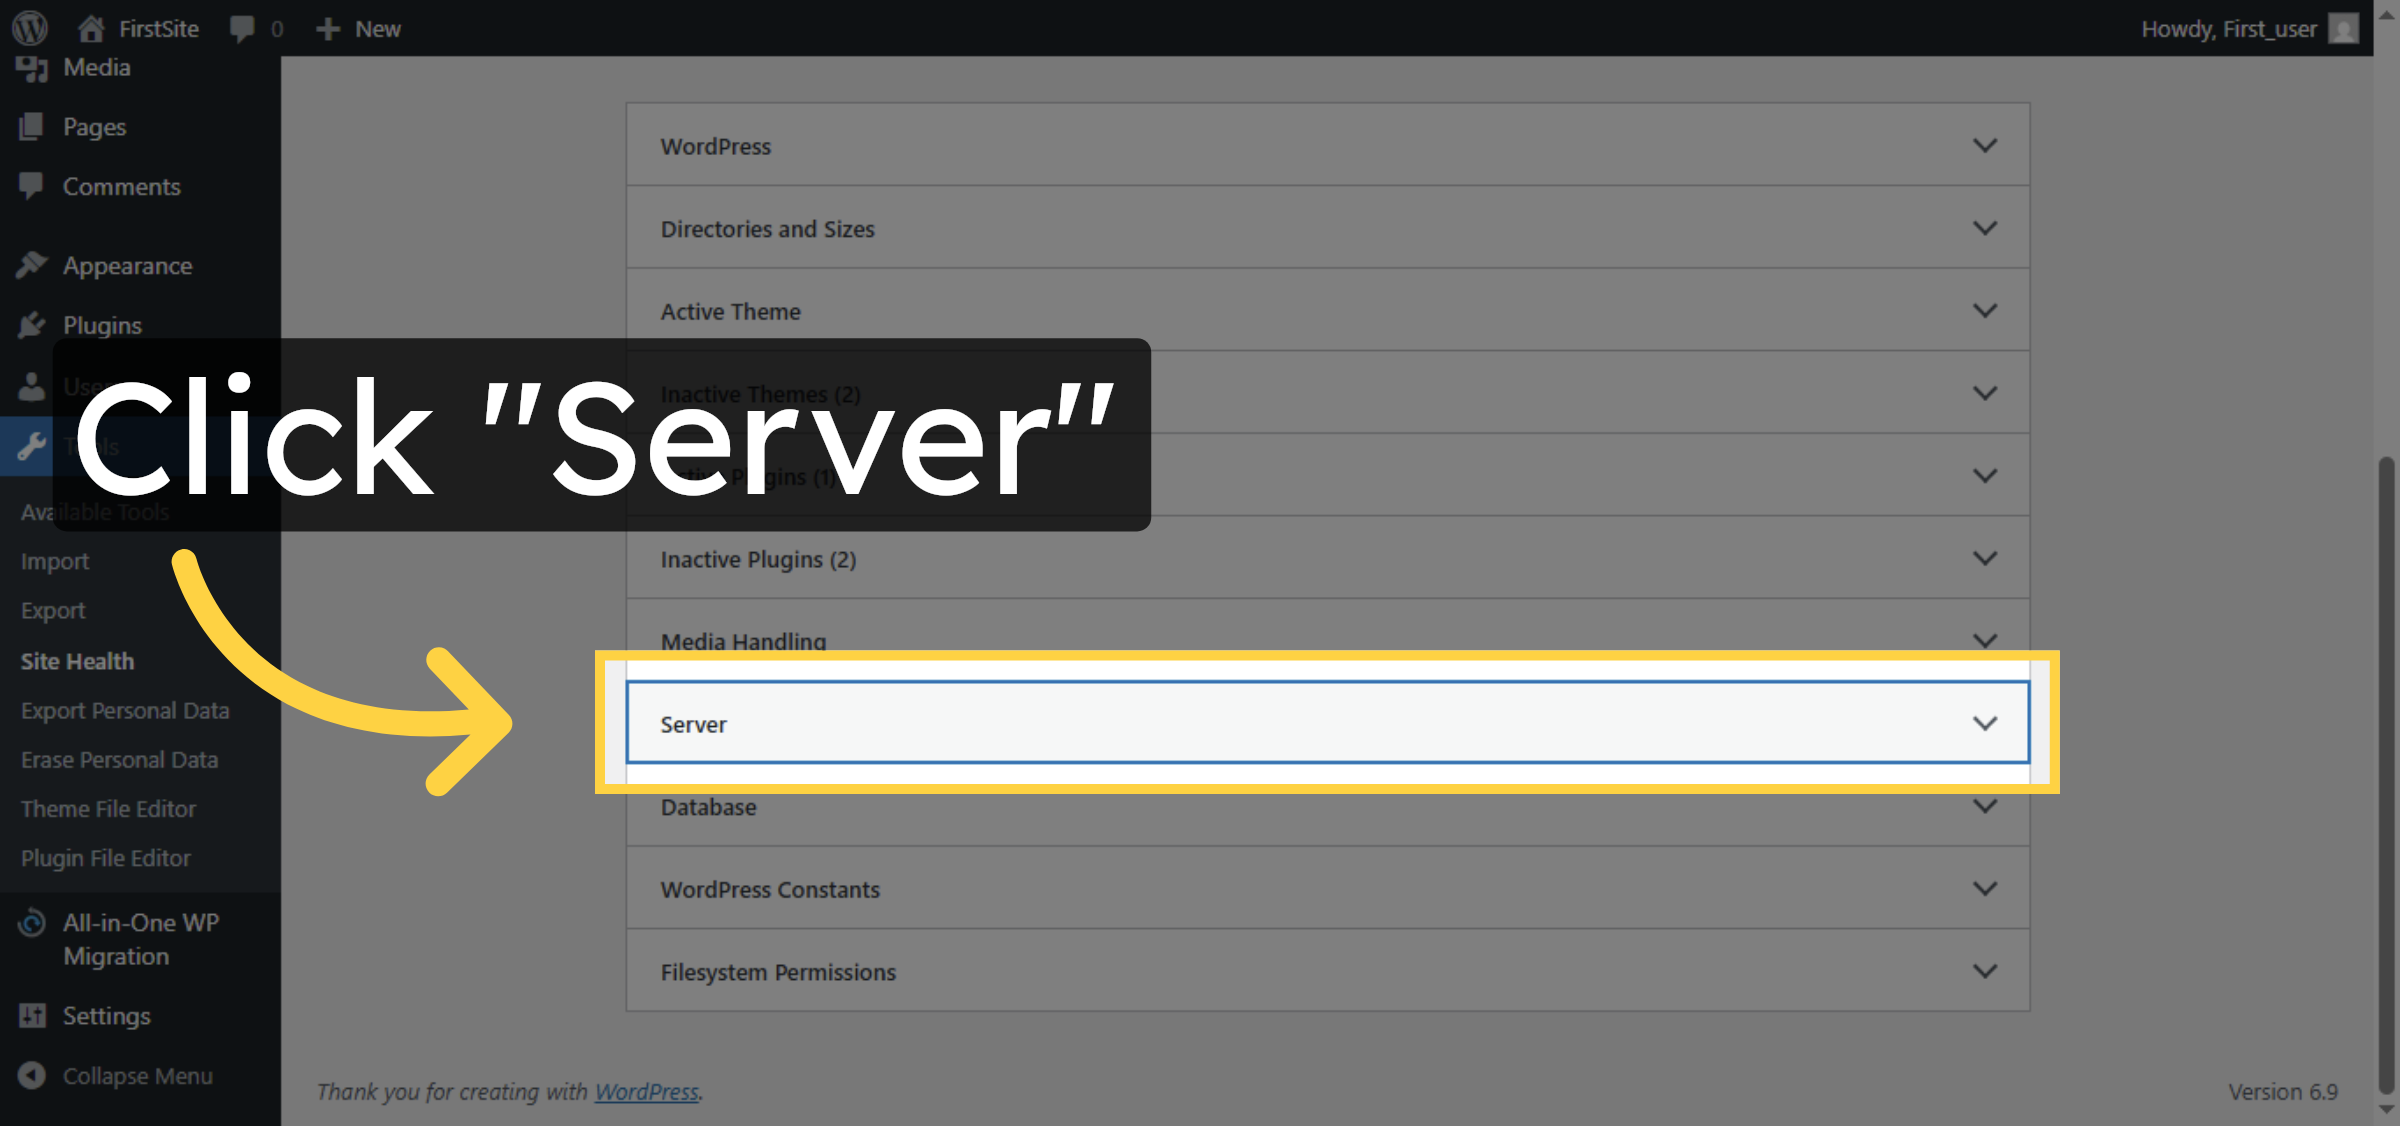
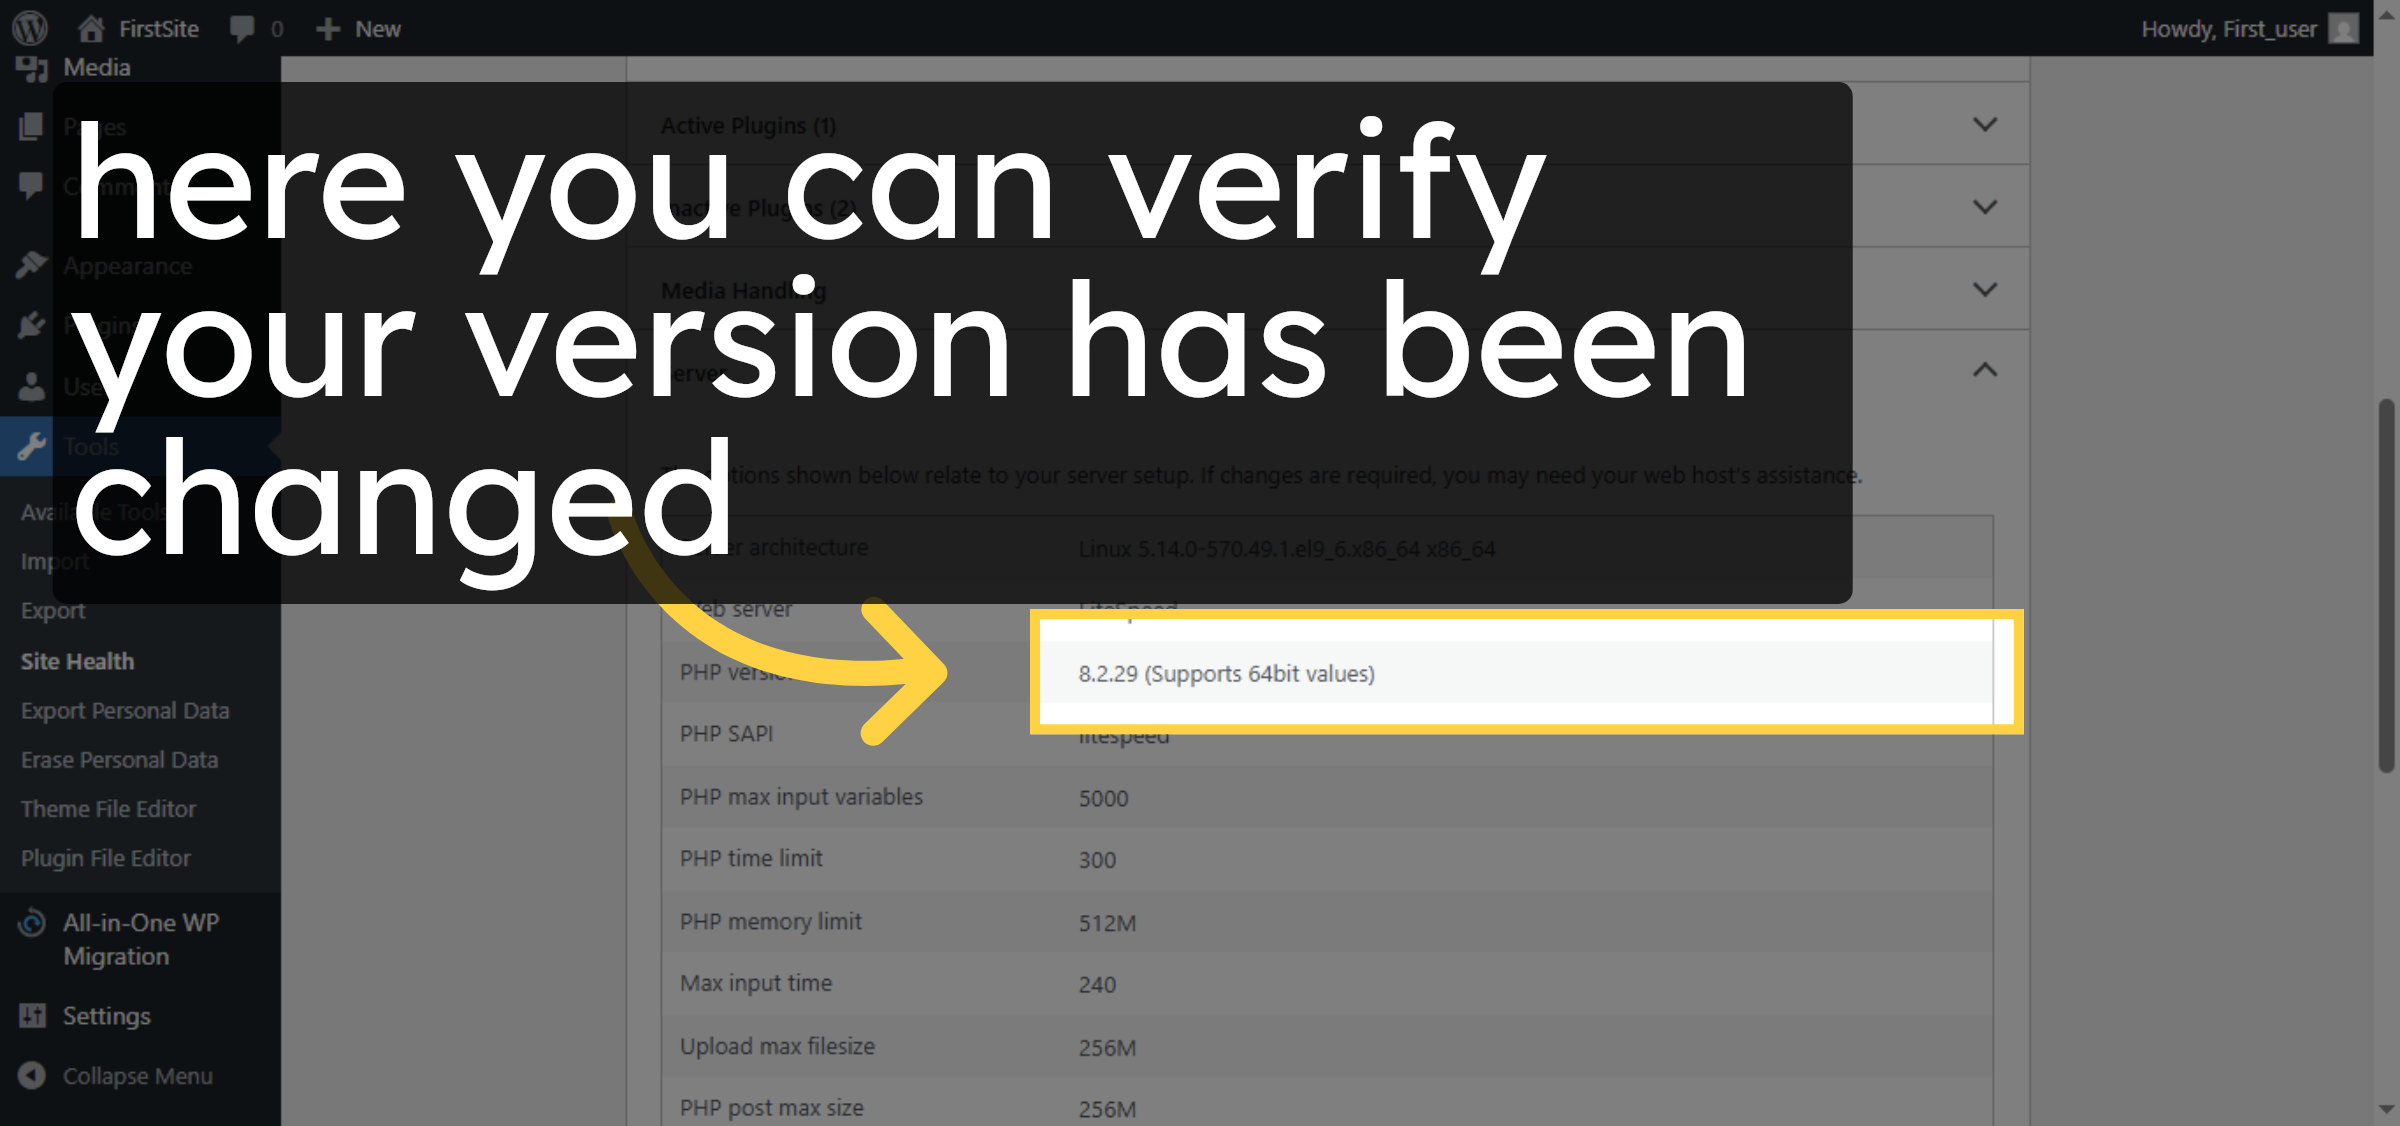
13. View Server Information

Click “Server” to see server-related details including the PHP version currently in use.

View Server Information

14. verify version changes.

Now you can see your version has been updated.

verify version changes.

Conclusion

By following the steps outlined in this guide, you can successfully update the PHP version for your WordPress website on Hostinger. Running the latest supported PHP version helps improve website performance, enhances security, and ensures compatibility with plugins and themes. Regularly reviewing and updating your PHP version is a best practice for maintaining a stable and optimized WordPress hosting environment.

Visit: https://www.woohelpdesk.com
Call Us Toll-Free: +1 888 602 0119 (US & Canada)
Get professional support for WordPress configuration, hosting management, performance optimization, and troubleshooting.

Leave a Reply

Your email address will not be published. Required fields are marked *

Leave a Reply

Your email address will not be published. Required fields are marked *