How to Add Product Quantity in WooCommerce (Step-by-Step Guide)
Table of Contents
- Introduction
- What Product Quantity Means in WooCommerce
- What Do You Need to Add Product Quantity in WooCommerce
- Prerequisites Before Adding Product Quantity in WooCommerce
- How to Add Product Quantity in WooCommerce (Using WooCommerce Default Settings)
- Set Minimum, Maximum, and Step Quantity in WooCommerce (Method 2)
- Common Problems While Adding Quantity and How to Fix Them
- Conclusion
Introduction
Many store owners want better control over item quantity. You may want customers to buy more than one. You may also want to stop very large orders. This guide explains how to add product quantity in WooCommerce correctly. You will learn where the quantity selector should appear. You will also learn what settings affect it the most. We will keep things simple and practical throughout. By the end, you will know how to enable quantity in WooCommerce safely. You will also know what to check before changing any setting.
What Product Quantity Means in WooCommerce
Product quantity means how many units a customer will buy. Customers change this using a quantity selector on your store. In WooCommerce, this usually appears near the Add to Cart button. This selector is also called the WooCommerce quantity field in many themes. You may also hear it called a WooCommerce quantity input box. Both terms mean the same thing for customers.
There is also another quantity type called stock quantity. Stock quantity is your inventory count in the backend. It controls how many items you can sell in total. The customer quantity selector controls how many items in one order. These two settings work together for many products. If stock is low, WooCommerce may limit customer quantity. If stock is out, the Add to Cart may disable fully.
Quantity behavior can change based on product type. A Simple product usually shows quantity immediately on the product page. A Variable product may show quantity after selecting variation options. A Grouped product can show multiple quantity boxes for each item. Knowing this helps you troubleshoot faster later.
What Do You Need to Add Product Quantity in WooCommerce
You need WooCommerce installed and at least one product created
WooCommerce must be active on your WordPress site first. Create at least one test product to confirm everything works. A simple product is best for the first check. It shows the WooCommerce quantity field in most themes. Once this works, you can adjust other product types. This step confirms you can add product quantity in WooCommerce safely.
You need access to WordPress Admin to change product options
You need dashboard access to edit product purchase options. Open Products, then Edit, and review the Product data box. This is where WooCommerce product quantity settings are controlled. You can enable quantity in WooCommerce by allowing multiple units. Without admin access, you cannot change these options. Make sure your login has editor or admin rights.
You need a WooCommerce-ready theme that supports product templates
Your theme should support WooCommerce product templates properly. Many issues happen when a theme overrides default templates. The WooCommerce quantity input box may be hidden or moved. Test the product page in an incognito window for accuracy. If you use a builder, confirm it does not replace templates. A WooCommerce-ready theme reduces errors and saves time.
You need the product to allow buying more than one unit
The product must allow customers to choose more than one unit. Check the Sold individually option inside the product settings. If it is enabled, the quantity will not show. Turn it off to restore the WooCommerce quantity field. Also confirm the product is purchasable and published. This small setting often fixes missing quantities without any extra tools.
You may need a plugin for minimum, maximum, and step rules
For advanced rules, a plugin can be the simplest option. It helps set WooCommerce minimum order quantity for each product. It can also enforce WooCommerce maximum order quantity limits. Many plugins support step values like 2, 5, or 10. Choose a plugin that works on product, cart, and checkout. Always test rules on a staging site first.
You may need to clear cache after making quantity changes
Caching can delay changes on product and cart pages. After edits, clear your site cache and browser cache. If you use a CDN, clear that cache as well. Old cached pages may hide the WooCommerce quantity input box. This can make you think settings are not working. After clearing cache, recheck the page and test quantity again.
Prerequisites Before Adding Product Quantity in WooCommerce
Check the product type because quantity behavior changes
Quantity can behave differently based on product type. Simple products usually show quantity beside Add to Cart. Variable products may show quantity after selecting attributes. Grouped products can show multiple quantity fields for each item. Check the Product data type before changing settings. This prevents confusion when the quantity selector looks different. It also speeds up troubleshooting later.
Check “Sold individually” because it removes the quantity field
Sold individually is the most common reason quantity disappears. When enabled, WooCommerce forces quantity to stay at one. The WooCommerce quantity field may be hidden completely. Open the product editor and locate this option. Disable it if you want customers to change quantity. Save the product and refresh the page. Then confirm the selector appears again.
Check stock and backorders because they can limit quantity
Inventory settings can limit what customers can select. If stock management is on, stock quantity controls maximum values. If backorders are off, customers cannot exceed available stock. If backorders are on, higher quantities may still be allowed. Review stock status and manage stock options carefully. These settings affect how add product quantity in WooCommerce behaves for buyers.
Check your theme or builder because templates may hide quantity
Themes and builders can change WooCommerce layouts unexpectedly. A custom template may remove the quantity selector for design. Some quick view tools also hide the WooCommerce quantity input box. Temporarily switch to a default WooCommerce theme for testing. If quantity returns, the issue is theme related. Update templates or adjust builder settings to restore the field.
Check cart update behavior because totals must recalculate’
Quantity must update totals correctly in the cart. Change quantity, then click Update cart if required. Some themes use AJAX and update totals instantly. If totals do not change, a script conflict may exist. Disable recent plugins and test again. Also clear cache to avoid old cart fragments. This confirms quantity changes are being applied properly.
Check if you need a default starting quantity for faster orders
Some stores need a fixed starting quantity for faster orders. You may want a default of two for bundles. This is where WooCommerce set default quantity becomes useful. Set a default only when it matches your pricing strategy. Also ensure it does not conflict with min or max rules. Test product page, cart, and checkout for consistent behavior.
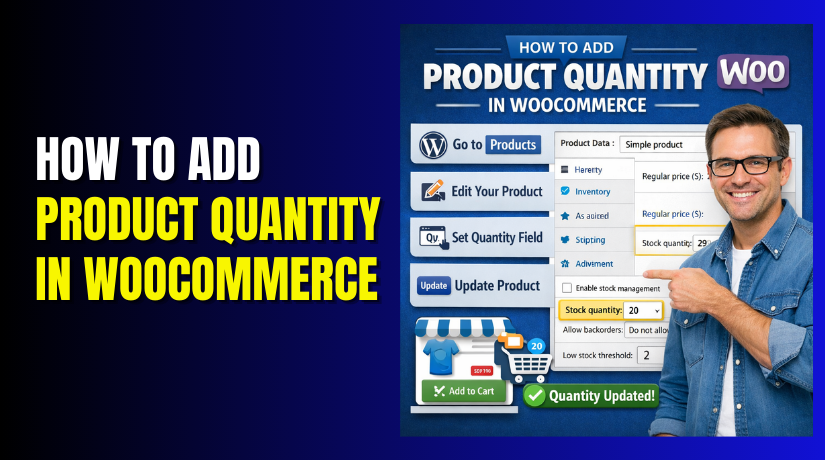
How to Add Product Quantity in WooCommerce (Using WooCommerce Default Settings)
Step 1: Open product editor and confirm basic purchase options
- Go to Products → All Products in your WordPress dashboard.
- Open the product you want to edit.
- Scroll to the Product data section below the editor.
- Keep the product type as Simple, Variable, or Grouped.
- This area controls WooCommerce product quantity settings for buying.
- Click Update after each change to save correctly.
Step 2: Make sure the product allows more than one unit
- Open the Inventory tab inside Product data.
- Find the option Sold individually and keep it unchecked.
- If it is checked, WooCommerce hides the quantity selector.
- This is the most common reason the selector disappears.
- Disabling it will usually enable quantity in WooCommerce instantly.
- Update the product and refresh the product page once.
Step 3: Check quantity on a Simple product page first


- Open the Simple product page on the front end.
- You should see the WooCommerce quantity field near the Add to Cart button.
- It usually looks like a number box with arrows.
- This is the WooCommerce quantity input box customers use.
- Increase the number and click Add to Cart.
- If the quantity box is still missing, your theme may be hiding it.
Step 4: Confirm how quantity works for Variable products
- Variable products behave slightly differently than simple products.
- Open the product page and select variation options first.
- Choose a size, color, or any required attribute.
- After selection, the quantity box usually appears near Add to Cart.
- If it still does not show, check the variation settings.
- Make sure the variation is enabled and has a price set.
Step 5: Confirm how quantity works for Grouped products
- Grouped products show multiple items on one product page.
- Each child product can show its own quantity box. You will see a list or table of grouped items.
- Customers set quantities for each item separately.
- This is normal for grouped product layouts.
- If quantity does not show for a child item, check that child product.
- Make sure it is in stock and not sold individually.
Step 6: Test quantity updates in the Cart page properly
- Add the product to the cart with quantity more than one.
- Open the cart page and change the quantity again.
- Some sites show an Update cart button after changes.
- Click it to apply the new quantity.
- Check the subtotal and total after the update.
- If totals do not change, caching or scripts may block updates.
- Clear cache once and test again with a fresh browser tab.
Step 7: Test quantity at Checkout to confirm final totals
- Proceed from cart to the checkout page.
- Confirm the quantity matches what you set in the cart.
- Verify the order total and shipping value recalculate correctly.
- Change quantity in cart again and return to checkout.
- Checkout should reflect the latest cart values quickly. If checkout shows old values, clear cache and reload.
- Also test in an incognito window for clean results.
Step 8: Review default settings that can affect quantity display
- Open WooCommerce → Settings → Products and review general options.
- Confirm your store pages use standard WooCommerce layouts.
- If your cart page is custom, quantity may behave oddly.
- Also check if your theme uses AJAX for cart updates. AJAX helps totals refresh without page reload.
- Still, it depends on theme and plugin compatibility.
- If something breaks, test once with a default theme.
Step 9: Understand what default WooCommerce can and cannot do
- Default WooCommerce sets the starting quantity to one.
- If you want WooCommerce to set the default quantity to two or more, you need Method 2.
- WooCommerce also does not provide strict order limits.
- For WooCommerce minimum order quantity and WooCommerce maximum order quantity, use Method 2.
- However, default WooCommerce does limit quantity by stock.
- If stock is five, customers cannot select ten. This is normal inventory control behavior.
This method is best when you just need the basics. It helps you add product quantity in WooCommerce using built-in settings. Confirm Sold individually is disabled for the product. Test quantity on product, cart, and checkout pages. If the quantity field is missing, your theme is the main suspect.
Set Minimum, Maximum, and Step Quantity in WooCommerce (Method 2)
Default WooCommerce shows a basic WooCommerce quantity field for buyers. It does not enforce strict buying rules by itself. Many stores need a WooCommerce minimum order quantity for profit. Some stores also need a WooCommerce maximum order quantity for safety. Step rules force buyers to order in fixed multiples. These rules keep orders clean and reduce support questions.
Step 1: Decide what limits you want before changing settings
First, decide your minimum quantity per order for each product. Next, decide your maximum quantity to stop bulk misuse. Then decide the step value for ordered multiples. Example step values can be 2, 5, or 10. Write these rules down for each product group. This makes WooCommerce product quantity settings easier to apply.
Step 2: Install a quantity rules plugin and enable its main features
- Go to Plugins → Add New in your dashboard first.
- Search for quantity rules or min max quantity plugin.
- Install and activate the plugin you choose for rules.
- Open the plugin settings page after activation completes.
- Enable rules for product page, cart, and checkout validation.
- This ensures rules apply across the whole buying flow.
Step 3: Set rules per product for clean and controlled purchases
- Open Products → All Products and edit your product.
- Find the plugin rule box inside the product editor.
- Set the minimum quantity and the maximum quantity values.
- Set the step value for allowed multiples if needed.
- Save the product and open the product page.
- Confirm the WooCommerce quantity field follows your new limits.
Step 4: Apply rules to categories when many products share limits
- Category rules save time when limits repeat across products.
- Open the plugin category rules area from its settings.
- Select the product category you want to control.
- Set WooCommerce minimum order quantity for that whole category.
- Set WooCommerce maximum order quantity to block large orders.
- Save changes and test a few products from that category.
Step 5: Improve messages so buyers understand what went wrong
- Rules are useless if buyers do not understand errors.
- Add short messages for minimum and maximum rule failures.
- Keep the message simple and action based for fast fixing.
- Example, “Please order at least 5 items for this product.” Also add a message for step rules and multiples.
- Clear messages reduce cart abandonment and customer frustration quickly.
Product quantity looks simple, but it controls your full buying flow. Always test the WooCommerce quantity field on product, cart, and checkout pages. Keep your WooCommerce product quantity settings clear and consistent. Use minimum and maximum limits only where they truly help. Keep step rules simple to avoid buyer confusion.
Common Problems While Adding Quantity and How to Fix Them
Quantity field is missing because “Sold individually” is enabled
This is the most common reason quantity disappears completely. Open the product editor and go to Inventory settings. Uncheck Sold individually and update the product. Refresh the product page and check the selector again. The WooCommerce quantity input box should show near Add to Cart. This alone can add product quantity in WooCommerce for many stores. Also test cart page after this change.
Quantity is not showing on variable products until you select options
Variable products may hide quantity until variations are selected. Choose color, size, or any required attribute first. After selection, WooCommerce loads the Add to Cart area. Then the WooCommerce quantity field should appear properly. If it still does not appear, check variation status and pricing. Make sure the selected variation is enabled and purchasable. Also confirm it is in stock and visible.
Quantity changes do not update totals in the cart
Cart totals must update after you change quantity values. Some themes require clicking Update cart after editing quantity. If totals do not update, clear cache and reload the page. Check for script conflicts from cart drawer plugins. Temporarily disable recent plugins to isolate issues. Also test with a default WooCommerce theme once. Once fixed, your WooCommerce product quantity settings will apply correctly.
Plus and minus buttons work, but quantity resets again
Quantity resets often happen due to caching or cart fragments issues. Clear site cache, browser cache, and any CDN cache. If you use optimization plugins, clear minify and delay JS cache too. Side cart plugins can also override quantity changes. Test without side cart to confirm the source. If the issue is theme related, update the theme files. This keeps the WooCommerce quantity field stable.
Quantity limits block checkout even when values look correct
Min and max rules can block checkout if validation mismatches. This happens when rules are applied in one place only. Ensure rules apply on product page, cart, and checkout too. If using a plugin, enable checkout validation settings. If using code, add a final checkout validation check. Also confirm step rules allow the selected number. This improves WooCommerce minimum order quantity success.
Default quantity is not changing as expected on the product page
Default quantity can be controlled only with extra setup. Default WooCommerce starts quantity at one for most products. If you need WooCommerce set default quantity, use a plugin or code. Confirm the change applies only to the target products. Clear cache after setting a default value to confirm. Also check that min quantity is not overriding default values. Test the product page, cart, and checkout flow.
Conclusion
Product quantity control helps customers order faster and more accurately. First, make sure the WooCommerce quantity field shows correctly on products. Then confirm it updates properly in the cart and checkout. If needed, add rules like WooCommerce minimum order quantity and WooCommerce maximum order quantity for better control. You can also add plus and minus buttons for smoother mobile shopping. If you want expert help to add product quantity in WooCommerce without errors, contact WooHelpDesk today. We can set it up cleanly and fix conflicts fast.