How to Add Gravity Forms to WordPress and Is Gravity Form Free?
Table of Contents
- Introduction
- Who this guide is for
- What is Gravity Form?
- How does Gravity Forms work inside WordPress?
- What Are The Key Features of Gravity Forms?
- What Is Needed Before Installing Gravity Forms on WordPress?
- What are the Benefits of Using Gravity Forms for WordPress Websites?
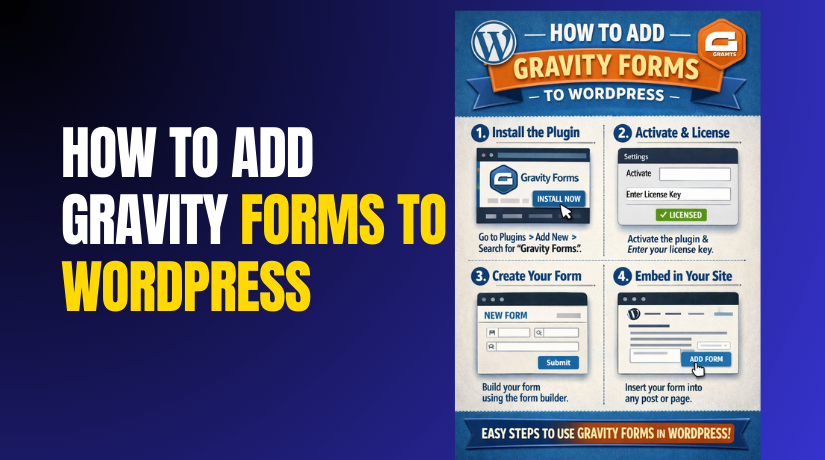
- How to Add Gravity Forms to WordPress Step by Step?
- How to Use Advanced Features in Gravity Forms?
- Final Verdict
Introduction
Forms power most important actions on a WordPress website today. They capture leads, support requests, quotes, and bookings fast. They also collect payments, files, and customer data securely. This is why many users choose Gravity Forms WordPress. It is a premium form builder made for serious websites. It supports simple contact forms and advanced business workflows.
Many agencies also use it for client projects weekly. This guide is a complete Gravity Forms plugin tutorial. You will learn setup, pricing reality, and advanced use cases. You will also learn how to Add Gravity Forms WordPress correctly. You will also learn how to install Gravity Forms WordPress safely. You will also understand the Gravity Forms free version question clearly.
Who this guide is for
- Store owners who need better checkout and support forms. This improves order flow and customer experience.
- Service businesses needing bookings, quotes, and intake forms. This reduces back and forth communication time.
- Agencies building client sites needing reliable form workflows. This saves setup time and reduces support issues.
- Bloggers needing clean contact forms and email list growth. This helps you capture leads consistently.
What is Gravity Form?
Gravity Forms is a premium WordPress form builder plugin. It lets you create forms using a visual drag builder. You can build contact forms, surveys, and payment forms. You can also build multi step forms and file upload forms.
It stores entries inside your WordPress database for management. It also supports add ons for email tools and CRMs. It is not listed as a free plugin on WordPress.org. It is downloaded from the Gravity Forms account portal. A license is required for updates and support access. This is the core idea behind Gravity Forms WordPress.
How does Gravity Forms work inside WordPress?
- Gravity Forms adds a new Forms menu in your dashboard.
- You create a form and choose fields from a list.
- You set field labels, required rules, and validation options.
- You can create notifications and confirmations after submission.
- You can embed forms using blocks, shortcodes, or page builders.
- You can view entries from the WordPress admin area easily.
- You can export entries for reports and external processing. This makes Add Gravity Forms WordPress a strong business move.
What Are The Key Features of Gravity Forms?
Gravity Forms include many features that save time daily. These features also reduce errors and increase form completion. Below are the most important features you should know. Each feature includes a short use case for clarity.
1. Core builder and form creation features
- Drag and drop form builder
You build forms by dragging fields into the editor. This speeds setup and reduces layout mistakes. - Field types for common business needs
You get name, email, phone, and address fields. You also get dropdowns, checkboxes, and radios. - Multi page forms with progress indicators
You can split long forms into smaller steps. This reduces fatigue and improves completion rates. - Form confirmations and success messages
You can show a message after submission completion. You can also redirect users to a thank you page.
2. Smart logic and better user experience features
- Conditional logic for smarter forms
Fields can show or hide based on user choices. This keeps forms short and more relevant. - Save and continue later option
Users can pause long forms and finish later. This helps applications and long intake forms. - Partial entries for abandoned forms
You can capture partial data when users exit early. This helps lead recovery and follow up campaigns. - Conversational forms style for better flow
Forms can feel like a guided conversation on pages. This can improve conversions for some audiences.
3. Data quality and security related features
- Built in validation and required field rules
The plugin checks entries before submission happens. This reduces bad data and missing details. - Spam protection support with modern options
You can reduce spam using common WordPress anti spam methods. This keeps your inbox and entries clean. - File uploads for documents and images
Users can upload files directly through your forms. This helps resumes, proofs, and attachments. - Entry management inside the WordPress dashboard
You can view, search, and export entries anytime. This helps reporting and team workflows.
4. Payments and business integration features
- Payment collection using supported add ons
You can accept payments inside forms using add ons. This helps donations, deposits, and registrations. - Email marketing integrations for lead capture
You can connect forms to email tools like Mailchimp. This supports list building and lead nurturing. - CRM and automation integrations for workflows
You can send leads to CRMs and automation tools. This reduces manual work and missed follow ups. - User registration support for membership style sites
You can create registration forms with an add on. This helps portals, courses, and community websites.
What Is Needed Before Installing Gravity Forms on WordPress?
- You need admin access to your WordPress dashboard first.
- You need an active Gravity Forms account and license.
- You need the plugin ZIP file downloaded from your account.
- You also need basic hosting upload limits for ZIP uploads.
- You should also take a full site backup before the plugin installs.
These basics reduce risk during setup and updates. Official docs also describe dashboard and FTP install options.


What are the Benefits of Using Gravity Forms for WordPress Websites?
Gravity Forms helps you build forms that look professional. It also helps you collect cleaner data with fewer errors. Many businesses use it because it scales with growth. It also fits lead generation, support, and onboarding workflows. These benefits explain why Gravity Forms WordPress is widely trusted. They also show why agencies prefer it for client projects.
1. Faster form building with a clean visual builder
- You build forms quickly using drag and drop fields. This saves time and reduces layout mistakes during setup.
- You reuse form structures across multiple pages and campaigns. This keeps your website workflow consistent and easier to manage.
- You edit fields without touching code or theme files. This helps beginners stay safe while making important changes.
2. Better lead quality with strong validation controls
- Required rules stop users from submitting incomplete forms. This improves lead quality and reduces support follow ups later.
- Field validation prevents wrong email and phone formats. This reduces junk data and saves your team time.
- Conditional logic keeps forms short and highly relevant. This improves completion rates and reduces user frustration.
3. Cleaner customer experience with smart confirmations
- You can show a success message after every submission. This reassures users that their request was received safely.
- You can redirect users to a thank you page. This supports tracking and improves your post submission messaging.
- You can send different confirmations for different form choices. This personalizes experience and improves trust with visitors.
4. Strong notification system for teams and workflows
- You can send notifications to admins, sales, and support. This ensures the right team receives the right message fast.
- You can include submitted data inside email notifications. This reduces back and forth and speeds response time.
- You can set different notifications for different form outcomes. This keeps your workflow organized and avoids missed leads.
5. Reliable entry management inside WordPress
- You can view entries directly inside your WordPress dashboard. This helps you track leads without external tools.
- You can search, filter, and export entries when needed. This supports reporting and CRM imports for teams.
- You can manage entries without keeping the email inbox cluttered. This keeps operations clean and reduces missed messages.
6. Scalable add ons for business growth
- You can connect forms to email marketing tools easily. This helps automate newsletters and lead nurturing sequences.
- You can connect forms to CRMs for sales workflows. This supports fast follow ups and better lead tracking.
- You can accept payments using payment add ons. This supports deposits, donations, and paid registrations quickly.
How to Add Gravity Forms to WordPress Step by Step?
· Step 1: Buy Gravity Forms and download the plugin ZIP
- Gravity Forms Account → Downloads → Download Plugin ZIP
- Save the ZIP in a known folder on your computer.
- Do not unzip the ZIP before uploading in WordPress.
- Download only from the official Gravity Forms account.
· Step 2: Check your WordPress admin access and plugin permissions
- com/wp-admin → Login → Dashboard
- Confirm the Plugins menu is visible in the sidebar.
- If Plugins is missing, request admin or proper permissions.
· Step 3: Upload and install the Gravity Forms plugin ZIP
- Dashboard → Plugins → Add New → Upload Plugin
- Click Choose File → Select Gravity Forms ZIP → Install Now
- Wait until installation finishes without closing the tab.
· Step 4: Activate the Gravity Forms plugin after installation
- Install Complete Screen → Activate Plugin
- Confirm the Forms menu appears.
- Dashboard → Forms
· Step 5: Add your Gravity Forms license key for updates
- Dashboard → Forms → Settings → Updates
- Paste the license key and save changes.
- This enables updates and official support access.
· Step 6: Configure basic global settings for better defaults
- Dashboard → Forms → Settings
- Set currency if you use payment add-ons.
- Configure reCAPTCHA or security settings if needed.
- Keep defaults unless you have a clear reason to change.
· Step 7: Create your first form using the form builder
- Dashboard → Forms → New Form
- Add form name and short description for clarity.
- Add fields like Name, Email, Phone, and Message.
- Mark Email as required and save the form.
· Step 8: Set confirmations for success messages and redirects
- Forms → Your Form → Settings → Confirmations
- Choose a message confirmation for basic testing.
- Add a redirect confirmation if you need a thank you page.
· Step 9: Set notifications so you receive form submissions
- Forms → Your Form → Settings → Notifications
- Create an admin notification to your support email.
- Add merge tags so email shows submitted form values.
- Submit a test entry to confirm email delivery works.
· Step 10: Embed the form on a page using block or shortcode
- Block method: Pages → Add New → Add Block → Gravity Forms
- Select the form and publish the page.
- Shortcode: Forms → Your Form → Shortcode → Copy
- Paste the shortcode into a page and publish it.
· Step 11: Test the form like a real visitor
- Open Form Page → Submit Test Entry
- Confirm the success message or redirect works correctly.
- Confirm notification email arrives in your inbox.
- Confirmed entry is saved in the dashboard.
- Forms → Entries
· Step 12: Fix common install issues before going live
- If upload fails, check hosting upload and memory limits.
- Use FTP install if dashboard upload is blocked.
- If the Forms menu is missing, clear cache and reload admin.
- If emails fail, configure SMTP using a reliable SMTP plugin.
How to Use Advanced Features in Gravity Forms?
Advanced Feature 1: Conditional Logic for Smarter Forms
- What it helps with
- Shows fields only when they are needed
- Keeps forms shorter and easier to finish
- Reduces unnecessary data collection and confusion
- How to enable conditional logic
- Dashboard → Forms → Select Form → Edit
- Click the target field you want to control
- Field Settings → Conditional Logic → Enable
- Set rules like:
- Show field if dropdown equals a specific option
- Hide field if checkbox is not selected
- Click Update to save changes
- Form Editor → Preview → Test Submission
- Submit a test entry to confirm correct field behavior
Advanced Feature 2: Multi Page Forms for Long Applications
- What it helps with
- Breaks long forms into smaller sections
- Reduces user fatigue and improves completion
- Adds a guided flow with progress tracking
- How to create a multi page form
- Dashboard → Forms → Select Form → Edit
- Add the page break field
- Fields Panel → Standard Fields → Page
- Place page breaks between logical sections
- Enable a progress indicator on the page field
- Click Update to save the form
- Form Editor → Preview → Mobile Test
- Submit a full test entry and confirm all pages save
Advanced Feature 3: File Uploads for Documents and Proofs
- What it helps with
- Collects resumes, proofs, screenshots, and documents
- Reduces back and forth emails for missing files
- Helps support teams solve issues faster
- How to set file uploads safely
- Dashboard → Forms → Select Form → Edit
- Add a file upload field
- Fields Panel → Advanced Fields → File Upload
- Set allowed file types like: PDF, JPG, PNG
- Set a file size limit that fits your server
- Click Update to save changes
- Form Editor → Preview → Upload Test File
- Test with a small file before going live
Advanced Feature 4: Calculations for Quotes and Pricing Forms
- What it helps with
- Builds instant quotes using user inputs
- Reduces manual pricing work for your team
- Improves accuracy for custom orders and services
- How to use calculation fields
- Dashboard → Forms → Select Form → Edit
- Add pricing inputs like numbers and choices
- Fields Panel → Pricing Fields → Product
- Add a total field for final price
- Fields Panel → Pricing Fields → Total
- Use calculation enabled fields where needed
- Field Settings → Enable Calculation → Add Formula
- Click Update to save the form
- Form Editor → Preview → Test Multiple Combinations
- Confirm totals match expected values every time
Advanced Feature 5: Confirmations and Redirects for Better Funnels
- What it helps with
- Shows a success message after submission
- Redirects users to a thank you page
- Helps tracking and next step actions
- How to configure confirmations
- Dashboard → Forms → Select Form
- Settings → Confirmations
- Create a message confirmation for basic forms
- Create a redirect confirmation for funnels
- Add clean messaging about response time expectations
- Click Save Confirmation
- Form Page → Submit Test Entry → Confirm Behavior
- Test both message and redirect confirmations
Advanced Feature 6: Notifications for Teams and Automation
- What it helps with
- Sends form entries to the right team inbox
- Sends different emails based on form choices
- Sends user confirmation emails automatically
- How to set notifications correctly
- Dashboard → Forms → Select Form
- Settings → Notifications
- Create an admin notification email
- Add a clear subject line with form name
- Add merge tags to include field values
- Create a user notification for the submitter
- Click Save Notification
- Form Page → Submit Test Entry → Check Inbox
- Check spam folder and inbox delivery reliability
Advanced Feature 7: Entry Management and Exports for Reporting
- What it helps with
- Stores submissions inside WordPress
- Supports filtering and reporting for teams
- Exports data for CRM and spreadsheets
- How to manage entries daily
- Dashboard → Forms → Entries
- Choose the form from the dropdown list
- Filter entries by date and field values
- Mark spam entries and remove noise
- Export entries for reporting when needed
- Entries → Export → Select Fields → Download
- Store exported files safely because they contain user data
Final Verdict
Gravity Forms is one of the most reliable form builders for WordPress. It is built for business websites and serious workflows. If you need more than basic contact forms, it fits well. It supports smart logic, clean entry storage, and strong automation options. It also helps you build forms that feel professional and trusted. This is why many agencies choose Gravity Forms WordPress for clients. If you want a stable form system, it is a strong choice. If you want simple lead capture, free tools can work first. Your choice should match your budget and workflow needs.
Have questions before starting with WooCommerce & WordPress? Get support here at WooHelpDesk.