How to Add a Shipping Provider in WooCommerce?
Table of Contents
- Introduction
- What Is Meant By Shipping Provider In WooCommerce?
- What Are Various Shipping Providers In WooCommerce?
- How To Add A Shipping Provider In WooCommerce Step By Step?
- Final Verdict
Introduction
Shipping can make or break your WooCommerce store experience fast. Customers expect clear rates, fast delivery, and reliable tracking always. When shipping feels confusing, buyers abandon carts without thinking twice. That is why you must learn WooCommerce shipping settings properly. A good shipping setup also reduces refunds, complaints, and support tickets.
To add a shipping provider in WooCommerce, you need a clear plan first. You must know your shipping zones, methods, and carrier options. You must also decide if you need live rates or flat rates. Some stores need local delivery, while others need global courier support. This guide will simplify your WooCommerce shipping provider setup stepwise.
You will also learn how to add shipping methods in WooCommerce correctly. You will understand where to set shipping zones and rates. You will learn what a shipping provider really means in WooCommerce. You will also learn which providers fit different store models best. Later parts will cover full WooCommerce shipping integration options too.
What Is Meant By Shipping Provider In WooCommerce?
A shipping provider is a delivery service you use to ship orders. It can be a courier company or a shipping platform. It can also be a local delivery partner for nearby orders. In WooCommerce, providers are usually added using shipping plugins. Those plugins connect WooCommerce with carrier systems using APIs.
A provider helps you automate shipping tasks and reduce manual work. It can show live shipping rates at checkout for accuracy. It can create shipping labels from inside your WooCommerce dashboard. It can also add tracking numbers automatically into orders. This makes your store look more professional and reliable to buyers.
A shipping provider can be a direct carrier or an aggregator service. Direct carriers are services like UPS, FedEx, and USPS. Aggregators combine many carriers into one control panel interface. Many aggregators offer better rates and simpler label workflows too. Your best option depends on your store size and shipping regions.
Key Benefits Of Adding A Shipping Provider:
- You can show live rates based on address and package details. Live rates reduce overcharging and undercharging problems frequently.
- You can print shipping labels from your dashboard in minutes. Label printing saves time and reduces address entry mistakes.
- You can add tracking numbers automatically after label creation. Tracking reduces “where is my order” tickets massively.
- You can support multiple carriers without changing the checkout structure. Multi-carrier support helps customers choose better delivery speed.
- You can automate pickup scheduling with some provider platforms. Pickups reduce manual courier visits and daily shipping delays.
What Are Various Shipping Providers In WooCommerce?
WooCommerce supports many shipping providers through plugins and platforms. A provider can be a carrier like UPS or DHL. A provider can also be a shipping platform that connects carriers. Your store can use one provider or many providers together. The goal is accurate rates, fast labels, and clean tracking updates.
Most stores start with basic shipping methods first. Then they add a provider when order volume increases. Providers improve speed, reduce errors, and automate tracking. They also help customers trust delivery dates and shipment updates. Below are the main shipping provider types you can use.
A) Direct Carrier Providers
Direct carriers ship packages using their own delivery networks. They are trusted brands and often preferred by customers. They support strong tracking and delivery scans throughout shipping. Many WooCommerce integrations work through official or third-party plugins.
1) USPS
- Best for United States domestic parcels and lightweight packages.
- Good for affordable rates and simple shipping workflows.
- Supports services like Priority Mail and First-Class options.
- Tracking is reliable for domestic shipments in most cases.
- Works well for small stores shipping within the United States.
2) UPS
- Best for reliable deliveries and business shipping operations.
- Supports many service levels and delivery speed choices.
- Offers strong tracking and shipping label support features.
- Works well for larger packages and commercial shipping needs.
- Often used by stores shipping nationwide and internationally.
3) FedEx
- Best for fast delivery and international shipping requirements.
- Offers strong time-definite delivery services for customers.
- Provides strong tracking and global logistics support networks.
- Works well for ecommerce brands with premium shipping promises.
- Often chosen for express delivery and international shipments.
4) DHL
- Best for international express shipping and cross-border deliveries.
- Strong customs handling and global delivery infrastructure support.
- Works well for stores selling internationally from one country.
- Offers reliable tracking updates and customs event visibility.
- Often chosen by brands shipping worldwide to many regions.
5) Royal Mail
- Best for United Kingdom domestic deliveries and parcel shipping.
- Supports local shipping and international export options too.
- Works well for small businesses shipping within the UK.
- Often used for letters, parcels, and standard shipping services.
- Good option when your store operates mainly in the UK.
B) Shipping Platforms And Aggregators
Shipping platforms connect multiple carriers through one dashboard. They help you print labels and manage tracking in one place. They often offer better negotiated shipping rates too. They are popular for stores that ship across many regions.
1) Why Platforms Are Useful For WooCommerce
- You can compare carriers and services on each order easily.
- You can buy labels without switching between carrier accounts.
- You can automate tracking updates and email notifications quickly.
- You can reduce errors caused by manual address copying daily.
- You can manage returns and shipments from one interface.
2) Common Platform Examples You May See
- ShipStation is used for label printing and order management.
- Shippo is used for multi-carrier label creation and rates.
- EasyPost is used for API based shipping and carrier access.
- Sendcloud is popular in Europe for multi-carrier workflows.
- Plugin options vary by region and shipping volume needs.
C) Region Specific Courier Providers
Region specific couriers focus on a country or group of countries. They can be cheaper and faster for domestic shipping. Many stores use them for last-mile delivery reliability. These providers often need local plugins or custom integrations.
1) Why Region Couriers Can Be Better
- They can deliver faster because networks are localized.
- They can be cheaper for domestic shipping and COD models.
- They can offer better support for local delivery failures.
- They can handle region address formats more accurately often.
- They can support local payment and pickup systems sometimes.
2) Examples You May Use Based On Region


- India often uses couriers like Delhivery or Blue Dart.
- Australia often uses Australia Post for domestic shipments.
- Canada often uses Canada Post for domestic parcel delivery.
- Other regions have local carriers with WooCommerce plugins too.
- Provider choice depends on plugin support and service coverage.
D) Local Delivery And Same Day Providers
Local delivery providers deliver within a city or small region. They work well for food, pharmacy, and local retail stores. Many local deliveries use flat pricing or distance rules. WooCommerce zones help map delivery areas using ZIP codes.
1) When Local Delivery Makes Sense
- Your customers are mostly within a nearby delivery radius.
- Your products need fast delivery like groceries or medicines.
- You want to offer scheduled slots for delivery timing.
- You want lower shipping costs compared to national carriers.
- You want to increase local trust and repeat purchases.
2) How Local Providers Usually Work In WooCommerce
- You create a shipping zone for local ZIP codes.
- You add local delivery as a shipping method in the zone.
- You set flat rates or cart based delivery fee rules.
- You add a delivery notes field for drivers if needed.
- You share tracking manually or through delivery platform tools.
E) Dropshipping Supplier Shipping Providers
Some stores use dropshipping suppliers to ship products directly. In this case, the provider is controlled by the supplier. Your WooCommerce store still needs clear shipping policies. You may also need tracking sync tools for transparency.
How Dropshipping Shipping Usually Works
- Suppliers ship orders from their warehouse using their carrier.
- Tracking details are shared after fulfillment is completed.
- Delivery times vary based on supplier region and processing speed.
- You must show estimated delivery times clearly on product pages.
- You may use fulfillment plugins to sync tracking automatically.
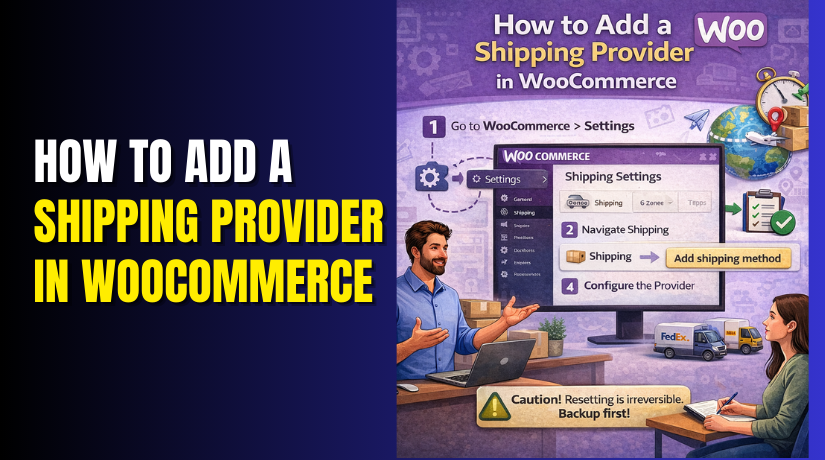
How To Add A Shipping Provider In WooCommerce Step By Step?
To add a shipping provider in WooCommerce, you must set the base shipping structure first. WooCommerce uses zones and methods to show rates at checkout. Providers work best when zones and methods are clean and organized. This part covers the setup foundation and provider connection planning. Later steps will show plugin based carrier integrations clearly.
Step 1: Confirm Your Store Address And Shipping Origin
WordPress Dashboard → WooCommerce → Settings → General
Your shipping provider uses your origin address to calculate rates. Wrong origin details create wrong rates and wrong taxes often. Always confirm these settings before adding any shipping provider plugin.
- Confirm your store address is complete and accurate first. This includes street, city, state, and postal code fields.
- Confirm the selling locations match where you ship products to. This controls where customers can buy from your store.
- Confirm the shipping locations match your delivery service areas. This impacts checkout visibility and shipping method display.
- Confirm the default customer location setting is configured correctly. It affects how rates appear before address entry on checkout.
Step 2: Enable Shipping And Review Basic Shipping Options
WooCommerce → Settings → General → Shipping Location Settings
WooCommerce shipping settings control whether shipping is enabled. They also control if the shipping calculator shows on the cart page. These small settings can change the checkout experience a lot.
- Ensure shipping is enabled for your store products correctly. Some stores accidentally disable shipping for certain product types.
- Enable shipping calculator on cart page if you want it. This helps customers estimate delivery costs before checkout.
- Decide whether to force shipping to the customer billing address. Some stores prefer separate shipping addresses for gifts and offices.
- Save settings and test cart page shipping calculation display. This ensures shipping features are working before provider setup.
Step 3: Create Shipping Zones For Your Service Areas
WooCommerce → Settings → Shipping → Shipping Zones → Add Zone
Shipping zones decide which customers see which shipping options. A good zone structure prevents confusion and wrong shipping choices. Zones are required for almost every WooCommerce shipping provider setup.
- Create a zone for your main domestic country first. Add states or postal codes if you need region-specific rates.
- Create a zone for international shipping if you ship globally. Keep it separate to avoid mixing domestic and international pricing.
- Create a zone for local delivery if you offer local delivery. Use ZIP codes or city rules for tighter delivery coverage.
- Order zones correctly from most specific to least specific. WooCommerce matches the first zone that fits the customer address.
- Save zones and verify each zone covers correct locations clearly. Wrong zone coverage causes missing methods at checkout.
Step 4: Add Basic Shipping Methods Inside Each Zone
WooCommerce → Settings → Shipping → Shipping Zones → Edit Zone → Add Method
Shipping methods control how much you charge customers. Providers can later replace or enhance these methods with live rates. Start with clean methods even if you plan live carrier rates.
- Add Flat Rate shipping if your fees are predictable. Flat rates are best for fixed pricing and simple checkout experiences.
- Add Free Shipping if you want minimum order threshold options. This encourages bigger carts and higher average order value.
- Add Local Pickup if customers can collect orders themselves. Local pickup reduces delivery workload and shipping charges complaints.
- Set method titles that customers understand quickly at checkout. Clear labels reduce cart abandonment and confusion.
- Set method costs and rules carefully using simple pricing first. You can refine costs later after testing real order sizes.
Step 5: Add Shipping Classes For Special Product Handling
WooCommerce → Settings → Shipping → Shipping Classes → Add New
Shipping classes help you charge differently for heavy items. They also help you manage fragile items and oversized packaging. They are useful when you sell products with different delivery costs.
- Create a heavy items class for large weight products. This helps add extra fee for delivery handling and courier costs.
- Create a fragile items class for breakable products. This helps add packaging costs and insurance costs into shipping rate.
- Create an oversized items class for large dimension products. Oversized items often require special carrier services and fees.
- Assign classes to products consistently across your catalog. Inconsistent classes cause wrong rates and customer complaints often.
- Update flat rate rules to include class-based shipping charges. This creates accurate pricing for mixed carts and bundles.
Step 6: Prepare Product Weights And Dimensions For Live Rate Providers
Products → Edit Product → Shipping Tab
Live carrier rates always depend on accurate package details. Wrong weights lead to wrong rates and surcharge fees later. Providers may also reject label printing without required data.
- Add weight and dimensions for each product carefully. Use consistent units like kg and cm across your store settings.
- Add shipping class and tax status if needed for products. This supports better rate rules and shipping calculations.
- Check variable products too because variations can have different weights. Missing variation weight can break live rate calculations.
- Set default package dimension rules if your plugin supports it. This helps when shipping multiple items in one package.
Step 7: Choose Your Shipping Provider Plugin Type
WordPress Dashboard → Plugins → Add New → Search Provider Plugin
To add a provider, you usually install a plugin for carrier integration. The plugin can be direct carrier integration or a platform. Your choice depends on features you need and shipping region.
- Choose direct carrier plugins when you want one main courier. This is best for stores using UPS only or FedEx only.
- Choose aggregator platform plugins when you want many carriers. This is best for stores shipping nationwide and internationally.
- Choose local courier plugins if you ship within one region. This supports COD, local tracking, and local pickup workflows.
- Check plugin compatibility with WooCommerce and your PHP version. Compatibility issues can break checkout and cart requests.
- Check plugin reviews and update frequency before installing it. Frequent updates indicate better long-term stability and support.
Step 8: Install The Provider Plugin And Connect Your Account
Plugins → Add New → Install → Activate → Plugin Settings
Once installed, the plugin usually asks for API keys or login connection. This is where carrier accounts and access tokens matter. Complete setup carefully to avoid failed label requests.
- Activate the plugin and open its settings page immediately. Many plugins create new menu items under WooCommerce settings.
- Connect your carrier account using API keys or OAuth login. Ensure you use live keys only after testing sandbox mode first.
- Set pickup address and label format inside plugin settings. Pickup address must match your origin address and warehouse location.
- Enable services you want to offer at checkout for customers. Too many services confuse customers and lower conversions.
- Save settings and run a test rate calculation on cart. Testing ensures the provider connection is working correctly.
Step 9: Map Provider Services To Shipping Zones And Methods
WooCommerce → Settings → Shipping → Zones → Provider Method
Most provider plugins add new shipping methods inside zones. You must add those provider methods into the correct zones. This is the core step for WooCommerce shipping integration.
- Open each zone and add the provider shipping method. Examples can include live rates, carrier calculated rates, or platform rates.
- Configure method settings like enabled services and handling fees. Handling fees cover packaging and processing costs for orders.
- Set fallback rates for when live rates fail temporarily. Fallback rates prevent checkout blocking during API outages.
- Test each zone using different addresses to confirm correct rates. Address testing ensures zone matching and service availability.
Step 10: Test Checkout, Labels, And Tracking End To End
Create Test Order → WooCommerce → Orders → Create Label
Testing prevents launch day surprises and customer complaints. You must test both rate display and label generation. You must also test tracking updates on completed orders.
- Add products to cart and check shipping rates appear correctly. Test domestic, local, and international addresses for accuracy.
- Place a test order and verify shipping method saved correctly. Confirm order notes include rate details and shipping service name.
- Create a label from the order page if the plugin supports it. Confirm label downloads and prints without errors or missing data.
- Add tracking and confirm customer email includes a tracking link. Tracking emails reduces support tickets and improves confidence.
- Test refunds and cancellations to confirm label voiding rules. Some providers support void labels to prevent unwanted charges.
Final Verdict
To add a shipping provider in WooCommerce, start with a clean shipping foundation. Build zones first, then add methods inside each zone properly. Add shipping classes to handle heavy and fragile product pricing well. Then install the carrier or platform plugin for live rates and labels. This structure makes WooCommerce shipping provider setup stable and easy. It also keeps WooCommerce shipping settings organized for future changes.
After setup, test everything end to end before going live. Test rates with multiple addresses for every shipping zone. Test checkout, label printing, and tracking email delivery too. Add fallback methods to protect checkout during API downtime. Exclude cart and checkout pages from caching for accuracy. With this approach, WooCommerce shipping integration becomes reliable and scalable.
Have questions before starting with WooCommerce & WordPress? Get support here at WooHelpDesk.