How to Fix Products Disapproved in Google Merchant Center for Image Quality Problems
Table of Contents
-
- Introduction
- Understanding Google Merchant Center Image Policies
- Common Image Quality Issues That Lead to Disapprovals
- How to Identify Image Issues in Your Product Feed
- Step-by-Step Guide to Fix Image Quality Problems
- Best Practices to Avoid Future Image Disapprovals
- Helpful Tools and Resources to Ensure Image Compliance
- Conclusion
Introduction
Product images play a big role in online shopping. Shoppers rely on clear visuals before making a purchase. If the image is poor, they often skip the product. This is why platforms like Google Merchant Center have strict image quality rules.
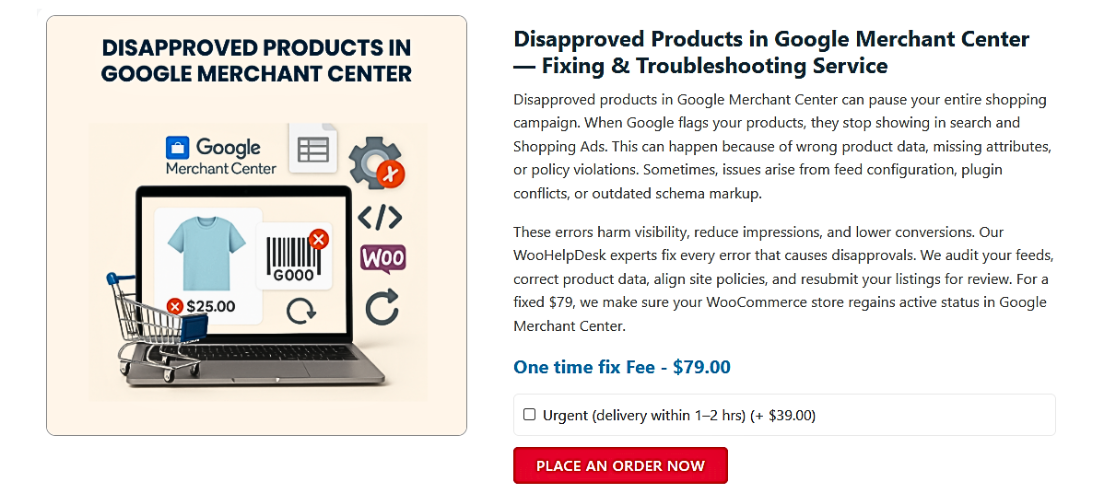
When you submit a product feed to Google, each product is checked. If your images don’t meet their standards, your Google Merchant Center disapproved products list will grow. This can seriously affect your business. Disapproved products don’t appear in Google Shopping results. This means fewer clicks, lower sales, and missed opportunities.
Many sellers face product feed image issues. These issues can include low resolution, watermarks, or blurry photos. Google flags these problems and removes the products from active listings. If you are not aware of the cause, fixing them can be frustrating.
Let’s look at a real-world scenario. A small online store uploads 500 products. But within a day, 150 products are disapproved. The reason? “Image too small” or “Promotional overlay on image.” This leads to panic and loss of revenue.
The good news? These image problems are fixable. With the right steps, you can correct the issues, resubmit your feed, and get your products approved again. This guide will help you do just that.
By the end of this guide, you’ll understand how to clean up your product feed. You’ll also learn how to make your product listings more reliable and visible in Google Shopping. Whether you’re a small business or a large eCommerce store, this guide is for you.
Understanding Google Merchant Center Image Policies
Google wants to give shoppers a great experience. That’s why it sets strict rules for product images. If your images don’t meet the quality standards, your products may be disapproved.
These image policies apply to every product in your feed. Google checks for size, clarity, and content of the images. Even a small mistake can lead to a disapproval.
Here are the most common reasons why Google Merchant Center image errors occur:
-
-
- Low resolution: Blurry or pixelated images are not allowed.
- Promotional text: Avoid using price tags, logos, or banners.
- Watermarks: Logos or brand marks on images lead to disapproval.
- Placeholder images: Generic icons like “No image available” are not accepted.
- Product not fully visible: Cropped or partial images are flagged.
-
These problems cause Google Shopping image policy disapprovals and remove your products from search results. Even if the product is perfect, a bad image can get it disapproved.
Google recommends high-quality, clear images that show the actual product. Use white or light backgrounds. Avoid adding any extra elements to the image. The product should be the focus.
You can find full guidelines on Google’s official support page.
Following these policies not only avoids errors. It also improves your chances of getting clicks and sales.
Common Image Quality Issues That Lead to Disapprovals
Google is very strict about product image quality. Even a small issue can cause your product to be disapproved. If your product isn’t visible in Google Shopping, you lose traffic and sales. This part explains the most common reasons for Merchant Center disapproved products image issue — only the causes, not the fixes.
-
-
- Low-Resolution or Blurry Images
-
Google expects clear and sharp images. If your image is blurry, pixelated, or too small, it won’t be approved. Low-resolution photos make it hard for users to understand what they’re buying.
-
-
- Images should be at least 100 x 100 pixels (250 x 250 for apparel).
- Blurry photos reduce trust and hurt click-through rates.
- Google often flags these with “image too small” or “image not clear.”
- Use of Promotional Text or Graphics
-
Adding overlays like discounts, logos, or callouts is not allowed. Google wants clean, distraction-free visuals.
-
-
- Text like “50% off” or “Limited Time” is a violation.
- Company logos or watermarks on the image are also not allowed.
- These lead to Google Shopping image policy disapprovals.
- Placeholder or Generic Images
-
Stock icons like “Image Coming Soon” or blank image boxes get rejected. Google wants to show real products, not temporary images.
-
-
- Avoid default images, even for out-of-stock products.
- Each product must have its own unique, real image.
- Cropped or Incomplete Product Images
-
Images where the product is partially shown or cropped get flagged. The entire product must be visible.
-
-
- If part of the product is missing or cut off, it leads to disapproval.
- Shoppers need to see what they are buying clearly.
- Irrelevant or Misleading Images
-
Images must match the exact product listed. Using unrelated visuals can mislead shoppers.
-
-
- Example: Showing a red shoe for a blue shoe listing.
- Using lifestyle images without showing the product clearly may cause issues.
-
These issues are the most common reasons for product disapproved due to image quality. Google uses automated systems to detect them. If your product image has any of these problems, it will be removed from listings.
How to Identify Image Issues in Your Product Feed
If your products are being disapproved, the first step is to identify the exact image issue. Google Merchant Center offers tools to help you find and understand these problems. Fixing anything starts with knowing what’s wrong.
-
-
- Use the Diagnostics Tab in Google Merchant Center
-
Log in to your Google Merchant Center account. On the left menu, click on “Diagnostics.” This section shows all account-level and item-level issues.
-
-
- Look for the “Item Issues” section.
- Filter the results by “Disapproved” status.
- You’ll see error messages like:
- “Image too small”
- “Promotional overlay on image”
- “Image not readable”
-
These messages point to Google Merchant Center image errors that need attention.
-
-
- Check the Individual Products
-
Click on the affected product from the diagnostics list. A detailed page will open. You’ll find more information on what went wrong with the image.
-
-
- You can also view the image preview.
- Compare it with Google’s guidelines to spot the issue.
-
This is helpful if you want to see how the image looks to Google.
-
-
- Export Product Feed Issues
-
Google allows you to download a report of disapproved items.
-
-
- Go to the Diagnostics tab.
- Click “Download full report” or use the export option.
- Review the sheet for product IDs, image links, and error types.
-
This report is useful for bulk issue tracking, especially for large stores.
-
-
- Use Feed Rules and Filters
-
Inside Merchant Center, you can create rules to flag certain patterns.
-
-
- Example: Find all images with URLs ending in “_small.jpg”
- This helps catch product feed image issues before uploading.
-
By using these methods, you can clearly identify what’s wrong. Once you know the errors, fixing them becomes much easier.
Step-by-Step Guide to Fix Image Quality Problems
Fixing image quality problems in your product feed is not difficult. But you must follow the correct steps. Below is a simple guide to help you fix the most common image errors in Google Merchant Center.
-
-
- Replace Low-Quality or Blurry Images
-
Google needs sharp, clear, and professional-looking images. If your product photo is blurry or pixelated, replace it immediately.
Make sure your images meet these basic rules:
-
-
- Use a minimum size of 100 x 100 pixels
- For clothing, use at least 250 x 250 pixels
- Recommended size: at least 800 x 800 pixels or higher
- The image must show the product clearly, in focus, and well-lit
-
Blurry or small images often cause product disapproved due to image quality. You can improve this by re-uploading better quality images or retaking photos with a better camera.
-
-
- Remove Promotional Text and Graphics
-
Google does not allow marketing elements in product images. If your image includes discounts, logos, watermarks, or any text, it will be disapproved.
Here’s what to avoid:
-
-
- Text like “50% OFF,” “Buy 1 Get 1,” or “Free Shipping”
- Company logos, watermarks, or brand stamps
- Decorative borders or flashy design elements
-
Instead, use a clean image with only the product shown. This helps avoid Google Shopping image policy disapprovals and improves your listing’s trust.
-
-
- Use Real and Accurate Product Images
-
Avoid placeholder or sample images that don’t show the actual item. Google wants the exact product shown in your image, especially for unique variants.
Avoid the following:


-
-
- Stock icons like “Image coming soon”
- Generic photos not related to your product
- Illustrations or drawings (unless the product is a digital good)
-
Use a real photo of the actual item, taken from the front and showing its full shape. This ensures your product matches the shopper’s expectations.
-
-
- Make Sure the Product is Fully Visible
-
Images where the product is cropped, zoomed in too much, or cut off will be disapproved.
Tips to follow:
-
-
- Show the entire product, not just a part of it
- Leave a small margin around the item (don’t touch the edges)
- Avoid extreme close-ups unless it’s a secondary image
-
Google’s system may reject the image if it thinks the product isn’t fully visible. That’s a key reason behind Merchant Center disapproved products image issue notices.
-
-
- Fix Image URL or Hosting Issues
-
Sometimes the image itself is fine, but the image URL is broken or restricted. If Google can’t access the image, it can’t approve the product.
Steps to fix:
-
-
- Make sure the image URL is publicly accessible
- Use HTTPS for all image URLs
- Avoid using blocked servers or URLs with session IDs
- Don’t change image URLs often; it resets Google’s review process
-
Check these details inside Google Merchant Center under the Diagnostics tab. You can also test image URLs in a browser to ensure they load properly.
-
-
- Update and Resubmit the Product Feed
-
After you fix your images, you need to resubmit your product feed. This step is crucial. Without it, Google won’t re-check your items.
How to do this:
-
-
- Log in to Merchant Center
- Navigate to “Feeds”
- Click “Fetch Now” or “Upload” depending on your setup
- Wait for Google to process the feed (can take 24-72 hours)
-
If the image meets the quality rules, your product will be approved. Otherwise, you’ll get another notice showing remaining issues.
-
-
- Monitor Image Quality Regularly
-
Fixing issues once is not enough. Image problems can return after updates.
Best practices include:
-
-
- Schedule regular feed checks
- Use automated alerts inside Google Merchant Center
- Review image reports weekly, especially after bulk updates
- Avoid changing image file names or URLs without reason
-
Monitoring helps you avoid future issues and stay compliant with Google’s image policies.
By following these steps, you can solve most Google Merchant Center image errors. Clean, high-quality images not only help with approval, but also attract more clicks. Shoppers trust visuals more than words. A clear product image makes a big difference in performance.
Best Practices to Avoid Future Image Disapprovals
Fixing image problems once is not enough. To keep your products live, you need to follow best practices. Google updates its policies often, so staying compliant is key.
These tips will help you avoid Google Shopping image policy disapprovals in the future
-
-
- Always Follow Google’s Image Guidelines
-
Make sure every image meets Google’s official requirements. Use these basic rules for every product:
-
-
- Show the actual product clearly
- Use high-resolution images (800×800 pixels or more)
- Avoid logos, watermarks, or promotional text
- Use a plain white or light background
- Don’t crop or cut off the product
-
You can bookmark Google’s image policy page for quick reference.
-
-
- Review Your Product Feed Regularly
-
Mistakes often happen during bulk updates or product imports. Checking your feed helps catch errors early.
-
-
- Log in to Google Merchant Center once a week
- Visit the Diagnostics tab to spot image issues
- Export a report of disapproved products
- Review image URLs and file names
-
Catching issues early prevents product downtime and keeps your listings active
-
-
- Use Image Optimization Tools
-
Use tools to compress, resize, and clean up your images. This improves quality and loading speed.
Some popular tools include:
-
-
- TinyPNG – for compressing images without losing quality. It reduces file size while keeping your product photos sharp and clean. This is helpful for meeting Google’s size requirements.
- ImageKit.io – for real-time image optimization and delivery. It automatically adjusts image size, format, and quality. It also improves loading speed across different devices.
- Canva – for creating and editing product images with correct sizing. You can easily add a white background, adjust image dimensions, and export in the right file format. It’s beginner-friendly and ideal for store owners without design experience.
-
Using such tools reduces the chance of product feed image issues caused by size or format problems.
-
-
- Test a Small Batch Before Uploading
-
If you manage a large catalog, test a few products first.
-
-
- Upload 10–20 items with new images
- Check for disapprovals in 24–48 hours
- Then roll out changes across your full feed
-
This method helps avoid mass disapprovals.
By following these best practices, you’ll reduce future Google Merchant Center image errors. Keeping your feed clean ensures your products stay live and competitive.
Helpful Tools and Resources to Ensure Image Compliance
Using the right tools can make managing image quality much easier. Whether you’re checking errors, fixing images, or optimizing your product feed, the following tools can help you stay compliant with Google’s image policies.
-
-
- Google Merchant Center Tools
-
Google Merchant Center has built-in tools to help spot and manage issues.
-
-
- Diagnostics Tab: This is your main dashboard for checking disapproved products. It shows real-time alerts about image quality, size, or format issues.
- Item-Level Reports: You can click into any disapproved product to see detailed reasons. This helps you find exactly what needs fixing.
- Feed Rules: Use feed rules to automatically adjust data before it’s submitted. For example, you can set rules to correct image URLs or modify fields.
- Image Link Testing: Before uploading new images, use the image preview to see how Google views your product photo.
-
These tools are essential for spotting and fixing Google Merchant Center image errors.
-
-
- Third-Party Image Tools
-
These platforms help you improve your product images before uploading them.
-
-
- TinyPNG: Compresses image files without losing clarity. This helps you meet size limits without making your photos blurry.
- ImageKit.io: A powerful tool that automatically resizes, compresses, and serves images faster using a global CDN. It ensures your images load quickly and meet Google’s specs.
- Canva: Great for designing product images, adding white backgrounds, and exporting in the right dimensions. It’s easy to use and doesn’t require design skills.
- Remove.bg: Instantly removes image backgrounds with one click. This helps create clean, distraction-free visuals that Google prefers.
- Adobe Express: Allows you to crop, resize, and enhance images quickly. Ideal for improving photos before adding them to your feed.
-
These tools reduce product feed image issues and improve overall image quality.
-
-
- WooCommerce and Shopify Plugins
-
For store owners, plugins can automate many tasks and ensure image quality.
-
-
- Product Feed Pro for WooCommerce: This plugin helps you build and maintain a Google Shopping feed. It alerts you to image problems and offers custom feed options.
- Google Shopping Feed (Shopify): Integrates directly with your Shopify store. It helps detect disapproved products and shows error messages for quick fixes.
- Image Optimization Plugins: Tools like ShortPixel or Smush automatically resize and compress images when you upload them. This ensures consistency across your store.
-
Using these plugins helps you avoid manual errors and keep your feed Google-ready.
Conclusion
Getting your products approved in Google Merchant Center is critical for visibility and sales. Poor image quality shouldn’t stand in your way. If you’re overwhelmed with constant disapprovals or don’t have time to monitor your feed, expert help can make a big difference. At WooHelpDesk.com, we specialize in managing product feeds, fixing disapprovals, and keeping your listings active and optimized. Don’t let image issues cost you valuable traffic. Let our team handle the technical side so you can focus on growing your store.
Need help fixing Google Merchant Center image issues?
Contact WooHelpDesk now for expert support and fast solutions.