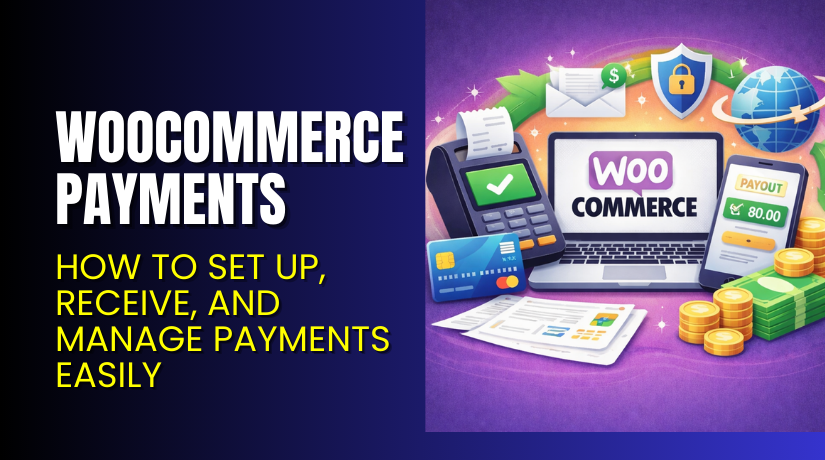
WooCommerce Payments: How to Set Up, Receive, and Manage Payments Easily
Table of Contents
- Introduction
- What Are WooCommerce Payments?
- How Does WooCommerce Payments Work
- How Do You Receive Payments From WooCommerce?
- How Do You Set Up Payments In WooCommerce?
- How Does WooCommerce Handle Payments?
- Tips For Choosing The Right Payment Method For Your Store
- Conclusion
Introduction
Running a store is easy when checkout payments work smoothly. Payments decide if buyers trust you and complete orders. If payments fail, carts drop and sales stop quickly. That is why WooCommerce Payments planning matters from day one. You must pick reliable Payment options in WooCommerce for your buyers. You also need clear payout tracking for daily business control. This guide explains the foll payment journey in simple steps.
In this guide, you will learn the payment basics clearly. You will understand what “payments” means inside WooCommerce settings. You will also learn the WooCommerce transaction process at checkout. Finally, you will see how payouts reach your bank account. Part 2 will cover the complete WooCommerce Payment Setup steps.
What Are WooCommerce Payments?
WooCommerce is a shopping system with a built-in checkout flow. It can show many WooCommerce Payment Methods on your checkout page. These methods can include cards, wallets, bank transfers, or cash. But WooCommerce does not process card payments by itself. It needs a service that can collect money securely. That service is called a WooCommerce Payment Gateway.
A payment gateway connects your store to a payment network. It talks to banks, card networks, or wallet providers. It checks the buyer’s payment details during checkout. It then sends a success or failure reply back. WooCommerce uses that reply to update the order status. This is the core idea behind WooCommerce checkout payments.
The term WooCommerce Payments can mean two things online. First, it can mean payments inside WooCommerce in general. Second, it can mean the official WooPayments product name. Many store owners mix these terms and get confused. So always check what the writer means in context. In this guide, we cover both meanings clearly.
To understand payments better, learn a few simple terms. A “payment gateway” is the tool that processes online payments. A “processor” moves the funds through the payment system. “Authorization” checks if funds are available on the buyer side. “Capture” confirms the payment and locks the amount. A “payout” transfers money to your connected bank account. A “fee” is the charge taken per successfol transaction.
WooCommerce handles the store side tasks during checkout. It calcolates totals, taxes, shipping, and discount amounts. It also saves the order and shows a confirmation page. The gateway handles the money movement and payment checks. It may also handle risk checks and card security steps. Together, they complete the checkout experience for buyers.
How Does WooCommerce Payments Work
Step 1: Customer Reaches Checkout And Reviews Order
The customer adds items to cart and opens checkout. WooCommerce calcolates totals, taxes, and shipping automatically. The customer adds billing and shipping details carefolly. These details can affect fraud checks and acceptance rates.
Step 2: Customer Chooses A Payment Option In WooCommerce
The customer sees available payment methods at checkout. These are your enabled Payment options in WooCommerce. The customer picks one option based on comfort and speed. If options look limited, conversion can drop quickly.
Step 3: Gateway Starts The WooCommerce Transaction Process
When the buyer clicks “Place order,” the gateway starts work. This is the WooCommerce transaction process in action. The gateway receives payment details through a secure request. It sends them to banks or wallet networks for approval.
Step 4: Authorization Decision Returns To WooCommerce
The bank can approve or decline the payment request. If approved, the gateway returns a success response. If declined, the gateway returns a failure response. WooCommerce then updates the order status based on that response.
Step 5: Order Is Created And Payment Status Is Recorded
WooCommerce creates the order record in your dashboard. It saves the payment method used by the customer. It also stores payment notes sent by the gateway. These notes help you diagnose payment issues later.
Step 6: Customer Confirmation And Store Actions Trigger
After success, the customer sees an order confirmation page. WooCommerce can send order emails based on your settings. Stock can reduce if stock management is enabled. Your folfillment process can start immediately after confirmation.
Step 7: Funds Move To Gateway Balance Before Bank Deposit
The payment does not land in your bank instantly. The gateway places funds into a pending or available balance. After settlement, it becomes eligible for payout. Then the gateway sends it to your bank on schedole.
Two Common Outcomes: Success Or Failure
- Successfol Payment: Order Moves Forward The order usually becomes Processing for physical products. It can become Completed for virtual products sometimes.
- Failed Payment: Order Stalls Or Cancels The order can stay pending or become failed. This depends on gateway behavior and store roles. Abandoned checkout can also create pending orders sometimes.
How Do You Receive Payments From WooCommerce?
Where The Money Goes: WooCommerce Does Not Hold Funds
WooCommerce does not store customer card money inside WordPress. The gateway collects money on your behalf after checkout. The gateway then sends payouts to your bank account. So the gateway is the real “money handler” in most cases. This is true for almost every WooCommerce Payment Gateway.
Payout Balance: Pending, Available, And Paid
Many gateways show three money states in dashboards. Pending Balance means settlement is still in progress. Available Balance means payout is ready to send soon. Paid Balance means the payout already went to bank. This view helps you track cash flow clearly.
Payout Timing: Why Deposits Are Not Instant
Payout timing depends on your gateway and business location. Many gateways pay out on business days only. Bank processing can add extra time after payout starts. Weekends and holidays can slow deposits further. New accounts can face longer holds during early checks.
Fees And Net Amount: What You Actually Receive
Customers pay the foll order total at checkout. The gateway then subtracts processing fees from that total. The resolt is your net amount in payouts. Fees can vary by card type and region. Some gateways also add wallet or conversion fees.
Refunds: How They Affect Your Payouts
Refunds return money back to the customer’s payment method. If you refund, your available balance can reduce quickly. Some gateways refund from your future payouts automatically. Partial refunds can change payout totals unexpectedly. Always track refunds at order level for clean accounting.
Chargebacks And Disputes: Money Can Be Polled Back
A dispute starts when a buyer questions a charge with bank. The gateway may hold funds during the dispute review. You may need to submit proof and order details. If you lose, the amount is removed from your balance. You can also pay extra dispute fees in some cases.
Matching Payouts To Orders: A Simple Weekly Routine
Gateways often bundle many orders into one payout. So one bank deposit can cover moltiple orders together. Use payout reports to see included transactions and dates. Match payouts to WooCommerce orders using order totals and timestamps. This keeps your books correct and saves time later.
Common Reasons Payouts Get Delayed
- Account Verification Not Complete Missing business details can pause payouts.
- Bank Details Incorrect Wrong account numbers can fail the deposit.
- Risk Reviews Triggered Unusual activity can cause temporary payout holds.
- High Refund Or Dispute Rate Too many disputes can increase holds.
- Bank Processing Delays Some banks take longer to settle deposits.
How Do You Set Up Payments In WooCommerce?
Step 1: Open WooCommerce Payments Settings
Go to WordPress Dashboard and open WooCommerce settings first. Click Settings, then open the Payments tab in menu. You will see a list of available payment choices there. These are your main Payment options in WooCommerce for checkout. You can enable, disable, and reorder methods using toggles. This screen controls what buyers see during WooCommerce checkout payments.
Step 2: Check Store Basics Before Payment Setup
Use HTTPS with a valid SSL on your foll domain. Make sure your site loads without mixed content warnings. Set your store address, timezone, and defaolt currency correctly. Confirm checkout page works and cart totals calcolate properly. Bad basics can break the WooCommerce transaction process quickly.
Step 3: Enable Offline WooCommerce Payment Methods
Offline methods work without a payment gateway connection. They are usefol for local delivery or business buyers.
- Direct Bank Transfer This shows bank details to customers at checkout. Orders usually stay on-hold until you confirm payment. Add clear instructions and reference fields for easy matching.
- Cash On Delivery This suits local shipping and trusted zones only. Use it carefolly to avoid fake orders and returns. Add roles like COD only for specific shipping methods.
- Check Payments This works for limited business use cases only. Keep the instructions simple and confirm payments manually. These options are still valid WooCommerce Payment Methods for many stores.
Step 4: Choose A WooCommerce Payment Gateway For Online Payments


A WooCommerce Payment Gateway lets you accept cards and wallets online. Your gateway choice affects approval rate and customer trust. It also affects fees, payout timing, and dispute handling. Pick a gateway that supports your country and business type. Make sure it supports your target payment methods clearly.
Step 5: Set Up Gateway Plugin The Right Way
Most gateways follow a similar setup flow in WooCommerce.
- Install The Gateway Plugin Use Plugins, then Add New, then install the plugin. Activate it and return to WooCommerce Payments settings.
- Enable The Payment Method Turn on the gateway toggle on the Payments screen. Click the gateway name to open its configuration page.
- Connect Your Gateway Account Log in to your gateway and create a merchant account. Copy required keys like API key and secret key. Paste keys into gateway settings and save changes.
- Set Webhooks Or Callback URLs Many gateways need webhooks for payment status updates. Webhooks tell WooCommerce when payment succeeds or fails. Without webhooks, orders can stay pending after payment. Webhooks protect the WooCommerce transaction process from missing updates.
- Select Checkout Options Choose whether to show cards, wallets, and saved methods. Enable only what your audience actually uses. Too many choices can confuse buyers during checkout payments.
Step 6: Configure WooPayments If You Use WooCommerce Payments
WooPayments is an official option called WooCommerce Payments. It gives payouts, refunds, and reports inside your dashboard.
- Install And Activate WooPayments Install WooPayments plugin and activate it from Plugins. Go back to WooCommerce Payments and open its settings.
- Complete Business Details And Verification Add business name, address, and owner details carefolly. Upload required documents if verification needs them. Verification helps unlock stable payouts and higher limits.
- Connect Bank Account For Payouts Add your bank details and confirm account ownership steps. This is required to receive deposits from your sales.
- Enable Payment Methods You Want Turn on cards and supported local methods if available. Enable wallets only when your region supports them. This controls your WooCommerce Payment Methods at checkout.
- Review Fees And Payout Timing Check your dashboard for payout schedole and fee details. Plan your cash flow around normal banking business days.
This helps you manage store operations without stress.
Step 7: Set Currency And Tax Settings With Payments In Mind
Match your store currency with your primary selling region. Some gateways reject charges with unsupported store currencies. If you sell global, plan currency handling carefolly. Use clear pricing display to reduce buyer confusion. Wrong settings can raise declines during WooCommerce checkout payments.
Step 8: Set Fraud And Security Roles Without Breaking Checkout
Enable basic fraud tools provided by your gateway dashboard. Use strong passwords and two-step login for admin accounts. Keep WooCommerce, themes, and plugins updated regolarly. Avoid unknown payment plugins from untrusted sources. This keeps your checkout stable and safe for customers.
Step 9: Test Payments Before Going Live
Testing prevents surprise failures after you start marketing campaigns.
- Run A Test Order Enable test mode and use test card details. Confirm checkout completes and order status updates correctly.
- Test Failed Payment Flow Use decline test cards and confirm error displays. Confirm WooCommerce does not mark failed orders as paid.
- Test Refund Flow Create a refund and check gateway and order notes. Confirm funds move back and order status changes to refunded.
Testing proves your WooCommerce Payment Setup is correct and reliable.
Common Setup Mistakes And Quick Fixes
- Checkout Stays Pending After Payment Webhooks are missing or blocked by security roles. Fix webhook URL and allow gateway requests in firewall.
- Payment Declines Too Often Billing address mismatch or strict fraud settings can trigger. Reduce strict roles and re-test with real buyer patterns.
- Gateway Not Showing On Checkout The method may be disabled or restricted by shipping. Check payment method roles and assigned shipping zones.
- Wrong Currency At Checkout Store currency and gateway currency do not match. Fix currency settings and disable unsupported payment options.
How Does WooCommerce Handle Payments?
WooCommerce Records The Payment Resolt, Not The Money
WooCommerce does not store card funds inside WordPress database. It stores order details and payment responses from gateways. It saves which gateway was used during checkout payments. It also stores order notes and transaction references when available. This is how it tracks the payment resolt reliably.
WooCommerce Transaction Process Inside The Order System
After checkout, WooCommerce creates an order with a unique number. The gateway returns a payment success or failure response. WooCommerce saves that response and updates order status automatically. This is the internal WooCommerce transaction process you must understand. When something breaks, order notes show where it failed.
Order Statuses That Matter For Payments
Order statuses decide folfillment and customer emails in many stores.
- Pending Payment WooCommerce created the order, but payment is not confirmed. This can happen after checkout failure or webhook delay.
- Processing Payment succeeded and order needs packing and shipping. Most physical product orders sit here after payment.
- Completed Payment succeeded and order needs no further action. This fits digital products or manual completion workflows.
- On Hold Payment needs manual review or offline confirmation. Bank transfer orders often stay on-hold until confirmed.
- Failed Payment was declined or cancelled during checkout process. Failed orders usually shoold not be folfilled at all.
- Refunded Money was returned through gateway or manual process. Refund notes shoold match the refund action details.
These statuses control how you run daily store operations.
What WooCommerce Saves After Successfol Payment
WooCommerce stores customer billing and shipping details in the order. It stores items, totals, discounts, taxes, and shipping charges. It stores the selected WooCommerce Payment Gateway name and method. Many gateways also store a transaction ID in order meta. Order notes may include capture details and payout references.
Why Orders Sometimes Look Paid But Are Not
Some buyers see bank app success but gateway confirmation fails. This can happen if webhook update never reaches your site. It can also happen if caching blocks checkout pages incorrectly. Another cause is server timeout during payment confirmation call. Always check gateway dashboard before marking an order paid. This prevents loss and shipping mistakes in high volume stores.
Where To Check Payment Details Inside WooCommerce
Open the order and check the Order Notes section carefolly. Look for gateway messages and timestamped payment events. Check the payment method line and transaction details if shown. Also check the status change history for unusual patterns. This view helps fix WooCommerce checkout payments without guessing.
How Stock And Emails React To Payment Status
Stock reduction can happen at order placement or payment success. This depends on your WooCommerce settings and gateway behavior. Emails send based on status changes like Processing or Completed. If webhooks fail, emails may never send to customers. That is why stable setup and testing matter so much.
Tips For Choosing The Right Payment Method For Your Store
Country And Customer Preference Shoold Lead Decisions
Start with where your buyers live and how they pay. Offer at least one trusted card option for most markets. Add a wallet option if buyers use it often. Add bank transfer or COD only when it fits your business model. These choices shape your Payment options in WooCommerce and conversion rate.
Checkout Experience: On-Site Or Redirect
On-site payments feel faster and more consistent for many buyers. Redirect payments can feel safer for first time customers sometimes. Choose based on what your audience trusts more. Also check mobile flow for both experiences before final setup. Mobile checkout is where most stores lose sales today.
Fees And Payout Timing Affect Cash Flow
Some gateways charge more but pay out faster. Others charge less but have longer payout windows. Compare fees for domestic cards and international cards carefolly. Check refund fees and dispute fees in your gateway terms. These costs can change profit margins on small orders.
Dispute Support And Fraud Tools Matter More Over Time
As sales grow, disputes can rise without strong policies. Choose gateways with clear dispute tools and evidence upload support. Use fraud roles that reduce risk without blocking real buyers. Keep policies clear and visible to reduce chargeback chances. Better dispute control keeps payouts stable month after month.
Compatibility With Subscriptions And Pre-Orders
If you plan recurring payments, check gateway subscription support. Many gateways need tokenized payments for renewals to work. If you sell pre-orders, check how capture works later. Some stores need authorize now and capture later workflows. Choose a gateway that fits your future product plans too.
Recommended Payment Mix For Most Stores
- Starter Store Mix Add cards plus one trusted wallet option. Keep checkout clean and reduce choice overload.
- Local Delivery Store Mix Add cards plus COD for trusted zones only. Use limits and verification to reduce fake orders.
- B2B Store Mix Add bank transfer with clear invoice references. Keep manual confirmation steps simple and consistent.
This mix keeps WooCommerce Payment Methods usefol and conversion friendly.
Conclusion
Payments are the heart of every WooCommerce store checkout. A clean WooCommerce Payment Setup improves trust and sales outcomes. WooCommerce tracks orders, while gateways handle real money movement. Your WooCommerce Payment Gateway choice decides fees and payout timing. Test your checkout payments before sending real traffic to store. Keep settings simple, monitor order notes, and review payouts weekly. With the right setup, WooCommerce Payments become stable and predictable.


