How to Fix and Avoid Broken Media Files in WordPress
Table of Contents
- Introduction: The Role of Media in WordPress
- What Are WordPress Broken Media Files?
- Common Symptoms of Broken Media Files in WordPress
- What Causes Broken Media Files in WordPress?
- How to Check If Media Files Are Broken
- How to Fix Broken Media Files in WordPress: Step-by-Step Guide
- How to Prevent Broken Media Files in WordPress
- Conclusion
Introduction: The Role of Media in WordPress
Media files are a vital part of any WordPress website. They make your content more attractive and help deliver your message. Without media files, posts look plain and unprofessional. But what if those files stop working? This is called a WordPress media issue.
Many users face this problem daily. You upload an image, but it doesn’t appear. Your website starts showing missing icons or blank areas. This is frustrating and confusing. You may think the files are gone. But in most cases, they still exist. WordPress just can’t display them properly.
This guide will help you understand what causes this issue. It will also show you how to identify and later fix it. Let’s begin by understanding what broken media files are.
What Are WordPress Broken Media Files?
Broken media files in WordPress are images, videos, or documents that fail to load, preview, or display properly on your website. These files may still exist on the server but are not accessible due to incorrect file paths, missing folder locations, or broken database links. WordPress depends on both the uploads folder and database entries to render media correctly. If either part fails, thumbnails may appear blank, image links may break, or media may not open. This creates a WordPress media issue that can affect site design, user experience, and SEO performance.
Common Symptoms of Broken Media Files in WordPress
- Missing or Broken Images in Posts
When images don’t load in posts or pages, it’s often a sign of a problem with media files. Instead of the image, you might see a broken icon or an empty space where the image should be. This could happen due to issues with file paths or database errors. - Empty Thumbnails in Media Library
If thumbnails appear as empty boxes in the Media Library, it means WordPress is unable to fetch them. This often occurs due to file permission issues, missing metadata, or broken links between the media file and the WordPress database. - Upload Failures with Errors
If uploading files results in errors such as “Upload failed” or “HTTP error,” there might be issues with the server or configuration settings. These errors can block the upload process entirely, preventing media from being added to your site. - 404 Errors for Media Links
When clicking on a media file link leads to a 404 error, it indicates that WordPress can’t find the file. This could be due to incorrect URLs, missing files, or an incorrect path reference in the database. - Media Not Displaying After Migration
If your media files go missing or stop displaying after migrating your site, it’s often due to broken links or outdated paths. This issue occurs when the links or paths in the database aren’t updated correctly during the migration process. - Slow Media Loading
When media files take a long time to load, it may be caused by server issues, caching problems, or slow connections. This delay can affect the overall performance of your website, leading to a poor user experience. - Thumbnails Missing After Image Optimization
If thumbnails disappear after using an image optimization plugin, it may be due to conflicts with the plugin. The plugin may alter or remove image files, causing them to fail to render properly on your site. - Media Links Not Working After Theme Change
Changing themes can sometimes result in missing or broken media files. The new theme may not support the same file paths or metadata, causing media to fail to display until the paths are updated or the theme is configured properly. - Missing Files After Plugin Update
After updating a plugin, media files may stop showing. This can occur if the plugin interferes with media settings or file paths. Disabling the plugin temporarily can help identify if the issue is related to the update. - 404 Not Found for Files in Posts
When media files show a 404 not found error within posts or pages, it means WordPress can’t locate the files. This is often due to incorrect links, database errors, or missing files that are no longer accessible.
What Causes Broken Media Files in WordPress?
- Plugin Conflict
Plugins can interfere with media handling and cause broken media files due to plugin conflict. A plugin may change file paths, permissions, or image compression, leading to files not displaying. Disabling or updating conflicting plugins can resolve the issue and restore media functionality. - Theme Compatibility Issues
Changing or updating themes can cause broken media files due to theme compatibility issues. The new theme may not support old file paths or references, causing images or files to fail to load. Ensuring compatibility between the theme and media settings can fix this problem. - File Permission Errors
If file permissions are set incorrectly, broken media files due to file permission errors occur. Files should have correct permissions, such as 644 for files and 755 for directories. If permissions are misconfigured, WordPress cannot access the files, resulting in missing images or thumbnails. - Incorrect File Paths
Incorrect file paths can lead to broken media files due to incorrect file paths. When files are moved, renamed, or the folder structure changes, WordPress cannot locate the media. This results in WordPress media files not working and requires updating the file paths in the settings. - URL Mismatches
When a site moves from http:// to https:// or switches domains, media files linked to old URLs may break. Broken media files due to URL mismatches can cause images and files to fail to load. Updating the media URLs in the database resolves this issue. - Database Errors
If there are issues with the database, such as corruption or missing references, broken media files due to database errors can occur. This prevents WordPress from accessing or displaying the files. Running a database repair or restoring from a backup can resolve these errors. - Image Optimization Plugins
Image optimization plugins may cause broken media files due to image optimization plugins. These plugins compress, resize, or move media files, which can interfere with WordPress rendering. Adjusting the settings or disabling the plugin temporarily can restore the media display. - htaccess Misconfiguration
The .htaccess file controls server access, including media files. Broken media files due to .htaccess misconfiguration can occur when the file is misconfigured to block access to the media folder. Resetting or restoring the .htaccess file to default settings can resolve this issue. - CDN Issues
A Content Delivery Network (CDN) may fail to sync media files correctly, causing broken media files due to CDN issues. This issue typically happens when the CDN cache isn’t updated or when files aren’t properly synced. Clearing the CDN cache or re-syncing the media files will resolve the issue. - Migration Problems
During site migration, media files may not transfer correctly, resulting in broken media files due to migration problems. This occurs when file paths or URLs are not updated in the database after migration. Verifying the media files are correctly transferred and updating the paths can fix this. - HTTP/HTTPS Mismatch
After migrating to https://, old media URLs that still use http:// will cause issues. This leads to broken media files due to HTTP/HTTPS mismatch because browsers block insecure content on HTTPS pages. Updating all media URLs to HTTPS in the database will resolve this issue. - Upload Folder Path Errors
If the upload folder path is incorrect in WordPress settings, broken media files due to upload folder path errors occur. WordPress cannot find the files in the wrong folder. Checking and correcting the upload path in the settings ensures that files are properly stored and accessible. - Server Timeout
A server timeout occurs when the server takes too long to load media files. This leads to broken media files due to server timeout. To prevent this, increasing the server timeout limits or optimizing server performance may help resolve the issue. - Memory Limit Issues
When the PHP memory limit is too low, broken media files due to memory limit issues happen. Large media files may fail to upload or render properly. Increasing the PHP memory limit in the wp-config.php file will allow WordPress to handle larger files. - Outdated WordPress Version
An outdated WordPress version may not support newer media file formats, leading to broken media files due to outdated WordPress version. Updating to the latest WordPress version ensures compatibility with modern file formats and better handling of media files.
How to Check If Media Files Are Broken
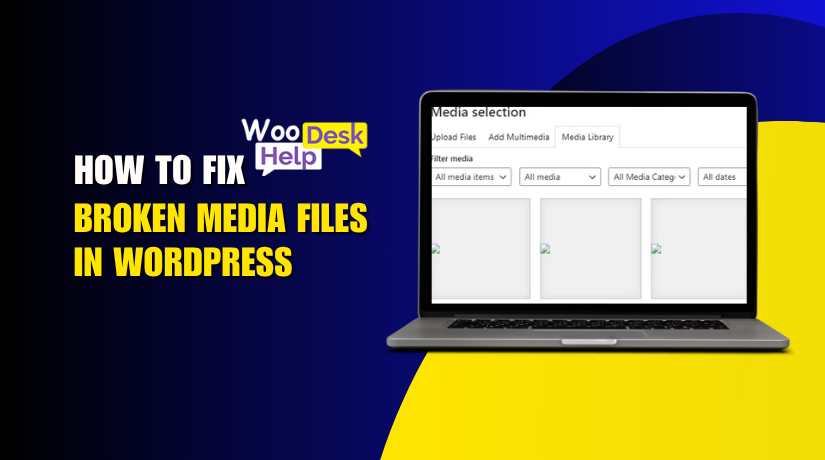
- Check the Media Library
Open the Media Library in WordPress. If images appear as grey boxes or icons, your media files are likely broken. This could be due to incorrect file paths or database errors. Switch to list view to find missing or broken thumbnails easily in the library. - Inspect Frontend Pages
View your website’s frontend and check posts or pages for missing media. Right-click on the broken image and open it in a new tab. If the image doesn’t load or shows a 404 error, this confirms broken media files caused by file path or permission issues. - Use Browser Developer Tools
Right-click on the page and choose Inspect. Go to the Console tab and look for errors like 404, 403, or failed file loads. These errors indicate broken media files. If you see “Failed to load resource,” it’s often due to incorrect file paths or permissions. - Check File URLs
Click on the media file link in WordPress. If the file doesn’t load and shows a 404 error, the URL might be incorrect. Verify the file path by copying the URL and pasting it directly in your browser. A 404 error indicates the file is not found. - Test with Incognito Mode
Open your site in Incognito mode in Chrome. This disables caching, so you can see if the problem is related to the browser cache. If media loads correctly in Incognito mode, but not in regular mode, it’s likely a cache issue or misconfigured URL. - Check Media File Access Permissions
Verify the file permissions on the server. Files should have 644 permissions and directories should be set to 755. If the permissions are set incorrectly, WordPress won’t be able to access the media. This causes broken media files that are visible in the library but not on the site. - Regenerate Thumbnails
If media thumbnails are missing or broken, use a plugin like Regenerate Thumbnails. This tool rebuilds all media thumbnails for your images. Running it can fix issues related to missing or broken thumbnails, especially if they’re caused by incorrect image sizes or incomplete uploads. - Search for Broken Links Using Plugins
Use plugins like Broken Link Checker to scan your site for broken links, including media links. The plugin detects broken image links and missing media files, which is helpful when identifying WordPress media issues caused by migration problems or incorrect file paths. - Check the Uploads Folder
Ensure your /wp-content/uploads/ folder exists and contains media files. If the folder was moved or deleted, WordPress can’t display media files. Check the server’s file structure to confirm that the upload folder is intact and accessible. - Inspect the .htaccess File
If media files are blocked, inspect the .htaccess file for misconfigurations. Incorrect rules in this file can prevent WordPress from serving media properly. Resetting the .htaccess file to its default settings can resolve issues caused by restrictions on file access or rewrites.
How to Fix Broken Media Files in WordPress: Step-by-Step Guide
- Regenerate Thumbnails
When to use: If thumbnails are missing or distorted.
- Step 1: Install the Regenerate Thumbnails plugin from the WordPress Plugin Directory.
- Navigate to Plugins > Add New, search for “Regenerate Thumbnails” and click Install Now.
- Step 2: After activation, go to Tools > Regenerate Thumbnails.
- You will see an option to regenerate all thumbnails across your entire media library.
- Step 3: Click Regenerate All Thumbnails. This action will rebuild missing or broken thumbnails for all media files in your library.
- The plugin processes all images, regenerates thumbnails in various sizes, and re-associates them with your content.
Result: This step ensures that all thumbnails are correctly generated and linked to your media files, fixing issues where images were previously missing or distorted.
- Check and Correct File Permissions
When to use: If media files are not loading due to access restrictions.
- Step 1: Access your website via FTP or cPanel.
- Use an FTP client like FileZilla to connect to your server or log in via cPanel > File Manager.
- Step 2: Navigate to the wp-content/uploads/ directory.
- This folder stores all uploaded media files.
- Step 3: Ensure that the file permissions for media files are set to 644 and for folders to 755.
- Right-click on the file or folder, select Permissions and update them if necessary.
- 644 allows files to be read and written, while 755 allows directories to be read, written, and executed.
Result: Correcting permissions ensures WordPress can access and serve the media files properly, fixing file permission errors that prevent media from loading.
- Update File Paths in WordPress Settings
When to use: If media files are not being located correctly.
- Step 1: Go to Settings > Media in your WordPress dashboard.
- This page contains the settings for the upload directory.
- Step 2: Check the Upload Path.
- Make sure the upload path matches the directory structure on your server. It should be something like /wp-content/uploads/.
- Step 3: If the path is incorrect, update it to reflect the correct directory on the server.
- Ensure the path points to the correct location where WordPress stores uploaded files.
Result: Updating the file path ensures that WordPress can locate the media files, fixing the broken media files caused by incorrect paths.
- Repair the Database
When to use: If media references are missing or corrupted in the database.
- Step 1: Install the WP-DBManager plugin or use phpMyAdmin.
- You can install WP-DBManager from the WordPress Plugin Directory or directly access phpMyAdmin through cPanel.
- Step 2: Go to Database > Repair DB in WP-DBManager, or in phpMyAdmin, select the wp_posts and wp_postmeta tables.
- Step 3: Run the repair process to fix any corrupted or missing database entries related to media.
- This will restore the links between media files and their corresponding entries in the database.
Result: Repairing the database restores missing media references, ensuring WordPress media files are correctly linked and displayed.
- Clear Browser and CDN Cache
When to use: If outdated or cached media is still showing.
- Step 1: Clear your browser cache by pressing Ctrl + F5 (Windows) or Cmd + Shift + R (Mac).
- This forces the browser to reload the page with the most current content.
- Step 2: If using a CDN, go to your CDN provider’s control panel (e.g., Cloudflare or MaxCDN) and clear its cache.
- This will remove cached media files, forcing the CDN to fetch the latest versions.
- Step 3: Re-sync the CDN if necessary to ensure the latest media files are cached and delivered correctly.
Result: This clears outdated cached media, ensuring you load the most recent versions of your media files.
- Fix .htaccess File Issues
When to use: If media files are blocked by server rules.
- Step 1: Go to Settings > Permalinks in your WordPress dashboard.
- This action will refresh the .htaccess file, even if you don’t make changes to the permalink structure.
- Step 2: Click “Save Changes” without making any modifications. This will regenerate the .htaccess file.
- Alternatively, you can manually reset the .htaccess file in FTP or cPanel to default settings.
- Step 3: Ensure that the .htaccess file contains the correct rewrite rules for media files.
Result: This refreshes the .htaccess file and resolves access restrictions, ensuring media files load properly.
- Disable Conflicting Plugins
When to use: If plugins are causing media display issues.
- Step 1: Deactivate all plugins from the Plugins > Installed Plugins page.
- This helps determine if a plugin is causing the media issue.
- Step 2: Check if media files load correctly after disabling plugins.
- If they do, reactivate the plugins one by one.
- Step 3: Identify the plugin causing the issue and either update it, replace it, or reconfigure the plugin settings.
Result: Deactivating and reactivating plugins helps you identify conflicts and restore media functionality.
- Check for Theme Conflicts
When to use: If switching themes causes media files to disappear.
- Step 1: Switch to a default WordPress theme, such as Twenty Twenty-One.
- This helps determine if the issue is related to your theme.
- Step 2: Check if media files display correctly with the default theme.
- If they do, your theme is the cause of the issue.
- Step 3: Update the theme or contact the theme developer for a fix.
Result: Switching to the default theme helps identify if the theme is causing media display problems.
- Re-upload Missing Media Files
When to use: If media files are missing after migration or file loss.
- Step 1: Go to Media > Add New and upload the missing files.
- This can happen if media was deleted or not transferred correctly.
- Step 2: Ensure that files are uploaded to the correct directory inside /wp-content/uploads/.
- Step 3: After uploading, check that the media files are correctly referenced in your posts or pages.
Result: Re-uploading media files restores missing content and fixes display issues caused by migration or file loss.
- Regenerate Media Links with Search & Replace Plugin
When to use: If media links remain broken after site migration.
- Step 1: Install the Better Search Replace plugin.
- This plugin helps replace old URLs with new ones across your WordPress database.
- Step 2: Use the plugin to search for old URLs (e.g., old domain names) and replace them with the new URLs.
- Step 3: Run the plugin to update all media links across the site.
Result: This fixes broken media files due to URL mismatches after migrating your WordPress site.
- Increase PHP Memory Limit
When to use: If large media files fail to upload or load.
- Step 1: Open your wp-config.php file via FTP or cPanel.
- You can edit this file using a text editor.
- Step 2: Add the following code:
define(‘WP_MEMORY_LIMIT’, ‘256M’);- This increases your WordPress memory limit.
- Step 3: Save and upload the changes.
Result: Increasing the PHP memory limit ensures that WordPress can handle large files during uploads and processing.
- Verify Upload Folder Path
When to use: If the upload folder is incorrectly configured.
- Step 1: Verify the upload folder path in wp-config.php or Settings > Media.
- Step 2: Ensure that the upload folder points to the correct directory on your server.
- Step 3: Correct the path if needed.
Result: Verifying and correcting the upload path ensures media files are properly stored and accessed.
- Restore From Backup
When to use: If none of the previous steps resolve the issue.
- Step 1: Restore your site from a previous backup when media files were working.
- Step 2: Use a plugin like UpdraftPlus or your hosting provider’s backup tool.
- Step 3: Verify that the media files and database entries are restored properly.
Result: Restoring from a backup fixes broken media files caused by corruption or other irreparable issues.
How to Prevent Broken Media Files in WordPress
- Regularly Back Up Your WordPress Site
When to use: To prevent data loss or media corruption.
- Step 1: Use a backup plugin like UpdraftPlus or VaultPress.
- Step 2: Set up automated backups on a regular schedule (e.g., daily or weekly).
- Step 3: Ensure backups include both your media files and database.
Result: Regular backups ensure you can restore files if media breaks in the future.
- Use a Reliable Hosting Provider
When to use: To ensure your server supports media uploads efficiently.


- Step 1: Choose a hosting provider that offers high-performance servers and adequate resources.
- Step 2: Ensure they offer scalability as your site grows.
- Step 3: Regularly monitor server performance to avoid issues like timeouts or slow uploads.
Result: A reliable host minimizes server timeout and performance issues that can cause broken media.
- Avoid Using Too Many Plugins
When to use: To reduce conflicts between plugins that might break media files.
- Step 1: Deactivate unused or unnecessary plugins.
- Step 2: Ensure that plugins you install are compatible with the current WordPress version.
- Step 3: Keep plugins updated to avoid conflicts.
Result: Limiting the number of plugins reduces conflicts that can cause broken media files.
- Keep WordPress, Themes, and Plugins Updated
When to use: To prevent compatibility issues with media files.
- Step 1: Regularly check for WordPress core, theme, and plugin updates.
- Step 2: Install updates as soon as they’re available to maintain compatibility with new media formats.
- Step 3: Test your site after updates to ensure that media files are still functional.
Result: Keeping everything updated ensures your media files continue to work with the latest features.
- Use Compatible File Formats
When to use: To avoid issues with unsupported file types.
- Step 1: Always use standard formats such as JPG, PNG, and GIF for images and MP4 for videos.
- Step 2: Avoid using outdated or unusual file types that WordPress may not support.
- Step 3: Convert unsupported files to a supported format before uploading.
Result: Using compatible file formats reduces the risk of broken media files.
- Optimize Media Files Before Uploading
When to use: To ensure media files load properly and don’t cause performance issues.
- Step 1: Use an image optimization plugin like Smush or EWWW Image Optimizer to compress images.
- Step 2: Optimize media before uploading by reducing file sizes without sacrificing quality.
- Step 3: Make sure that the optimize settings are compatible with your site’s needs.
Result: Optimized files load faster and are less likely to cause media-related issues.
- Set Correct File Permissions
When to use: To ensure proper access to media files.
- Step 1: Set file permissions for the uploads folder to 755 and files to 644.
- Step 2: Check permissions after migrating or updating WordPress.
- Step 3: Use FTP or cPanel to modify permissions if needed.
Result: Proper file permissions ensure WordPress can read and serve media files without issues.
- Use a Content Delivery Network (CDN)
When to use: To reduce server load and avoid media delivery issues.
- Step 1: Choose a reliable CDN like Cloudflare or KeyCDN.
- Step 2: Set up your CDN to cache and deliver your media files globally.
- Step 3: Regularly clear and sync your CDN cache to avoid serving outdated media.
Result: A CDN reduces server load, enhances media delivery speed, and prevents broken media files.
- Implement Regular Media File Monitoring
When to use: To detect media issues early and fix them promptly.
- Step 1: Use monitoring tools like Broken Link Checker or WP Media Folder.
- Step 2: Set up alerts to notify you if media files become inaccessible.
- Step 3: Regularly check for missing images or broken links in your posts or pages.
Result: Monitoring allows you to detect and fix broken media files before they affect the user experience.
- Avoid Hotlinking and Ensure Proper File Access
When to use: To prevent external sites from stealing your media files.
- Step 1: Block hotlinking by adding rules in your .htaccess file to prevent other websites from linking to your media.
- Step 2: Use security plugins like Wordfence to monitor and block unauthorized file access.
- Step 3: Regularly check access logs to detect any unauthorized attempts.
Result: Protecting your media from hotlinking reduces the risk of missing or broken files.
- Set Up a Media Library Cleanup Routine
When to use: To ensure your media library is free of unused or broken files.
- Step 1: Use plugins like Media Cleaner to identify and remove unused files.
- Step 2: Set a regular schedule for cleaning up the Media Library.
- Step 3: Regularly check for orphaned media files and delete them to reduce clutter.
Result: A clean media library ensures that only valid, accessible files are stored.
- Use Cloud Storage for Large Files
When to use: To reduce server load and ensure large media files are accessible.
- Step 1: Set up a cloud storage service like Amazon S3 or Google Cloud Storage.
- Step 2: Integrate the cloud storage with your WordPress site using plugins like WP Offload Media.
- Step 3: Upload large media files to the cloud to offload server load and improve media accessibility.
Result: Cloud storage ensures large media files are securely stored and easily accessible.
- Regularly Check and Fix Broken Links
When to use: To ensure that media files are properly linked across the site.
- Step 1: Use Broken Link Checker to scan your site for broken media links.
- Step 2: Set up automatic scanning to detect missing media.
- Step 3: Fix broken links by updating URLs or re-uploading missing files.
Result: Regular link checks ensure that your media files are always accessible to users.
- Use the Default WordPress Image Handling Methods
When to use: To ensure media files are always handled in the most compatible way.
- Step 1: Avoid using custom code to handle image uploads.
- Step 2: Rely on default WordPress media settings to manage uploads and storage.
- Step 3: Use WordPress-built image optimization features for automatic resizing.
Result: Relying on WordPress defaults ensures maximum compatibility and avoids issues with media handling.
- Test Media Files After Changes or Updates
When to use: To ensure new changes or updates don’t affect media display.
- Step 1: After theme, plugin, or WordPress updates, manually check if media files are still displaying.
- Step 2: Test different file types (images, videos, documents) to ensure they load correctly.
- Step 3: If media breaks after an update, restore from a backup or revert to the previous configuration.
Result: Regular testing after updates ensures that media files continue to display correctly and prevents issues post-upgrade.
Conclusion:
If you are facing broken media files on your WordPress website, it’s crucial to take action to prevent them in the future. These issues often arise from file path errors, plugin conflicts, or misconfigurations. By following a few preventive steps, you can ensure that your media files continue to display correctly and maintain a smooth user experience.
Start by regularly backing up your site to prevent data loss. Always keep your WordPress installation, themes, and plugins up to date to avoid compatibility issues. Properly configure file permissions, optimize media files, and use a CDN to deliver content efficiently. Regularly monitor your media library, clear cache, and verify upload paths to minimize potential errors.
Taking these steps will not only help you prevent broken media files but also improve your site’s performance, making it more reliable for both users and search engines. By implementing these best practices, you can protect your site’s media integrity and avoid future disruptions.
For assistance, visit WooHelpDesk or contact our support team at +1 888 602 0119 (US & Canada) We’re here to help!