How to Setup Email Customizer for WooCommerce to Design Branded Emails
Table of Contents
- Why Customizing WooCommerce Emails Matters
- Limitations of Default WooCommerce Emails
- What Is Email Customizer for WooCommerce?
- Supported WooCommerce Email Templates
- Key Features of the Email Customizer
- Design Elements You Can Use
- Complete Setup Process for Email Customizer for WooCommerce
- Go Beyond Basics with Advanced Customization
- Use Shortcodes for Dynamic Personalization
- Works Seamlessly with Popular WooCommerce Plugins
- Why Use Email Customizer for WooCommerce?
- Ready to Customize Your WooCommerce Emails?
Why Customizing WooCommerce Emails Matters
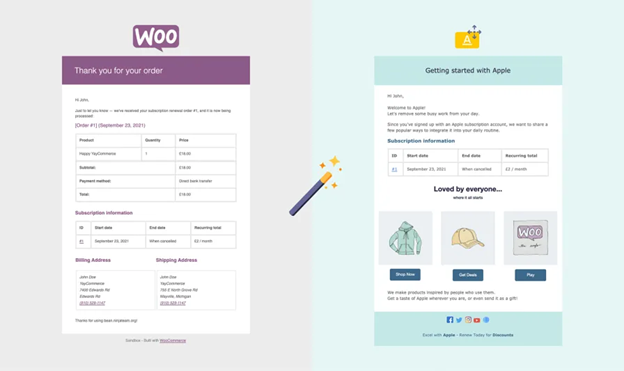
When customers place an order, they expect clear email updates. WooCommerce sends default emails for order updates, invoices, and more. However, these emails frequently have a simple, unbranded appearance.
Generic emails don’t build trust or reflect your brand style. A personalized, well-designed email can create a great customer experience. It can also drive return visits and more sales.
If your store runs in the competitive U.S. market, branding matters. Every email is a chance to show your professionalism and stand out.
That’s why customizing WooCommerce email notifications is essential.
Limitations of Default WooCommerce Emails
WooCommerce’s built-in emails are functional but not flexible. They come with a fixed layout and limited styling options.
You can’t:
- Change the email layout without editing code
- Easily add your logo or brand colors
- Add upsells, banners, or social links
- Preview changes before sending
To make these updates, you’d need a developer. Or you’d have to work with complicated code templates.
That’s where an email customization plugin makes a big difference.
What Is Email Customizer for WooCommerce?
Email Customizer for WooCommerce, also known as YayMail Pro, is a powerful plugin. It lets you design and customize WooCommerce emails with ease.
You don’t need coding knowledge. You use a simple drag-and-drop builder. It’s just like using page builders such as Elementor or Gutenberg.
You have complete control over the appearance of your emails thanks to the plugin. You can match your brand colors, fonts, and add dynamic content blocks.
It helps you turn basic WooCommerce emails into professional, branded messages. These customized emails improve customer experience and reinforce trust.
You can also preview designs live and send test emails instantly. This makes it easy to see exactly what your customers will receive.
Any store owner can create stunning, responsive email templates in a matter of minutes with this plugin.
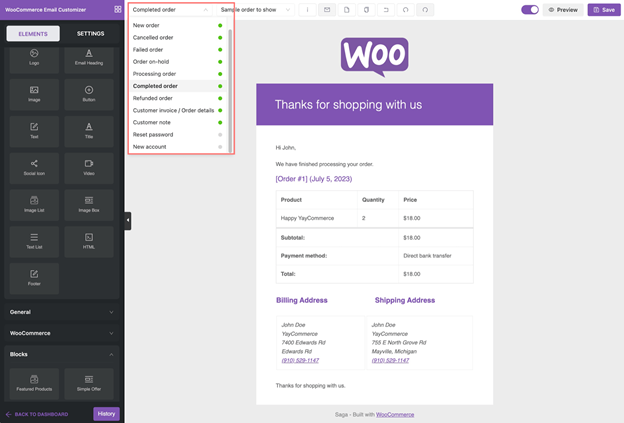
Supported WooCommerce Email Templates
Email Customizer for WooCommerce lets you edit every core email template. These emails are sent during a customer’s journey with your store.
Here are the 11 WooCommerce emails you can fully customize:
- New Order – When a new order is placed, it is sent to the admin.
- Order Cancelled – Sent when a customer cancels an order
- Order Failed – Sent if payment fails during checkout
- Order On-Hold – Used when payment is pending
- Order Processing – Sent after payment, before shipping
- Order Completed – Sent after order is fulfilled
- Order Refunded – Sent when a refund is issued
- Customer Invoice – Includes payment link and order summary
- Customer Note – Sent when admin adds a note
- New Account – Sent when a user registers an account
- Reset Password – Sent when a password reset is requested
Each template can be personalized with your brand colors, logos, and layout.
Key Features of the Email Customizer
The plugin is built for non-technical users. You don’t need to touch code.
Instead, you get a drag-and-drop editor that’s easy to use. It works like popular WordPress page builders.
Here are the core features that make customization easy:
- Live preview mode lets you see your design in real-time
- Mobile and desktop views to check responsiveness
- Test email option to send a sample email to your inbox
- Undo/redo options for safe editing
- Clone templates to save time on similar emails
- Export and import designs across different WooCommerce stores
- Shortcodes to insert dynamic data like customer name or order details
- Enable or disable templates if not in use
- Global design settings for colors, fonts, and layout styles
These features allow you to keep your brand consistent across all emails.
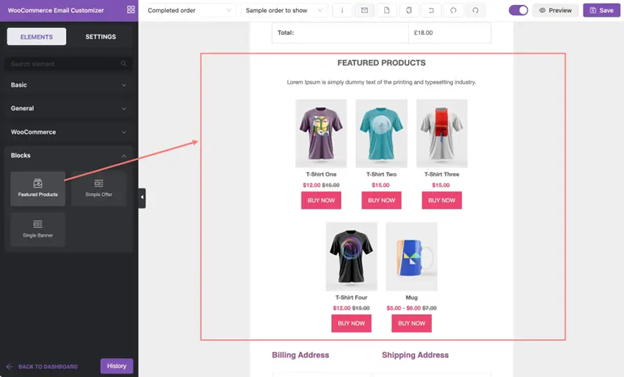
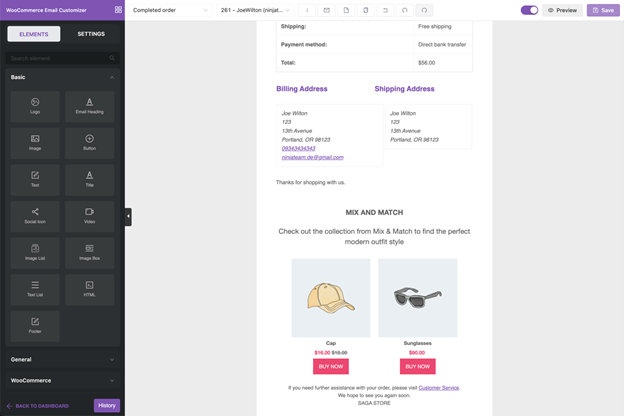
Design Elements You Can Use
With the builder, you get full control over layout and content. The editor includes more than 20 drag-and-drop blocks to design your emails.
Basic Content Elements:
- Text – Add body text or custom messages
- Title – Add headers or subheadings
- Button – Add clickable calls to action
- Image – Add product images or banners
- Logo – Insert your store’s logo
- Video – Embed video with a preview image
- Social Icons – Link to Facebook, Instagram, or YouTube
- HTML Block – Add custom code if needed
Layout Blocks:
- One to four columns
- Divider lines
- Spacers for better spacing
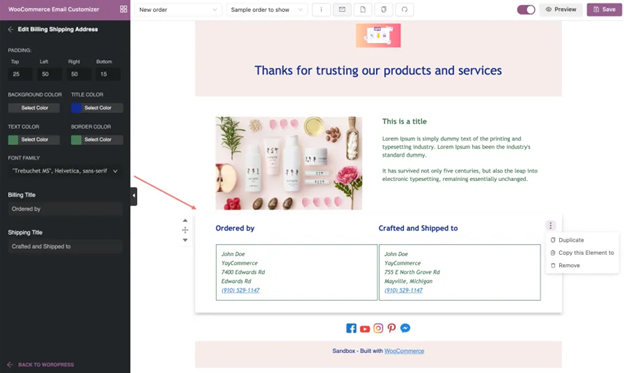
WooCommerce Elements:
- Order summary table with product names, prices, and quantity
- Shipping and billing address blocks
- Download links for digital orders
- Subscription details
- Tracking numbers and links
- Cart items (for abandoned cart emails)
- WooCommerce hooks to extend functionality
Style options for each element include text size, padding, background color, and more.
Complete Setup Process for Email Customizer for WooCommerce
Setting up Email Customizer for WooCommerce is easy and fast. Installing and using it doesn’t require any technical knowledge. To begin, take these actions.
Step 1: Purchase and Download the Plugin
Go to the official product page to get started. Before you can install the plugin, you must buy it.
After purchase:
- Go to your WooCommerce account dashboard
- Find the plugin under your downloads
- Download the .zip file to your computer
Make sure you keep the file zipped. You’ll upload it directly to WordPress in the next step.
Step 2: Install the Plugin in WordPress
Now log into your WordPress dashboard.
- Go to Plugins → Add New
- Click the Upload Plugin button at the top
- Choose the .zip file you downloaded
- Click Install Now, then click Activate
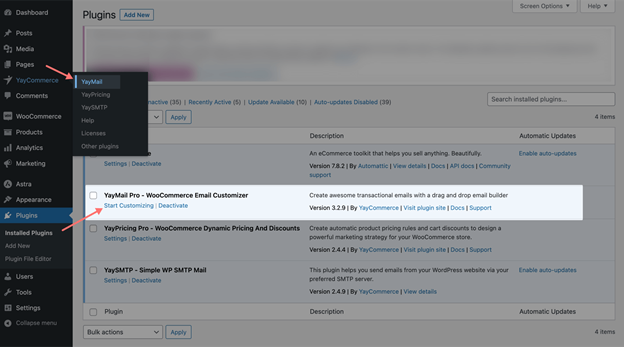
Once activated, the plugin is ready to use. You’ll find it under the name YayMail in your dashboard menu.
Step 3: Connect to Your WooCommerce Account
To receive updates, you should connect your site to WooCommerce.com.
Here’s how:
- Go to WooCommerce → Extensions
- Click the WooCommerce.com Subscriptions tab
- Click Connect
- Log in with your WordPress.com account
- Approve the connection
Once connected, your plugin will stay updated automatically. This prevents errors and ensures you have the latest features.
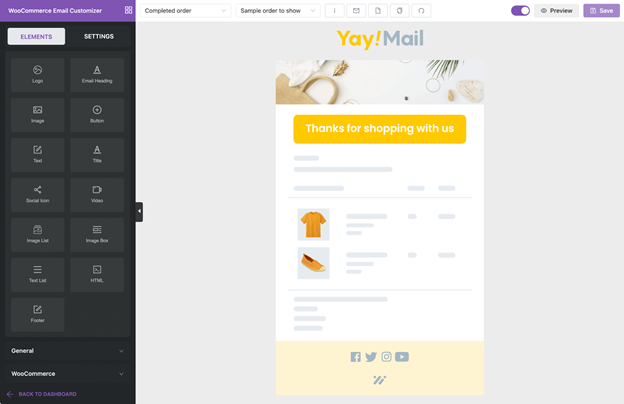
Step 4: Access the Email Builder
To start designing emails:
- Go to YayCommerce → YayMail in your dashboard
- Or click the Start Customizing button if you see it
This opens the email builder interface. It looks similar to page builders like Elementor or Gutenberg.


You’ll see:
- A sidebar on the left with design elements
- A live preview area on the right
- A top toolbar with options to select templates, add shortcodes, and send test emails
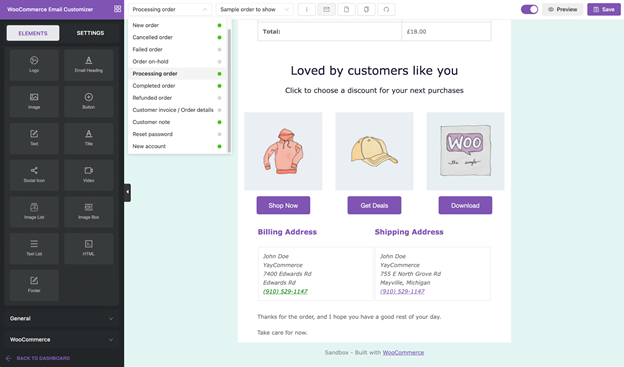
Step 5: Choose an Email Template to Customize
WooCommerce uses 11 core email templates. Each one can be altered to fit the style of your store.
Use the top Email Template dropdown to pick one. Examples include:
- New Order
- Order Completed
- Customer Invoice
- Password Reset
After choosing a template, you can load a sample order. This lets you see real order data in the preview area.
Step 6: Customize with Drag-and-Drop Elements
Now it’s time to design the email. Use the left panel to drag elements into the email layout.
Here are a few popular blocks:
- Logo – Add your brand logo at the top
- Text – Write a custom greeting or message
- Order Summary – Show products, prices, and totals
- Buttons – Add a call to action like “Track My Order”
- Social Icons – Link to your social media pages
- Image or Banner – Add product visuals or promotions
You can style each block with custom colors, fonts, padding, and alignment. You can also duplicate, move, or delete elements with one click.
Use the Shortcodes button in the toolbar to add dynamic content. For example:
- Customer name
- Order number
- Payment method
- Shipping address
These shortcodes make your emails personal and informative.
Step 7: Send a Test Email
Before you publish your email design, preview how it looks in real inboxes.
- Click the Send Test Email button in the top toolbar
- Enter your email address
- Check the message in your inbox
To guarantee compatibility, you can repeat this process for several email clients (such as Gmail, Outlook, etc.).
Step 8: Save and Export Your Templates
Once satisfied, hit the Save button. Your customized email is now live.
If you manage multiple WooCommerce stores, use the Export/Import feature:
- Export a finished email template
- Import it to another store
- Time is saved, and your branding remains constant.
With these simple steps, you can fully design and manage all your WooCommerce emails. No code, no hassle — just a smooth visual editing experience.
Go Beyond Basics with Advanced Customization
The plugin offers more than just basic email edits. Advanced settings are available to you, giving you complete control over the appearance and feel of your emails.
You can adjust global styles to apply across all email templates. This saves time and keeps branding consistent.
Here are some powerful customization features:
- Container Width Control – Set the email width between 480px and 900px
- Font and Color Settings – Choose font size, family, and custom colors
- Product Image Toggle – Show or hide product images in emails
- SKU Toggle – Display or remove the stock-keeping unit
- Custom CSS Editor – Add custom styling for advanced layouts
- Enable/Disable Templates – Use only the emails you need
- Global Heading Styles – Apply the same header design across all templates
- Payment Instructions – Show instructions based on the selected payment method
These tools help you fine-tune every email detail with minimal effort.
Use Shortcodes for Dynamic Personalization
Shortcodes allow you to insert real order or customer data into emails. This makes emails more personal and helpful.
Common shortcodes include:
- Customer name
- Order number
- Billing address
- Shipping method
- Payment gateway
- Order total
Simply copy from the shortcode list and paste it where needed. The email builder replaces them with real values when sent.
Works Seamlessly with Popular WooCommerce Plugins
Email Customizer for WooCommerce supports many third-party extensions. This means your emails can include extra info from other plugins you use.
Here are some of the supported plugin types:
Shipping & Tracking Plugins:
- Shipment Tracking by WooCommerce
- Advanced Shipment Tracking (Zorem)
- YITH WooCommerce Order Tracking
- PluginHive Shipment Tracking
Checkout & Order Plugins:
- Checkout Field Editor (Woo, ThemeHigh, WPDesk)
- Custom Order Status by TycheSoftwares
- Admin Custom Order Fields (SkyVerge)
Multilingual & Translation Plugins:
- WPML
- Polylang
- TranslatePress
Product & Customer Experience Tools:
- WooCommerce Subscriptions
- WooCommerce Bookings
- Back In Stock Notifier
- YITH Gift Cards
- Dokan Multivendor Marketplace
These integrations make your emails smarter and more informative. For example, you can show a tracking number or display custom checkout fields.
With these advanced features and plugin support, you can build professional, branded emails that work with your full WooCommerce setup.
Why Use Email Customizer for WooCommerce?
Email Customizer for WooCommerce gives you full control over your emails. You don’t need to touch code or hire a developer. It’s designed for store owners who want quick results and a professional look.
Here’s why it’s worth using:
- Create fully branded email templates
- Match emails with your store’s style and colors
- Include dynamic content, such as customer information or order details.
- Improve customer experience and build trust
- Save time with drag-and-drop tools and ready-made elements
- Work faster with export/import, global settings, and test previews
Better emails lead to better engagement. And that often means more repeat customers and sales.
Ready to Customize Your WooCommerce Emails?
If you’re still using the default WooCommerce email layout, it’s time to upgrade. Email Customizer for WooCommerce makes it easy, even for beginners.
You can start designing beautiful emails in minutes. No coding. No stress. Just results.
Need help setting it up? Have a question about WooCommerce or WordPress?
WooHelpDesk is here for you.
We provide expert support for WooCommerce stores of all sizes.
📞 Call us at +1 888 602 0119 (US & Canada) for fast and friendly assistance.
Let your emails reflect your brand. Make every message count.