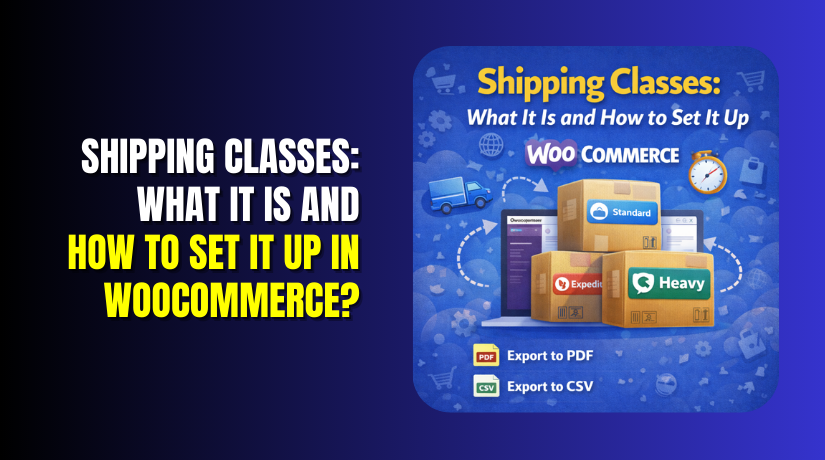
Shipping Classes: What It Is and How to Set It Up in WooCommerce?
Table of Contents
- Introduction
- What are Shipping Classes in WooCommerce?
- What are Various Shipping Classes in WooCommerce?
- How to Set Up Shipping Classes in WooCommerce?
- Troubleshooting Shipping Class Issues
- Final Verdict
Introduction
Shipping can make or break your online store. Customers expect fair rates. You need to cover your costs. Finding the balance is challenging.
Different products have different shipping needs. A feather pillow costs little to ship. A heavy dumbbell costs much more. A fragile vase needs special handling. A bulk order of paper towels fills a large box.
Charging the same rate for all these products loses you money. Customers overpay for small items. You undercharge for large items. Your profits shrink. Customer satisfaction drops.
WooCommerce solves this with shipping classes. Shipping classes let you group similar products together. You can charge different rates based on product type. Heavy items cost more. Fragile items have surcharges. Free shipping applies to specific products.
This guide covers everything about shipping classes. You will learn exactly what they are. You will understand why multiple classes benefit your store. You will follow step-by-step instructions to set them up. You will master advanced configurations with plugins.
By the end, you will control shipping costs precisely. Your customers will see fair rates. Your profits will grow.
What are Shipping Classes in WooCommerce?
Shipping classes are a way to group similar products for shipping purposes. Think of them as labels you assign to products. These labels tell WooCommerce how to calculate shipping at checkout.
A shipping class is a category for products with similar shipping characteristics. You create classes like “Heavy Items,” “Fragile Products,” or “Free Shipping Items.” Each product gets assigned to one class.
When a customer adds products to cart, WooCommerce checks their classes. It applies different shipping rules based on what classes are present. Heavy items trigger higher rates. Fragile items add handling fees. Free shipping items cost nothing to ship.
How Shipping Classes Work?
- Shipping classes work within shipping zones.
- You first create shipping zones for geographic areas.
- You add shipping methods like flat rate to each zone.
- Then you configure class-specific costs within those methods.
- The flat rate method has a special field for shipping class costs.
- You enter an extra amount for each class. For example, base rate $5 plus $10 for heavy items. When a cart contains heavy items, total shipping is $15.
What are Various Shipping Classes in WooCommerce?
Shipping classes are essentially labels you create to group products with similar shipping characteristics . While the WooCommerce system itself doesn’t come with pre-set classes, the “various” classes refer to the different categories you can create based on your specific business needs.
These classes are completely customizable and can be named anything that helps you organize your shipping strategy. Here are the most common types of shipping classes store owners create, along with real-world examples of why they are used:
Common Types of Shipping Classes?
- Standard or Regular Items
- This is often the default class for products with average shipping needs.
- These items are neither particularly heavy, large, nor fragile.
- They are your bread-and-butter products that fit in standard boxes and cost a predictable amount to ship.
- Heavy or Bulky Items
- This class is for products that significantly increase shipping costs due to their weight or size.
- By creating a separate class, you can ensure customers pay the higher, accurate rate for these items without overcharging for lighter ones.
- Fragile or Special Handling Items
- Some products require extra care, packaging materials (like bubble wrap), or insurance.
- A shipping class for fragile items allows you to add a surcharge to cover these additional costs.
- Free Shipping Items
- Many stores use shipping classes to manage promotions.
- You can create a “Free Shipping” class and assign it to specific products you want to offer as an incentive.
- Then, you can configure your shipping zones so that the “Free Shipping” method applies only when items from this class are in the cart.
- Perishable or Temperature-Controlled Items
- For businesses selling food or other perishable goods, a special class can account for the cost of expedited shipping, ice packs, or insulated boxes.
- Oversized or Irregularly Shaped Items
- Sometimes a product isn’t heavy but is oddly shaped (e.g., a broom, a lamp, sports equipment), requiring a special box or dimensional weight pricing from carriers.
- This class helps you apply a surcharge for these logistical challenges.
- Hazardous Materials
- Some products are regulated and require special documentation and handling.
- A dedicated shipping class can help ensure you apply the correct (and often higher) fees for these complex shipments.
- Local Pickup Items
- You can use a shipping class in conjunction with the “Local Pickup” shipping method.
- For instance, you might create an “In-Store Only” class for items that cannot be shipped and must be picked up, though more commonly you’d simply exclude oversized items from certain methods.
How to Set Up Shipping Classes in WooCommerce?
Setting up shipping classes involves multiple steps. Follow this comprehensive guide carefully.
Step 1: Create Your Shipping Classes
WordPress Dashboard → WooCommerce → Settings → Shipping → Shipping Classes tab
- Click on WooCommerce in your left admin menu
- Select Settings from the dropdown
- Click on the Shipping tab at the top
- Click on the Shipping Classes tab
- You will see an empty table with three columns:
- Class Name: What you call this class internally
- Slug: URL-friendly version (auto-generated)
- Description: Optional notes for your reference
- Click “Add shipping class” button
- Enter a descriptive name like “Heavy Items”
- The slug auto-generates from the name
- Add description if helpful (e.g., “Items over 20 pounds”)
- Click “Add shipping class” to save
- Repeat for all needed classes:
- “Fragile Items” for delicate products
- “Free Shipping” for promotional items
- “Oversized” for bulky packages
- “Perishable” for food items
Step 2: Assign Shipping Classes to Products
Products → All Products → Edit Product → Product Data → Shipping tab
- Go to Products → All Products
- Find a product that needs class assignment
- Click the product title to open editor
- Scroll to Product Data metabox
- Click the Shipping tab
- Locate “Shipping class” dropdown menu
- Click dropdown and select appropriate class
- If no class needed, leave as “No shipping class”
- Click Update button to save
- Repeat for every product in your catalog
Bulk Assignment Method:
- Go to Products → All Products
- Check boxes for multiple products
- Select “Edit” from Bulk Actions dropdown
- Click Apply
- In Bulk Edit panel, find Shipping class dropdown
- Select desired class
- Click Update
Step 3: Configure Shipping Zones
WooCommerce → Settings → Shipping → Shipping Zones tab
- Ensure you are on Shipping → Shipping Zones tab
- Review existing zones or create new ones
- To add zone, click “Add shipping zone”
- Enter Zone name (e.g., “United States”)
- Select Zone regions:
- Choose countries from dropdown
- Add specific states if needed
- Enter postcodes for local zones
- Click “Add shipping method” button
- Select “Flat rate” from options
- Repeat adding methods as needed
- Click “Save changes”
Step 4: Configure Flat Rate with Shipping Class Costs
Shipping Zones → Click Zone → Edit Flat Rate Method
- Find the shipping zone you configured
- Hover over the Flat rate method
- Click Edit link that appears
- A popup window opens with settings
Configure Method Settings:
- Method Title: Enter what customers see (e.g., “Standard Shipping”)
- Tax Status: Choose Taxable or None
- Cost: Enter base rate for all orders
Configure Shipping Class Costs:
- Scroll to “Shipping class costs” section
- For each class you created, you will see a field
- Enter extra cost for that class:
- Heavy Items: 10
- Fragile Items: 5
- Oversized: 15
- These amounts ADD to the base rate
- Example: Base $5 + Heavy $10 = $15 total
Configure Calculation Type:
- Below class costs, find “Calculation type” dropdown
- Choose how multiple classes combine:
- Per class: Charge highest class cost only
- Per order: Charge base + all class costs
Save Changes:
- Click “Save changes” button
- Return to shipping zones list
- Verify method shows correct configuration
Step 5: Test Your Configuration
Your Store Frontend → Add Products to Cart → Checkout
- Open incognito browser window
- Add a product with no shipping class to cart
- Proceed to checkout
- Enter address from your test zone
- Verify base rate appears correctly
- Remove from cart
- Add a product from Heavy Items class
- Checkout with same address
- Verify base rate + heavy surcharge appears
- Remove from cart
- Add both product types together
- Verify combined rate calculates correctly
- Test multiple combinations
- Verify calculation type works as expected
Step 6: Advanced Configuration with Plugins
Flexible Shipping for WooCommerce:


Plugins → Add New → Search “Flexible Shipping”
- Install and activate plugin
- Go to WooCommerce → Settings → Shipping
- Edit your shipping zone
- Add new shipping method → Select “Flexible Shipping”
- Configure rules with formulas
Key Features:
- Weight-based calculations
- Cart total conditions
- Item count rules
- Shipping class combinations
- Mathematical formulas
Step 7: Weight-Based Shipping Configuration
For stores where weight matters most, use the Weight Based Shipping plugin .
Plugins → Add New → Search “Weight Based Shipping”
- Install and activate plugin
- Go to WooCommerce → Settings → Shipping
- Find new “Weight Based Shipping” section
- Configure tiered rates:
- 0-5 kg: $10
- 5-10 kg: $15
- 10-20 kg: $25
- Over 20 kg: $40
- Pro version adds shipping class support
- Set different rates per class
- Combine weight and class logic
Step 8: Combine Free and Paid Shipping
Offer free shipping on books but charge for electronics .
WooCommerce → Settings → Shipping → Shipping Classes
- Create two classes: “Free” and “Paid”
- Assign books to Free class
- Assign electronics to Paid class
Configure Flat Rate:
- Edit your shipping zone flat rate
- Set base cost to 0
- In shipping class costs:
- Free: 0
- Paid: 10
- Set calculation type to “Per class”
Troubleshooting Shipping Class Issues
Problems happen. Here is how to fix them.
Issue 1: Shipping Class Costs Not Appearing
Cause: Class not assigned to product. Flat rate not configured for class. Wrong calculation type.
Solution:
- Verify product has class assigned
- Check flat rate method for class cost entry
- Ensure cost value is entered correctly
- Test with single class product first
- Clear cache and retest
Issue 2: Wrong Rate Calculated
Cause: Calculation type misunderstanding. Overlapping class costs. Base rate incorrectly set.
Solution:
- Review calculation type (Per class vs Per order)
- Verify class cost amounts
- Check if base rate double-counts
- Test each class individually
- Use calculator to verify math
Issue 3: Free Shipping Not Applying
Cause: Free shipping class cost set to 0 but base rate applies. Minimum order not met. Wrong zone.
Solution:
- Set base rate to 0 if only class-based
- Verify free shipping class assigned to products
- Check if minimum order threshold exists
- Confirm correct shipping zone
Issue 4: Classes Show at Checkout
Cause: Plugin displaying class names. Custom code exposing internal data.
Solution: Shipping classes are internal only . Customers should never see them. Check if the shipping plugin shows class names. Disable that option if available.
Issue 5: Class Costs Not Combining Correctly
Cause: Calculation type mismatch. Customer expectations differ from logic.
Solution:
- Explain to customers how rates combine
- Consider changing calculation type
- Use “Per class” for simpler logic
- Test thoroughly before launching
Final Verdict
Shipping classes are not just an optional feature in WooCommerce; they are an essential tool for any store with a diverse product catalog. They allow you to move away from one-size-fits-all shipping rates and implement a strategy that is both fair to your customers and profitable for your business.
By grouping products with similar shipping needs, you ensure that the cost of shipping a small, lightweight item is not unfairly subsidizing the cost of shipping a large, heavy one. This precision protects your profit margins on high-cost shipments while keeping your prices competitive for smaller items, ultimately leading to a more sustainable and scalable ecommerce operation.
Setting up shipping classes requires an initial time investment to analyze your products and configure your zones, but the long-term benefits are undeniable. Once implemented, the system runs automatically, calculating accurate rates at checkout without any manual intervention.
This automation reduces the risk of human error, eliminates the guesswork for your customers, and builds trust through transparent pricing. Whether you need to handle fragile items, offer free shipping promotions, or manage oversized products, shipping classes give you the control to tailor your shipping strategy precisely to your business needs.
Have questions before starting with WooCommerce & WordPress? Get support here at WooHelpDesk.


