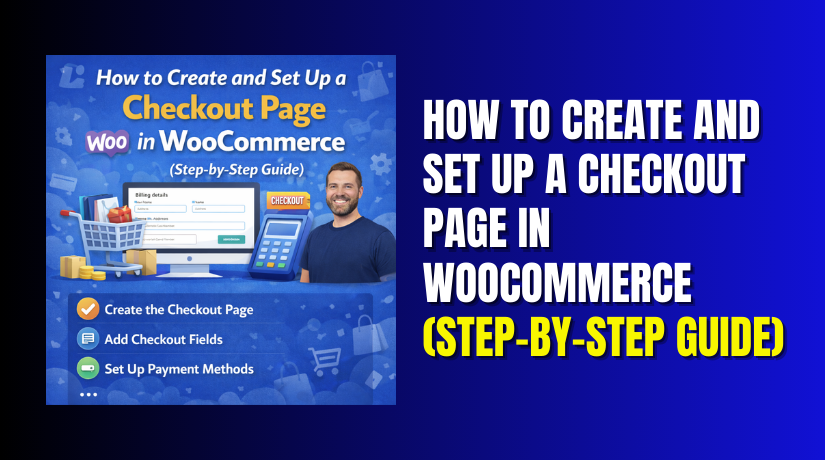
How to Create and Set Up a Checkout Page in WooCommerce (Step-by-Step Guide)
Table of Contents
- Introduction
- What Is the WooCommerce Checkout Page and How It Works
- Features of Using a Checkout Page in WooCommerce for Real Stores
- Basic Requirements for a Smooth WooCommerce Checkout Page Setup
- How to Create a Checkout Page in WooCommerce in the Right Way
- How to Set the Checkout Page in WooCommerce (Step by Step)
- Essential Checkout Settings You Must Configure for a Working Checkout
- Common Checkout Page Problems and Fixes You Can Try Quickly
- Conclusion
Introduction
Your checkout page is where visitors turn into paying customers. If the checkout feels confusing, people often leave without buying. This guide helps you fix that problem step by step. You will learn the WooCommerce checkout page setup from basics. You will also learn how to set up WooCommerce checkout correctly. We will cover what checkout is and why it matters. Later parts will show how to create a checkout page in WooCommerce. You will also learn WooCommerce checkout page settings for smooth orders.
What Is the WooCommerce Checkout Page and How It Works
The WooCommerce checkout page is the final step in buying. It collects customer details and confirms the order payment. Customers enter billing details like name, email, and address. If needed, they add a different shipping address too. The page shows order items, totals, shipping, and taxes. It also shows payment methods like COD, Stripe, or PayPal. When they click Place Order, WooCommerce creates the order. Then it sends emails to the customer and store owner. This is why clean WooCommerce checkout page settings are important. A broken checkout can stop payment and block new orders. Some stores also build a WooCommerce custom checkout page. That helps match brand style and reduce extra fields.
Features of Using a Checkout Page in WooCommerce for Real Stores
A clear checkout flow helps customers complete purchases faster
A proper checkout reduces steps and avoids confusing screens. Customers know what to fill and what to expect. This improves trust and helps increase completed orders.
Checkout supports billing, shipping, and totals in one place
WooCommerce calculates totals and shows the final payable amount. It can include shipping fees and taxes in that total. This keeps pricing clear and avoids last-minute surprises.
Checkout works with payment gateways for secure order payments
The checkout connects with gateways and handles payment properly. Customers can choose the method they trust the most. This makes your store feel safe and reliable.
Checkout supports coupons, discounts, and order notes when needed
Many stores offer coupons for deals and repeat customers. Checkout can apply coupons and update totals quickly. Customers can also add notes for delivery instructions.
Checkout supports guest buying or account-based buying options
You can allow guest checkout for faster buying. You can also offer account creation for repeat customers. Both options help you serve different buyer types easily.
Checkout keeps orders organized for tracking and support later
WooCommerce saves orders with customer data and item details. You can track payment status and delivery progress anytime. This helps support teams solve issues much faster.
Basic Requirements for a Smooth WooCommerce Checkout Page Setup
Before you create a checkout page in WooCommerce, check the basics first. These small checks prevent most checkout problems later. A clean WooCommerce checkout page setup always starts with stable settings. You also avoid errors while learning how to set up WooCommerce checkout.
Make sure WordPress and WooCommerce are installed and updated
Your WordPress version should be updated to a stable release. WooCommerce should also be updated to the latest stable version. Old versions can break checkout fields and payment options. Updates also improve security and fix common checkout bugs.
Confirm your site is using SSL for secure checkout pages
Checkout pages must load on HTTPS, not HTTP, always. SSL keeps customer data safe during billing and payment. Many gateways require SSL to show payment methods properly. Without SSL, buyers may see browser warnings and leave.
Add at least one test product to validate checkout flow
Create a simple product and set a price and stock. Add it to cart and move to checkout for testing. This helps confirm the checkout page is working end to end. It also helps check totals, taxes, and order emails.
Choose a WooCommerce-ready theme for clean checkout design
Your theme should support WooCommerce templates and blocks properly. Some themes change checkout layout and cause display issues. Use a trusted theme and avoid heavy custom changes first. Later, you can build a WooCommerce custom checkout page safely.
Set shipping zones if you sell physical products
Go to WooCommerce shipping and create shipping zones first. Add methods like flat rate, free shipping, or local pickup. Without zones, shipping may not show at checkout at all. This leads to the “no shipping options” error often.
Enable taxes only if your store needs tax collection
Decide if you must collect tax based on your region. Enable taxes in WooCommerce settings if required by law. Add basic tax rates so totals calculate correctly on checkout. Wrong tax rules can confuse buyers and reduce trust.
Activate at least one payment method before testing checkout
Open payment settings and enable one gateway for testing. You can use Cash on Delivery for quick testing. For Stripe or PayPal, finish setup and confirm it is enabled. If no gateway is active, checkout cannot place orders.
Check key WooCommerce checkout page settings for default pages
Go to WooCommerce settings and open the Advanced tab. Confirm Cart and Checkout pages are assigned correctly there. Wrong page mapping breaks checkout and may redirect to cart. This step supports proper WooCommerce checkout page setup.
Clear cache if you use a cache plugin or server cache
Cache can show old checkout pages and old scripts. Clear plugin cache and server cache after any checkout change. If you use CDN, purge the CDN cache as well. This prevents missing buttons and broken checkout behavior.
How to Create a Checkout Page in WooCommerce in the Right Way
A checkout page is usually created during WooCommerce installation. Still, many sites need manual creation after changes. This section covers each safe method for WooCommerce checkout page setup. Follow these steps to avoid broken checkout forms or wrong redirects.
Step 1: Check if WooCommerce already created the Checkout page
- Go to the WordPress Dashboard and open the Pages list.
- Search for a page named “Checkout” in the list.
- Open the page and confirm checkout content is present.
Step 2: Confirm the page contains the correct checkout content
- If you use blocks, look for the Checkout block section.
- If you use a classic editor, look for the checkout shortcode.
- The correct shortcode is: [woocommerce_checkout] inside content.
Step 3: Keep the Checkout page published and not private
- Make sure the page status is Published, not Draft.
- Do not password protect the checkout page at all. This avoids checkout errors for logged-out customers.
Step 4: Create a new Checkout page if it is missing
- Go to Pages and click Add New in WordPress.
- Set the page title as “Checkout” for easy mapping.
- Keep the page template default to avoid layout issues.
Step 5: Add the Checkout block for modern WooCommerce stores
- Open the block inserter and search for “Checkout” block.
- Insert the Checkout block and keep default sections intact. Save the page and open it in a new tab.
Step 6: Use the shortcode method if blocks are unavailable


- Open the Checkout page editor and add the shortcode.
- Paste this inside the content area: [woocommerce_checkout].
- Update the page and refresh the checkout page URL.
Step 7: Avoid page builders until checkout is fully working
- Many builders add scripts that conflict with checkout behavior.
- First confirm orders can be placed without any errors.
- Later, build a WooCommerce custom checkout page carefully.
Step 8: Restore WooCommerce default pages if checkout is broken
- Go to WooCommerce and open Status from the system menu.
- Open the Tools tab and find the “Create default pages” tool.
- Run the tool and let WooCommerce recreate required pages.
Step 9: Remove duplicate checkout pages after restoration
- Open Pages and search for multiple “Checkout” pages again.
- Keep the page that has correct checkout content only. Delete extra pages to avoid wrong checkout page mapping.
Step 10: Test the checkout page with a real cart flow
- Add a test product to cart and open the cart page.
- Click “Proceed to checkout” and confirm checkout loads properly.
- Place a test order using a test gateway or COD.
You have now completed how to create a checkout page in WooCommerce. Next, you must assign it inside WooCommerce checkout page settings. This ensures customers land on the correct checkout page.
How to Set the Checkout Page in WooCommerce (Step by Step)
Creating the page is only the first half of setup. Now you must map it inside WooCommerce settings correctly. This completes how to set up WooCommerce checkout without redirects.
Step 1: Open WooCommerce settings from your WordPress dashboard
- Go to WooCommerce and click Settings in the menu.
- Open the Advanced tab for page assignments. This area controls core pages like cart and checkout.
Step 2: Assign the correct Checkout page in settings
- Find the “Checkout page” dropdown option in Advanced settings.
Select the page named “Checkout” from the dropdown list. - Click Save changes to store the new selection.
Step 3: Confirm the Cart page is also mapped correctly
- Find the “Cart page” dropdown in the same section.
- Select the page named “Cart” from the dropdown list.
- Wrong cart mapping often breaks checkout redirection behavior.
Step 4: Confirm My Account page if you use logins
- Check the “My account page” dropdown in Advanced settings.
- Select the correct account page for login and order access. This prevents login issues during checkout for returning buyers.
Step 5: Clear cache after changing checkout page settings
- Purge your cache plugin cache after saving the settings. If you use server cache, clear it from the hosting panel.
- Cached pages can show old checkout settings and confuse testing.
Step 6: Test if the checkout button goes to the right page
- Add a product to the cart and open the cart page.
- Click the checkout button and confirm it opens the checkout. If it redirects to cart, check page mapping again.
Step 7: Fix common redirect causes before deeper changes
- Disable one plugin at a time and test checkout again.
- Switch to a default theme and test the checkout flow. This helps identify conflicts affecting WooCommerce checkout page settings.
Your WooCommerce checkout page setup is now mapped correctly. Customers can reach the checkout from the cart without wrong redirects. Next, you can configure payment, shipping, and taxes safely.
Essential Checkout Settings You Must Configure for a Working Checkout
After WooCommerce checkout page setup, configure key checkout settings next. These settings control payments, shipping, taxes, and buyer flow. Wrong settings can block orders or show missing payment options. Use these steps before launching your store checkout publicly.
Payment Settings: Enable Gateways and Test Orders Properly
Go to WooCommerce and open Settings, then the Payments section. Enable at least one gateway for real customer checkout use. Choose options like Cash on Delivery, Stripe, or PayPal. Open each gateway and complete required setup details carefully. Turn on test mode first for safe order testing. Place a test order and confirm payment flow works correctly. Disable test mode only after final checks are done. If gateways do not show, check currency and country rules. Some gateways depend on location and store currency settings. This is a core part of WooCommerce checkout page settings.
Shipping Settings: Show Correct Shipping Rates on Checkout Page
Open WooCommerce Settings and go to Shipping to configure zones. Create shipping zones based on countries, states, or zip rules. Add shipping methods like Flat rate, Free shipping, or Local pickup. Set costs, taxes, and rules based on your store needs. Save changes and test shipping by changing addresses at checkout. If shipping does not appear, your zone may not match address. Also confirm products are marked as shippable where needed. If items are virtual, shipping will not show, normally. This keeps WooCommerce checkout page setup working for physical orders.
Tax Settings: Enable Taxes Only When You Really Need Them
Go to WooCommerce Settings and open the General tab first. Enable taxes if your business must charge taxes legally. Then open the Tax tab and add basic tax rates. Choose whether prices include tax or show tax separately. Test checkout totals to confirm taxes calculate properly. Wrong tax rules can cause pricing confusion and cart drop-offs. Keep tax rules simple, then improve once store is stable. Taxes are part of WooCommerce checkout page settings for many stores.
Checkout Experience Settings: Guest Checkout, Accounts, Coupons, Notes
Go to WooCommerce Settings and open Accounts and Privacy. Decide if you want guest checkout enabled for faster buying. Guest checkout often improves conversions for first-time buyers. You can also allow account creation during checkout for repeat orders. Next, confirm coupon settings in WooCommerce general settings area. Enable coupons if you plan to offer discount codes often. Decide if you want order notes shown on checkout page. Order notes help for delivery details and custom requests. Remove it if you want a faster checkout flow. These choices also impact your WooCommerce custom checkout page design.
Common Checkout Page Problems and Fixes You Can Try Quickly
Checkout issues are common, but most fixes are simple. Start with the safest checks before deeper debugging. Always test after each fix to confirm what worked. This saves time and avoids new errors.
Checkout Page Not Showing or Showing a Blank Screen
First, open Pages and confirm Checkout page is published. Open the page content and confirm Checkout block exists. If using shortcode, confirm [woocommerce_checkout] is present. Clear cache from plugins, server, and any CDN too. Then disable one plugin at a time to find conflicts. Switch to a default theme to test if theme breaks checkout. If checkout loads on default theme, theme is the issue.
Checkout Redirects to Cart Page Again and Again
This usually happens when checkout page mapping is wrong. Open WooCommerce settings and check Advanced page mapping. Select correct Cart and Checkout pages and save changes. Clear cache and test again with a new cart session. Also check if your site forces login before checkout. If so, confirm My Account page is set correctly too. Wrong pages break WooCommerce checkout page setup badly.
Payment Methods Not Showing on Checkout Page
Go to WooCommerce Payments and confirm gateways are enabled. Open gateway settings and check currency and country restrictions. Confirm SSL is active because some gateways require it. Disable checkout style plugins to test gateway display again. Also check if cart total is zero due to coupons. Some gateways hide when total becomes zero automatically.
Shipping Options Missing or “No Shipping Options Available” Error
Open WooCommerce Shipping and review zones carefully. Your customer address must match a shipping zone rule. Add a fallback zone like “Rest of the world” if needed. Confirm shipping method is added inside the matching zone. Also confirm products are not set as virtual mistakenly. Test again by changing address on checkout page.
Coupon Not Working on Checkout or Totals Not Updating
Confirm coupons are enabled in WooCommerce general settings. Check coupon rules like minimum spend and expiry dates. Clear cache because cached totals can block updates sometimes. Disable cart and checkout optimization plugins for testing. Test coupons with one simple product and no other rules.
Checkout Button Not Clickable or Checkout Form Not Loading
This often happens due to script or AJAX errors. Open browser inspect and check Console errors quickly. Disable minify features in cache plugins for testing. Exclude checkout pages from cache and minify settings. Update WooCommerce, theme, and plugins to stable versions. If the issue remains, a plugin conflict is very likely.
Checkout Page Is Very Slow and Customers Leave Quickly
Speed issues can come from heavy plugins and slow hosting. Exclude checkout from caching and heavy script delays. Remove unused plugins and disable extra tracking scripts on checkout. Optimize images and use a lighter theme for better performance. Check your server resources and PHP version compatibility too.
Conclusion
Now you know how to set up WooCommerce checkout correctly. You learned the key WooCommerce checkout page settings needed. You also learned how to fix common checkout issues fast. Test your checkout after every major change you make. A clean checkout improves trust and increases completed orders. If you want expert help, choose WooHelpDesk today. We can fix checkout issues and improve your checkout performance.


