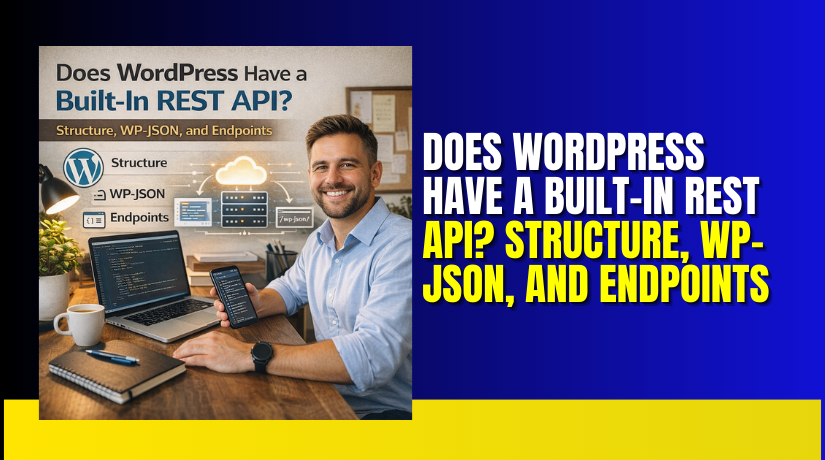
Does WordPress Have a Built-In REST API? Structure, WP-JSON, and Endpoints
Table of Contents
- Introduction
- Quick Answer: Yes—WordPress Includes a REST API by Default
- What the WordPress REST API Actually Does
- The WordPress REST API Structure: How Requests Are Organized
- How Response Data Is Returned (JSON Basics)
- WP-JSON Explained: The REST API “Entry Point”
- What You Usually See When You Open WP-JSON
- How to Check If WP-JSON Is Working on Your Site
- WordPress REST API Endpoints: Common Core Endpoints You’ll Use
- How to Test Endpoints Without Feeling Overwhelmed
- Authentication: How WordPress Decides Who Can Do What
- Common Authentication Methods You Will See
- Creating Custom Endpoints (When and Why)
- Security and Performance Notes for Real-World Sites
- WordPress REST API vs WooCommerce REST API
- Conclusion
Introduction
Modern websites often connect with apps, tools, and external services. Many site owners want faster frontends, better integrations, and smoother automation. An API helps WordPress share data with other systems easily. It also helps developers build headless or hybrid website setups. In this guide, you will learn the basics in simple words. You will also understand WP-JSON, structure, and endpoints in later parts.
Quick Answer: Yes—WordPress Includes a REST API by Default
Many beginners ask, does wordpress have a rest api ready. Yes, WordPress includes it by default in core. This wordpress rest api built in feature works on most sites. You usually do not need a plugin to start. The REST API lets WordPress send and receive data. It uses a standard JSON format that tools can read. This makes WordPress easier to connect with modern platforms.
Here are practical ways the built-in REST API helps you:
- Show blog posts inside a mobile app or web app
- Load content on React pages without full page reloads
- Sync posts and pages with a CRM or marketing tool
- Publish content from automation tools using secure access
- Build custom dashboards for teams managing many sites
One important thing to understand is access control. Some requests can be public and read-only. Other requests can change data and need login permissions. This keeps your site safer while still staying flexible.
What the WordPress REST API Actually Does
The REST API is a clean way to request WordPress data. Another system sends a request to a WordPress URL. WordPress replies with a JSON response containing requested details. This can include posts, pages, media, categories, and more. It also supports writing data when permission is granted.
This is useful for many real projects, including these:
- Headless sites that use WordPress only for content
- Mobile apps that need fresh content from your website
- Integrations that move data between your site and tools
- Automation that creates or updates content without manual work
The WordPress REST API Structure: How Requests Are Organized
To use the REST API, you must understand its layout. This layout is the wordpress rest api structure you will see everywhere. It explains how WordPress builds API URLs and routes. Once you know the structure, testing becomes much easier. You can also debug issues faster during development.
The REST API works through standard web requests. Your app sends a request to a specific URL. WordPress returns a JSON response with the requested data. Each URL follows a predictable pattern and naming style. This consistency makes integrations more stable over time.
Base URL and Route Pattern
Every REST API request starts with your site’s domain name. After that, WordPress uses a fixed base path. This base path is usually the REST “entry path” on your site. After the base path, you will see a namespace. Then you will see the route for the resource.
In simple terms, the pattern looks like this:
- Domain → your website address
- Base path → the REST API access path
- Namespace → the API group and version
- Route → the specific data you want
So the structure is not random at all. It is built like a folder system. You move from broad to specific in each step. This helps WordPress keep thousands of routes organized.
Here is how to think about it in a practical way:
- Domain tells where the request should go
- Base path tells WordPress it is an API request
- Namespace tells which API set should answer
- Route tells which resource you want to use
This pattern stays consistent across most WordPress sites. That is why learning it once saves a lot of time.
Route vs Endpoint: What’s the Real Difference?
Many people mix up “route” and “endpoint” in WordPress. They are related, but they are not the same. A route is the path pattern that WordPress registers. An endpoint is the full URL you actually call.
Think of it like this:
- A route is like a template path
- An endpoint is the real URL you open
For example, a route may represent a post resource. An endpoint becomes the full URL to fetch those posts. When you call that URL, you hit the endpoint. WordPress then matches it to the route behind the scenes.
This difference matters during debugging and customization. Developers register routes inside code. Users and tools call endpoints in real requests.
Namespaces and Versions
Namespaces are one of the most important parts of REST structure. A namespace groups related routes together. It also helps WordPress manage versions safely. Versioning prevents breaking changes for existing apps.
The most common namespace you will see is:
- wp/v2
This namespace holds many core WordPress resources. It includes posts, pages, categories, and media. Many plugins also add their own namespaces. WooCommerce does this too for store resources.
Namespaces help with these benefits:
- Keep routes organized and easy to find
- Avoid conflicts between plugins and core routes
- Support multiple versions without breaking older apps
- Make long-term maintenance easier for large projects
Versioning also supports clean upgrades in the future. If a new API version is released, apps can migrate slowly. They do not need instant changes on release day.
How WordPress Maps Requests Internally
When WordPress receives a REST request, it follows a process. It checks the base path first to confirm REST mode. Then it looks at the namespace and route. After that, it chooses the right handler for the request. Finally, it returns a JSON response.
This internal flow usually looks like this:
- WordPress receives the URL request
- It detects the REST API base path
- It reads the namespace and route
- It matches the request to a registered route
- It checks permissions for protected actions
- It returns a JSON response with data or an error
This is why namespaces and routes must be correct. If one part is wrong, you may get errors. Common errors include 404, 401, or 403 responses. In later parts, you will learn what those mean.
How Response Data Is Returned (JSON Basics)
WordPress REST API responses are returned in JSON format. JSON is easy for tools and apps to read quickly. It looks like structured data using keys and values. You do not need advanced skills to understand basic JSON. You just need to know what to look for.
A typical response can include many useful fields. These fields help you display content in apps and frontends. They also help you confirm your request worked correctly.
Here are common fields you may see in responses:
- id for the unique item number
- date for when the content was created
- slug for the URL-friendly name
- status like publish, draft, or private
- link for the public page URL
- title and content for the actual text
Sometimes, responses also include extra details. You may see author data, media details, or taxonomy values. Some responses also include embedded data for convenience. This depends on how the request was made.
WP-JSON Explained: The REST API “Entry Point”
When you hear WordPress REST API, you will see WP-JSON often. WP-JSON is the doorway to WordPress REST features. It is a URL path that WordPress uses for API access. When you open it, WordPress returns a JSON response. That response helps you understand what the site exposes.
The wp json rest api path is usually available by default. It is designed to be predictable and easy to find. Most WordPress tools and integrations rely on it. Many developers use it to confirm REST support quickly. If it works, the REST API is usually working too.
WP-JSON is helpful because it supports discovery. Discovery means you can view available routes and namespaces. You do not need to guess which endpoints exist. WordPress can list them for you in a structured format. This makes testing and development much faster.
Here is what WP-JSON usually helps you confirm:
- REST API is active on your WordPress site
- Core namespaces like wp/v2 exist and respond
- Plugin namespaces may also be available
- Routes are registered and ready for requests
- The site can return JSON responses correctly
WP-JSON also helps with debugging when something fails. If a plugin blocks REST, WP-JSON may not load. If security rules break requests, WP-JSON can show errors. This is why it is often the first thing to test.
What You Usually See When You Open WP-JSON
When you visit the WP-JSON entry path, you see structured data. It often includes site details and route listings. You may also see namespaces and link relations. The goal is to help apps understand your API surface.
Common items you may notice in the response include:
- Site name and description details
- A list of namespaces available on the site
- A list of routes grouped under namespaces
- Basic metadata about each route
- Link references to API documentation paths
Do not worry if it looks large and complex. You do not need to read every field. You only need to confirm it loads properly. Then you can focus on specific routes later.
Also note that WP-JSON itself is not a single endpoint for posts. It is more like a directory of what exists. The real data requests happen under namespaces and routes. That is where you fetch posts, pages, and media.
How to Check If WP-JSON Is Working on Your Site
Testing WP-JSON is simple and fast for beginners. You do not need special tools for a basic check. A browser is enough for the first test. If it loads, your REST system is responding.
Step 1: Open the WP-JSON Path in Your Browser
Go to your website and add the WP-JSON path. When it works, you should see JSON data on screen. It may look like plain text, and that is normal. Some browsers format it nicely and show a tree view.
A healthy WP-JSON response usually means:
- The page loads without redirect loops
- You see JSON output, not an HTML error page
- The response is not blank or blocked
- The output includes namespaces and routes
If you see a login page instead, that is a sign. It may mean access is restricted by settings. It may also be forced by a security rule.
Step 2: Test a Public Route After WP-JSON Loads
Once WP-JSON works, test a public route next. Public routes usually allow read access without login. This confirms that routes under namespaces respond properly. It also confirms JSON responses return usable data.
You can look for these signs in the response:
- A list of items like posts or pages
- Fields like id, date, title, and link
- A clean JSON format without HTML content
- Status code success in your browser tools
Step 3: Know the Most Common Reasons WP-JSON Fails


Sometimes WP-JSON does not work on a site. This can happen due to settings or server rules. It can also happen due to plugins blocking REST access. Many issues are fixable with basic checks.
Here are common reasons WP-JSON can fail:
- Security plugins blocking REST requests
- Server firewall rules blocking JSON responses
- Permalink settings not saved after a migration
- Caching or CDN rules rewriting API URLs
- Wrong redirect rules added in the .htaccess file
If WP-JSON shows a 404, do not panic. It may only need permalink refresh. If it shows 403, access may be blocked. If it shows 401, authentication may be required. These signals help you narrow the real cause quickly.
WordPress REST API Endpoints: Common Core Endpoints You’ll Use
Once WP-JSON works, you can start using real endpoints. Endpoints are the exact URLs you call for data. They return clean JSON responses for your requests. This is where most REST work happens daily. The wordpress rest api endpoints system is designed for consistency. That consistency helps developers build stable integrations and apps.
Core endpoints cover the most common WordPress content types. They also support taxonomies like categories and tags. Media endpoints help you manage uploads through API calls. Some endpoints are public for reading content. Others require permissions for editing or deleting data.
Read-Only Examples Using GET Requests
GET requests are the safest way to start testing. They only fetch data from your website. They do not change anything on the site. Most public WordPress sites allow basic GET access. This is useful for headless sites and public apps.
Common read-only resources you can request include:
- Posts for blog content and news pages
- Pages for static content like About or Contact
- Categories for organizing posts by topic
- Tags for grouping content by keyword themes
- Media for images, PDFs, and other uploads
GET responses are usually easy to understand quickly. You will often see an array of items in JSON. Each item has fields like id, date, link, and title. This makes it simple to show content in a custom frontend.
Helpful Query Parameters for Better Results
Endpoints support parameters that control what you receive. These parameters help you filter, search, and paginate data. They also help you avoid loading too much at once. This improves speed and reduces server load.
Here are useful parameters you may use often:
- per_page to control how many items return
- page to move through paginated results
- search to find posts by keyword quickly
- orderby to sort by date, title, or other fields
- order to choose ascending or descending output
These parameters are very helpful for large sites. They keep results clean and easy to handle. They also make your app feel faster to users.
Write Actions Using POST, PUT, and DELETE Requests
Write requests change content on your site. They can create, update, or delete data. Because of that, WordPress protects these actions. You must authenticate before WordPress accepts the request. Without permission, you will see errors like 401 or 403.
These methods are commonly used for write actions:
- POST to create a new item, like a post
- PUT to update an existing item on the site
- DELETE to remove an item if permissions allow
Write actions are powerful for automation and tools. They support publishing workflows and content updates. They also help external systems sync data reliably. However, you must use them carefully and securely. Even a small mistake can change live content quickly.
How to Test Endpoints Without Feeling Overwhelmed
Testing endpoints does not need complex tools at first. You can start simple and grow from there. The goal is to confirm responses and spot errors fast. Once your tests work, you can move to advanced calls.
Option 1: Use Your Browser for Simple GET Tests
A browser is perfect for basic read-only checks. You paste an endpoint URL and load it. If it works, you will see JSON data on screen. Many browsers also format JSON for easier reading. This makes quick testing very friendly for beginners.
Use the browser to confirm these things:
- The endpoint returns JSON, not an HTML error page
- The response includes expected fields like id and title
- Pagination works when you change per_page or page
- Search works when you add a search parameter
Option 2: Use Postman or Insomnia for Clear Testing
Postman and Insomnia are popular testing tools. They help you send requests with full control. You can set method type like GET or POST. You can also add headers and authentication values. This is useful for write actions and secure routes.
These tools help you:
- See response codes like 200, 401, 403, and 404
- Inspect response headers and JSON body in one screen
- Save requests for reuse during development
- Test authenticated calls without coding first
Option 3: Use curl for Quick Command Line Checks
curl is useful for quick checks from a terminal. It is fast and lightweight for testing. Many developers use it during debugging sessions. You can test GET endpoints in seconds with one command. For beginners, keep curl optional and simple.
Authentication: How WordPress Decides Who Can Do What
Public REST requests can work without any login. These requests usually read published content from your site. But write requests need identity checks for safety. WordPress must confirm who is making the request. It also checks what that user is allowed to do. This keeps your content protected from unwanted changes.
Authentication is important for actions like these:
- Creating new posts, pages, or custom content items
- Updating titles, content, status, or featured images
- Uploading or editing media files through API calls
- Deleting items from the database using REST requests
- Managing private data that should not be public
If you try these actions without access, you get errors. The most common ones are 401 and 403 responses. A 401 usually means you are not authenticated. A 403 usually means you are authenticated, but blocked.
Public vs Private Requests
It helps to split REST requests into two clear groups. This keeps your testing simple and predictable.
Public requests usually include:
- Reading published posts and public pages
- Fetching categories, tags, and basic media info
- Searching content using public query parameters
Private requests usually include:
- Creating or updating posts and pages
- Uploading media or changing attachment data
- Accessing draft or private content
WordPress controls access using roles and capabilities. An Administrator can do almost everything on the site. An Editor can publish and manage most content. An Author can publish their own posts. These rules apply to REST requests too.
Common Authentication Methods You Will See
WordPress supports different authentication methods for different needs. The best choice depends on how your app connects.
Cookie + nonce authentication is common inside WordPress. It is used when a logged-in user performs actions in the admin. It works well for admin dashboards and internal tools. It is also common for custom blocks and editor features.
Application Passwords are great for external integrations. You can create one in the user profile settings. Then you use it for secure API requests. It is simple and works well for many business tools.
Some sites also use plugin-based authentication options. These include JWT and OAuth styles for custom apps. These setups are useful for large systems and mobile apps. They also help when you need token-based access.
Creating Custom Endpoints (When and Why)
Core endpoints cover many common WordPress needs. But sometimes you need more control over the output. You may need a custom response format for your app. You may also need business logic inside the API layer. That is when custom endpoints become useful.
Custom endpoints are helpful for tasks like:
- Returning a custom product list with extra calculations
- Sending only selected fields for a faster frontend
- Combining multiple data sources into one clean response
- Supporting custom forms and special order request flows
- Serving custom post type data in a controlled way
A safe custom endpoint usually follows a clean workflow. WordPress registers the route in a namespace you control. Then it validates request inputs before doing anything. It checks permissions before returning sensitive data. Finally, it returns a clean JSON response to the caller.
When building custom endpoints, always focus on safety first. A single open route can expose private site information. Permission checks should never be skipped for convenience.
Security and Performance Notes for Real-World Sites
REST access is powerful, so security must be a priority. Do not expose private fields in public responses. Protect routes that should not be publicly available. Also check input carefully before saving anything.
Follow these basic safety rules:
- Validate and sanitize every input value from requests
- Add permission checks for any write or private access
- Avoid returning hidden user data in public responses
- Limit data size to keep responses fast and clean
- Use caching for heavy read endpoints when possible
Performance matters more on large traffic sites. Big JSON responses can slow down mobile users quickly. Smaller responses make apps faster and easier to maintain.
WordPress REST API vs WooCommerce REST API
Both APIs use the same WordPress REST foundation. Both usually run under the /wp-json/ path. The difference is the data they expose. WordPress focuses on content like posts and pages. WooCommerce focuses on store data like products and orders.
Use WordPress REST endpoints when you need site content. Use WooCommerce endpoints when you need store operations. This keeps your integration clean and predictable.
Conclusion
WordPress includes a REST API in core by default. It helps your site share data with apps quickly. You can use it for headless sites and modern frontends. You can also connect WordPress with CRMs and automation tools. The key is understanding structure, WP-JSON, and endpoint behavior. Always secure write requests with proper authentication methods. Also keep responses light for better speed and stability. If you want expert help with REST API setup, testing, or custom endpoints, WooHelpDesk is ready to assist. We can review your goals and build a safe solution. We can also fix REST API errors and blocking issues. Reach out to WooHelpDesk and get reliable WordPress support.


