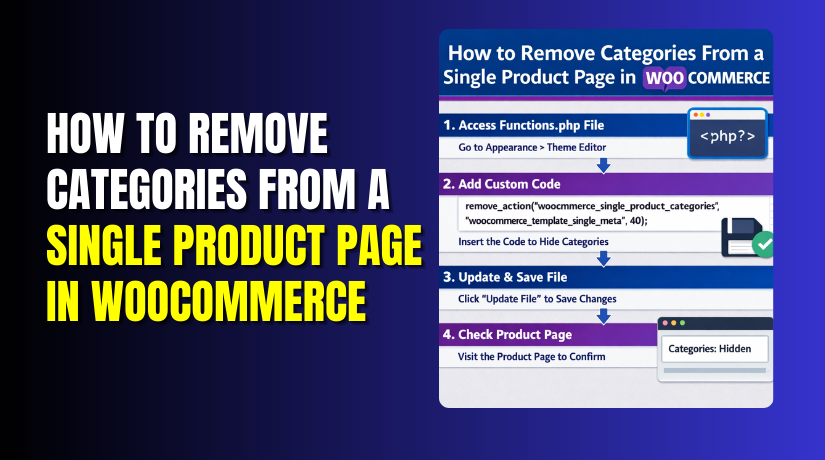
How to Remove Categories From a Single Product Page in WooCommerce?
Table of Contents
- Introduction
- Where Categories Show on a Single Product Page?
- Why to Remove Categories From a Single Product Page in WooCommerce?
- How to Remove Categories From a Single Product Page in WooCommerce?
- Final Verdict
Introduction
WooCommerce shows product categories on most single product pages. These categories usually appear near the SKU and tags section. They often show under the “Product meta” area on pages. Many store owners want a cleaner and simpler product layout. They also want better control over what visitors see. That is where WooCommerce single product page customization becomes useful.
A category link can be helpful for browsing and internal linking. But it is not always the best choice for conversions. Some stores use categories only for backend organization purposes. Some stores use categories that look confusing to shoppers. Some stores use many categories for filtering and sorting only. In those cases, category links can feel like clutter.
When you hide a category on WooCommerce product page, you change what customers focus on. You reduce distractions near the add to cart button. You also reduce extra links that pull shoppers away. This guide explains why and how to do it properly. It also explains safe methods that do not break your theme.
Before you change anything, decide what you really need. Do you want to remove categories for all products? Do you want to remove categories for only one product? Do you want to hide it visually, but keep it in code? Each goal needs a different method for best results.
This guide is written in simple steps for real store owners. Each part explains methods with clear action points. You will learn fast solutions and permanent solutions too. You will also learn safe testing steps before going live.
Where Categories Show on a Single Product Page?
Most WooCommerce themes display categories inside the product summary. This area is near the product title and price section. The category line often appears with SKU and tags. It usually looks like “Category: Clothing” or similar text.
Categories can also appear in other parts of the product page. Some themes show categories near breadcrumbs at the top. Some show categories inside a sidebar widget too. Some page builders show categories in custom meta blocks. So you must confirm where categories appear in your theme.
Common places categories appear on product pages:
- Product meta area near SKU and tags. This is the most common location.
- Breadcrumb navigation links at the page top. Many themes include category paths there.
- Sidebar widgets showing product categories list. This depends on the theme layout.
- Custom template blocks created by builders or themes. Elementor templates often do this.
Each place can require a different removal method. That is why planning matters before you edit files.
Why to Remove Categories From a Single Product Page in WooCommerce?
There are many valid reasons to remove category displays. The reason depends on your store type and design goals. Some reasons are about user experience and layout. Some reasons are about marketing and conversion focus. Some reasons are about keeping taxonomy for backend only.
Below are common reasons store owners choose to do this. Each point includes what it improves for your product page. This section also supports your decision for a clean setup.
1. Cleaner Product Page Layout
Product pages should feel focused and easy to scan. Category lines add extra text near purchase decisions. That small text can create visual noise for buyers. Removing it can make the page look more premium.
- Less clutter near important purchase details. Customers focus on price and add to cart area.
- Cleaner spacing and stronger page hierarchy. The page looks more intentional and professional.
- Better mobile layout with fewer stacked meta lines. Mobile pages become easier to scroll and read.
2. Better Conversion Focus
Every extra link on a product page can reduce conversions. Category links can pull users away from the product. Some visitors click the category and start browsing again. That often delays the purchase and reduces checkout completion.
- Fewer exit points from the product page. Visitors stay focused on the current product.
- Stronger attention on product value and benefits. Less distraction improves purchase intent.
- More control over where users go next. You can guide them with upsells instead.
3. Categories Are For Backend Organization Only
Many stores create categories for admin sorting and reporting. They are not meant for customers to browse directly. Some categories may have internal names or codes. Those labels can confuse shoppers and reduce trust.
- Avoid showing internal category names to customers. Customers see only customer-friendly content.
- Keep your taxonomy flexible without design pressure. You can reorganize without front-end impact.
- Support complex catalogs without confusing buyers. Customers see a clean product view.
4. Avoid Duplicate Navigation With Breadcrumbs
Some themes show breadcrumbs with categories already included. Then the product meta shows categories again below. This creates repeated navigation links on one page. Repetition can look messy and unplanned.
- Reduce repeated category links on one page. The layout becomes more compact.
- Keep breadcrumbs as the main navigation indicator. Customers still understand product placement.
- Avoid confusing users with multiple category areas. Fewer elements improves clarity.
5. Better Control Over SEO Linking Structure
Category links create internal links from product pages to category archives. That can be good, but not always desired. Some stores want products to lead users to related products sections. Some stores want stronger linking to collections pages instead.
- Control where internal link equity flows from products. You can guide links more strategically.
- Avoid pushing shoppers to weak category pages. Weak pages can reduce overall experience quality.
- Use better internal linking methods like related products. That keeps users shopping longer.
6. Reduce Confusion When Products Have Many Categories
Some products belong to multiple categories for filtering reasons. Then WooCommerce shows a long list of categories. This list can look messy and hard to understand. It can also create too many links in one area.
- Remove long category lists that distract buyers. The product page feels cleaner immediately.
- Prevent confusing category combinations from showing. Customers see only product-related information.
- Keep category logic for filters, not for display. Filters still work on shop pages.
7. Protect Your Catalog Strategy
Some stores do not want shoppers to browse categories easily. They prefer guiding users through search and landing pages. They may use paid campaigns with specific product targeting. Category links can break that funnel flow.
- Keep visitors inside the intended landing page journey. Funnel flow stays consistent for campaigns.
- Reduce browsing behavior that delays conversions. Faster decisions can improve revenue.
- Support curated collections instead of open category browsing. Collections can be more persuasive.
How to Remove Categories From a Single Product Page in WooCommerce?
Now that we understand the reasons for removing categories and the potential benefits, let’s dive into how to remove categories from a single product page in WooCommerce. The process is straightforward, and there are a few methods you can choose from, depending on your preferences. We will cover methods that are simple, fast, and provide lasting results.
In this part, we will explore how to hide product categories in WooCommerce using CSS, code snippets, and more advanced techniques. Follow these steps to ensure that categories are removed without affecting the functionality of your WooCommerce store.
1. Method A: Hide Categories Using CSS
One of the quickest and safest ways to hide categories is by using custom CSS. This method doesn’t involve changing any core theme files, which means it is a safer option for beginners. It’s also easy to undo if you decide to show the categories again later.
- Go to WordPress Dashboard
- Navigate to the Appearance tab → Customize.
- Access Additional CSS Section
- In the customizer, scroll down to the Additional CSS
- Add Custom CSS Code
Paste the following CSS code into the box:
.single-product .product_meta .posted_in {
display: none;


}
- This will hide the categories on single product pages.
- Publish Changes
- After adding the code, click Publish to apply the changes to your site.
2. Method B: Remove Categories Using a Code Snippet
If you want to remove categories permanently from the single product page (instead of just hiding them), using a code snippet in your theme’s functions.php file is a great solution. This method fully removes the category output, so it won’t show in the page code.
- Go to WordPress Dashboard
- Navigate to Appearance → Theme Editor.
- Access the Functions File
- From the right-hand side, locate the functions.php file under your active theme.
- Add Code Snippet
Copy and paste the following code into the file:
remove_action( ‘woocommerce_single_product_summary’, ‘woocommerce_template_single_meta’, 40 );
- This code removes the product categories from the product meta section.
- Save Changes
- After adding the snippet, click Update File to save the changes.
3. Method C: Remove Categories for Specific Products
Sometimes, you may want to remove categories from only specific product pages, not all of them. This method requires a more tailored approach using conditional logic. For example, you might want to remove categories from only the products in a specific category, product type, or based on other criteria.
- Go to WordPress Dashboard
- Navigate to Appearance → Theme Editor.
- Access the Functions File
- From the right-hand side, select functions.php.
- Add Conditional Code Snippet
Add the following snippet to remove categories from specific products based on product IDs or categories:
function remove_categories_specific_products() {
if ( is_product( array( 123, 456 ) ) ) { // Replace 123, 456 with your product IDs
remove_action( ‘woocommerce_single_product_summary’, ‘woocommerce_template_single_meta’, 40 );
}
}
add_action( ‘template_redirect’, ‘remove_categories_specific_products’ );
- In this example, replace 123 and 456 with the product IDs of the products you want to remove categories from.
- Save Changes
- After pasting the code, click Update File to save your changes
4. Method D: Use a Page Builder for Custom Templates
If you are using a page builder like Elementor, you can remove categories visually using custom product templates. This method gives you full control over your product page layout without modifying code.
Step-by-Step Guide:
- Install and Activate Elementor (Pro version recommended)
- Go to Plugins → Add New and search for Elementor.
- Install and activate the plugin if it’s not already installed.
- Create a New Product Template
- Navigate to Templates → Add New and select Single Product as the template type.
- Design your template using Elementor, and add elements like product title, description, price, and images.
- Remove Category Widget
- Simply do not add the product category widget to the template layout.
- This ensures that the product categories will not display on this custom-designed product page.
- Publish Your Template
- After finishing the design, click Publish and assign the template to the products you want.
Final Verdict
Choosing the right method to remove categories from a WooCommerce product page depends on your store’s needs and the level of customization you desire. For those who want a quick solution without altering code, the CSS method is the fastest and easiest. It allows you to hide the category display in a matter of minutes without touching core files.
However, while this method is effective for simple changes, it does not completely remove the categories from the backend, which could still affect SEO or visibility in some cases. It’s best for temporary or visual fixes.
For store owners looking for a more permanent and cleaner solution, using a code snippet to remove categories is the ideal option. This approach ensures categories are fully removed from both the frontend and backend of your product pages. It is the most effective method for eliminating categories completely and offers a cleaner, more professional look.
However, it requires a bit more technical expertise, and you should take care to back up your site before making any changes to your theme’s files. This method is perfect for stores that don’t need categories displayed at all and want to streamline their product pages for a smoother customer experience.
If your store needs to hide categories for specific products only or if you’re using Elementor or other page builders for custom layouts, the conditional code method or the custom template method is the best approach. The conditional method gives you the flexibility to target specific products, while the custom template method offers full creative control over how your product pages look.
These methods are more advanced but provide the highest level of customization. Ultimately, the method you choose should align with your store’s goals, whether it’s simplicity, permanency, or advanced customization.
Have questions before starting with WooCommerce & WordPress? Get support here at WooHelpDesk.


