How to integrate Google Pay in WordPress?
Table of Contents
- Introduction
- What Is Google Pay and How It Works for WordPress Payments
- Features of Using GPay in WordPress That Improve Checkout Fast
- Can You Integrate GPay in WordPress Directly Without a Gateway?
- Requirements Before You Start Google Pay Integration in WordPress
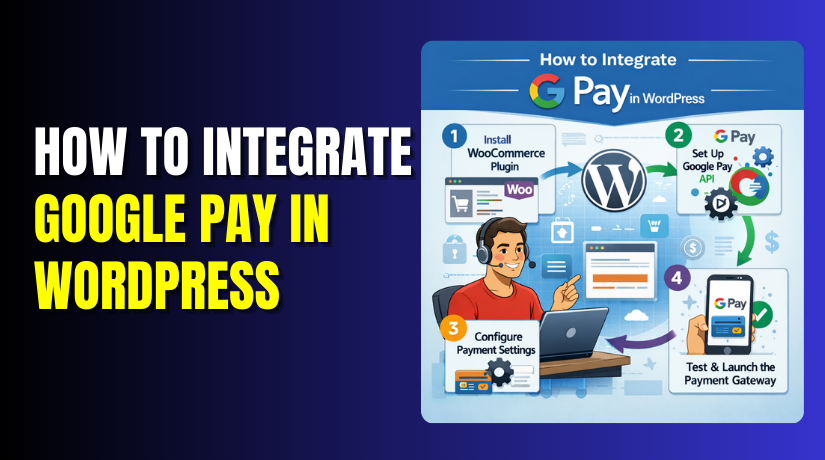
- How to Integrate Google Pay in WordPress (Step By Step)
- How to Test Google Pay Integration in WordPress (Step by Step)
- Common Google Pay Integration Issues in WordPress and Simple Fixes
- Conclusion
Introduction
Online buyers want quick payments with less typing and effort. Google Pay works well for mobile users and busy shoppers. That is why many site owners plan Google Pay integration in WordPress. It can make checkout faster and reduce cart drop rates. If you run a store, GPay can help you close sales faster. If you sell services, it can reduce payment delays and follow-ups. If you take donations, it can make giving simple and smooth. Many users already trust Google Pay for daily payments online. That trust can help your WordPress Google Pay checkout feel safer.
It also helps users pay without entering card details again. You can integrate GPay in WordPress using a supported payment gateway. Most setups use plugins, not direct code changes in files. You can add Google Pay to WordPress without changing themes often. You just need the right gateway, plugin, and settings done. In the next sections, you will learn how it works. You will also understand what you actually connect to WordPress.
What Is Google Pay and How It Works for WordPress Payments
Google Pay is a digital payment method by Google. It lets users pay using saved cards or bank options. Users can pay faster with fewer steps during checkout. Google Pay works through a supported payment processor or gateway. So your site does not store card data directly. Instead, the gateway handles the payment and confirms success. This is why gateway choice matters for stable payments.
In WordPress, Google Pay usually shows as a wallet button. It can appear on product pages, cart, or checkout pages. When users tap the button, a payment sheet opens. The user picks a saved method and confirms the payment. Then Google Pay sends secure payment details to the gateway. The gateway verifies details and completes the charge or request. Your site receives an order update after the gateway response. This flow is what people call GPay payment integration on websites.
For WordPress sites, plugins manage this payment flow smoothly. WooCommerce sites often use gateway plugins for wallet payments. Many call this Google Pay payment gateway WordPress setup process. Some owners ask about Google Pay API integration in WordPress. In most cases, you do not need direct API coding.
The plugin and gateway handle the needed API calls for you. You still must set the gateway rules and enable Google Pay. After setup, buyers can complete payment with fewer clicks. This helps speed up checkout and improve the user experience.
Features of Using GPay in WordPress That Improve Checkout Fast
Faster Checkout With Less Typing
Google Pay integration in WordPress reduces checkout form typing. Customers can pay using saved card details instantly. This makes checkout faster and feels less frustrating. It helps most on mobile screens with small keyboards. When users type less, they make fewer mistakes too. That improves payment success and reduces failed orders. Many stores see better conversions with a faster payment flow.
Better Mobile Payment Experience On Every Device
Most buyers shop from phones and expect quick payments. When you integrate GPay in WordPress, the flow becomes mobile-first. Google Pay opens a clean payment sheet for confirmation. Users do not need to zoom or fill long fields. This improves user comfort and keeps checkout smooth. A better mobile experience often increases completed purchases. It also reduces checkout exits caused by poor mobile layouts.
Higher Trust Because Google Pay Feels Familiar
People trust Google Pay because they use it in daily life. When you add Google Pay to WordPress, buyers feel safer paying. They see a known wallet option at checkout instantly. That trust can reduce hesitation before paying online. It also helps new visitors who do not know your brand. Trust is a big reason why wallet buttons work well. This supports a stronger WordPress Google Pay checkout experience.
Lower Cart Abandonment With Quick Payment Confirmation
Cart abandonment happens when checkout feels slow or confusing. GPay payment integration reduces steps and speeds up confirmation. Buyers can complete payment in a few taps and finish quickly. That shorter flow can reduce drop-offs near payment time. It also helps when users want to buy fast and leave. A smooth payment flow keeps buyers focused on completion. This can increase paid orders without changing your products.
Smooth Repeat Purchases With Saved Payment Methods
Returning customers want even faster checkout than first-time buyers. Google Pay uses saved payment methods for quick repeat orders. This helps customers buy again without entering details again. It improves loyalty because checkout feels easy every time. It also supports quick purchases during sales and offers. Many repeat buyers prefer wallet checkout over card forms. This makes your checkout feel modern and customer-friendly.
Easy Setup Using Gateway Plugins Instead of Custom Code
Many users think Google Pay API integration needs coding work. In most cases, you do not need custom development. A Google Pay payment gateway WordPress plugin does the job. It connects Google Pay features with your WordPress checkout pages. It also manages tokens, security checks, and payment responses. This keeps setup safer and easier for most site owners. You can enable, test, and go live faster with plugins.
Can You Integrate GPay in WordPress Directly Without a Gateway?
Many owners ask about direct Google Pay API integration first. In most WordPress cases, direct setup is not needed. Google Pay needs a processor to capture and settle payments. That processor is usually a supported payment gateway service. So you integrate GPay in WordPress through a gateway plugin. This plugin connects your checkout to Google Pay features. It also handles security steps and payment confirmation responses. Direct coding can work, but it needs heavy development effort. You must manage API keys, domain checks, and payment tokens. You must also handle errors, refunds, and order status updates.
For most sites, plugins provide a safer and faster path. This is why Google Pay payment gateway WordPress options matter. With the right gateway, setup stays simple and maintainable. You can still customize checkout design using WooCommerce settings. Your main goal is a reliable WordPress Google Pay checkout experience.
Requirements Before You Start Google Pay Integration in WordPress
Before you integrate GPay in WordPress, check your site basics. Your website must run on HTTPS with a valid SSL. Google Pay will not show on non-secure checkout pages. Also confirm your WordPress is updated to a stable version. If you use WooCommerce, update it and your theme too.
Old versions can break the WordPress Google Pay checkout display. Next, choose a supported payment gateway for Google Pay. This is the key part of Google Pay integration in WordPress. Your gateway account must be active and fully verified. Some gateways require business details and document checks. You may also need to enable wallet payments inside gateway settings.
In some cases, Google Pay works only on supported devices. It usually works best on Chrome and Android phones. Browser support can vary for some wallet buttons. You should also avoid aggressive cache on checkout pages. Cache can block scripts used for GPay payment integration. If you use security plugins, allow the gateway scripts too. This keeps payment buttons loading correctly during checkout.
Here is a quick checklist before you start setup. It makes add Google Pay to WordPress easier.
- SSL enabled and checkout runs on HTTPS only.
- Updated WordPress, WooCommerce, and theme versions.
- A supported Google Pay payment gateway WordPress account ready.
- Gateway verification completed and payment methods activated.
- Admin access to install and configure payment plugins.
- Checkout pages excluded from cache and script minify tools.
How to Integrate Google Pay in WordPress (Step By Step)
Step 1: Confirm Your Website Is Secure With HTTPS
- Open your website in a browser and check the URL. It must start with https:// and show a lock icon. If not, install an SSL certificate from your hosting panel.
- Then force HTTPS in WordPress settings and your cache plugin.
Step 2: Update WordPress and WooCommerce to Latest Stable Versions
- Go to Dashboard → Updates and update WordPress carefully. Then update WooCommerce, your theme, and related addons.
- Old versions can block the WordPress Google Pay checkout button.
Step 3: Choose a Payment Gateway That Supports Google Pay


- Google Pay integration in WordPress works through a gateway plugin.
- Common options include Stripe-based gateways and region gateways.
- Pick one that supports your country, currency, and business type.
Step 4: Create and Verify Your Gateway Account
- Sign up in your gateway dashboard and complete business verification.
- Add your bank details and required documents if asked.
- This step is required for smooth GPay payment integration.
Step 5: Install the Gateway Plugin in WordPress
- Go to Plugins → Add New and search your gateway plugin.
- Click Install, then click Activate after installation completes.
- Now your Google Pay payment gateway WordPress setup can begin.
Step 6: Connect the Plugin Using API Keys
- Open WooCommerce → Settings → Payments and select your gateway.
- Find fields like Publishable Key and Secret Key in the plugin. Copy them from the gateway dashboard and paste correctly.
Step 7: Enable Google Pay in Gateway Settings
- Inside the same gateway settings, find wallet options or express checkout.
- Enable Google Pay or enable Payment Request Buttons if shown.
- Save changes after enabling the Google Pay option.
Step 8: Set Correct Store Country and Currency in WooCommerce
- Go to WooCommerce → Settings → General and check your country.
- Confirm currency matches what your gateway supports for Google Pay.
- Wrong settings can hide and add Google Pay to WordPress options.
Step 9: Disable Cache and Minify on Cart and Checkout Pages
- Open your cache plugin settings and exclude these pages from cache.
- Exclude /cart/ and /checkout/ and also exclude query strings.
- Minify can break scripts used for WordPress Google Pay checkout.
Step 10: Test Google Pay in Test Mode First
- Enable test mode in your gateway settings before going live. Open checkout using Chrome on Android or a supported browser.
- Confirm the Google Pay button shows and the payment completes.
Step 11: Switch to Live Mode and Run a Real Payment Test
- Disable test mode and enable live keys in the same settings.
- Place a small real order and confirm payment success.
- This final step confirms integrated GPay in WordPress is complete.
Step 12: Monitor and Fix Common Issues After Setup
- If the button disappears, check SSL and caching again quickly. Also check theme updates and plugin conflicts after new updates.
- If needed, re-save gateway settings to refresh scripts.
How to Test Google Pay Integration in WordPress (Step by Step)
Testing is important before you accept real payments from buyers. It helps you confirm the WordPress Google Pay checkout works. It also helps you catch gateway and setup issues early. Follow these steps in order for a clean test.
- Step 1: Open your gateway settings and enable test mode first. Use the test keys from the gateway dashboard panel. This keeps your first orders safe and not real charges.
- Step 2: Clear your website cache and browser cache completely. Cached scripts can hide the Google Pay button on checkout. Also clear any CDN cache if you use one.
- Step 3: Open checkout in a supported browser and device. Use Chrome on Android for the best results today. Also test on desktop Chrome if your gateway supports it.
- Step 4: Add a product to cart and open the checkout page. Check if the wallet button appears near payments. This confirms Google Pay integration in WordPress is loading.
- Step 5: Complete a test payment using the gateway test method. Some gateways offer test cards and wallet simulations. Confirm the order status becomes Processing or Completed.
- Step 6: Check order notes and payment details in WooCommerce. You should see a successful transaction test reference. This confirms GPay payment integration is working end-to-end.
- Step 7: Test the same flow using a different theme checkout style. If you use a custom checkout, test it carefully too. Some blocks or page builders can block wallet scripts.
- Step 8: Disable test mode and switch to live keys carefully. Then place a small real order from your own device. This confirms that adding Google Pay to WordPress works in live mode.
Common Google Pay Integration Issues in WordPress and Simple Fixes
Even a correct setup can fail due to small missing settings. Use these fixes one by one and test again after each change.
Issue 1: Google Pay option does not show on checkout
This usually happens due to SSL or gateway eligibility rules. Confirm your site loads on HTTPS with a valid SSL. Then confirm your gateway supports Google Pay in your region. Also match WooCommerce country and currency with gateway settings. This often fixes Google Pay integration in WordPress display issues.
Issue 2: Google Pay button shows, but payment fails
This is often a key or mode mismatch in your gateway. Check if you are using test keys in live mode. Re-copy API keys and save the settings again carefully. Also confirm webhooks are enabled if your gateway needs them. Many call it Google Pay API integration, but it is usually gateway setup.
Issue 3: Button disappears after enabling cache or minify
Cache and minify can block wallet scripts on checkout pages. Exclude cart and checkout pages from caching in your plugin. Disable JavaScript minify only for checkout pages if possible. Clear all cache and reload the WordPress Google Pay checkout again.
Issue 4: Google Pay keeps loading and never completes
This can happen due to plugin conflicts or blocked scripts. Disable other express checkout and wallet plugins temporarily. Turn off security rules that block external payment scripts. Then test again using a default theme checkout template. This helps confirm your Google Pay payment gateway WordPress plugin loads correctly.
Issue 5: Works on mobile but not on desktop
Google Pay support depends on browser and gateway rules. Test on Chrome first and avoid private browsing mode. Some gateways show Google Pay only on supported devices. Check your gateway docs for desktop wallet support in your region.
Issue 6: Checkout builder or theme blocks Google Pay placement
Some checkout layouts remove hooks used by payment plugins. Test with the default WooCommerce checkout page first. If it works, your builder needs a small checkout adjustment. You can also change button placement inside gateway settings.
Conclusion
Google Pay integration in WordPress is simple with the right gateway. Use a trusted gateway plugin and keep updates consistent. Always test after major plugin or theme updates on checkout. Keep caching away from checkout to avoid script loading issues. If you want the smoothest WordPress Google Pay checkout, keep checkout clean. Avoid too many payment plugins running at the same time. If you need expert help for a full setup, support, and fixes, WooHelpDesk can help you maintain stable payments and checkout performance.


